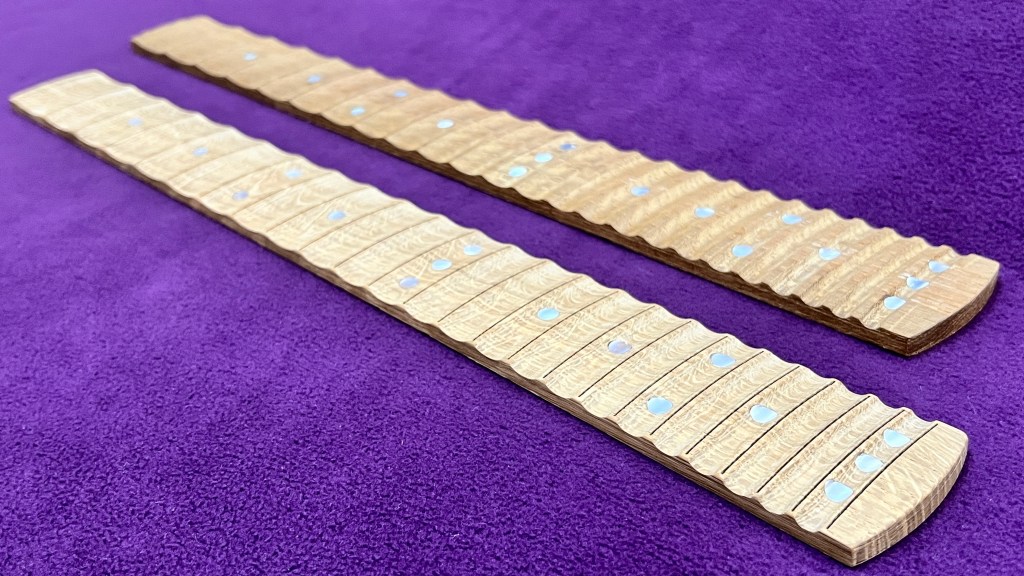
My latest YouTube video, published at 6.00 p.m. on Sunday, May 10th 2026 covers my recent mini project to research, design and make a scalloped guitar fretboard using Brian May’s Red Special guitar as my reference.
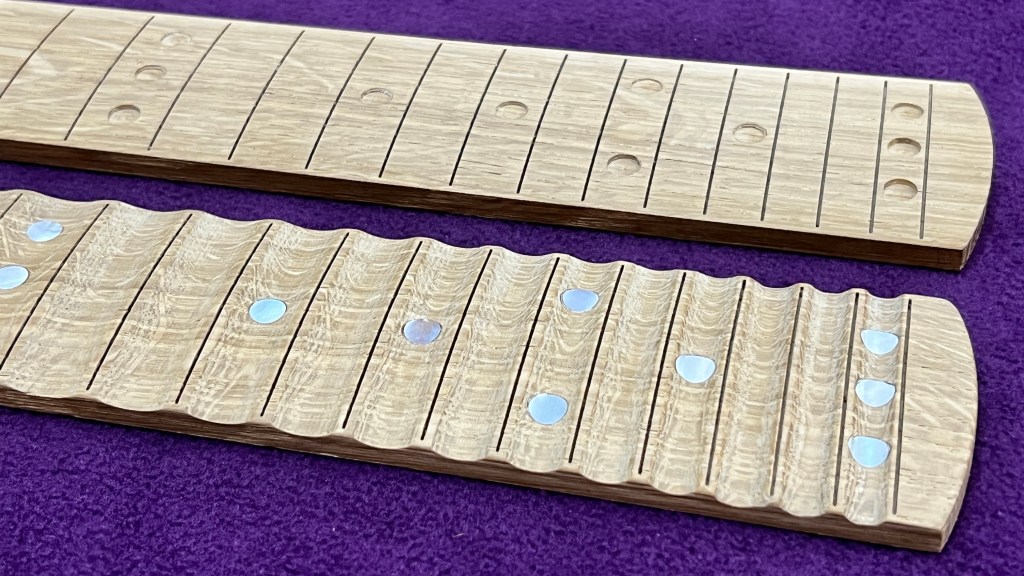
A scalloped fretboard allows players to press down the strings without their fingertips touching the wood. This reduces friction making for easier, deeper string bends, faster vibrato and improved articulation. Yngwie Malmsteen, Ritchie Blackmore and Steve Vai are perhaps the best known players who use guitars with scalloped fretboards. They are ideal for fast solo work but require a light touch to avoid bending notes out of tune.
Andrew Guyton made a Red Special replica with a scalloped fretboard for Brian May in January 2005 after he had approved and play tested a similar guitar. It is close to standard Guyton Brian May specification apart from the scalloped fretboard and is fitted with jumbo fret wire. Brian played it on the 2005 Queen + Paul Rodgers tour and commented that it “liberated his vibrato”. Brian continued to use the scalloped fretboard Red Special behind the scenes as his pre-concert warm-up guitar until he got his Empire Red Guyton RS Transporter in 2017.
This video covers the drilling out and replacement of several unsatisfactory mother of pearl (nacre) fretboard position marker dots on an oak fretboard for a Brian May Red Special guitar neck. The marker dots turned out too thin after final radiusing with a StewMac radiusing beam and 320 grit 3M Stikit Gold self-adhesive abrasive paper. I mill out the installed dots by mounting the fretboard back onto my Stepcraft 2/840 CNC machine with the help of a custom designed and CNC cut acrylic (perspex) alignment template. I then glue in replacement dots and abrade them flush with the radiused fretboard surface using a flat bladed diamond file.
I generally did not film any of the work involved with building my Red Special replica at the time, other than some of the early CNC routing attempts. This footage was neither edited in a way which best illustrated the processes nor contained any spoken commentary. As and when I have time, I will address this shortfall by publishing a series of videos with distinct segments and narrative to demonstrate key processes and offer tips for building a Brian May Red Special replica guitar from the perspective of an amateur luthier.
The first of the two embedded videos below illustrates some aspects of mahogany timber preparation for making the neck while the second entitled “Fretboard Techniques” covers making a stencil to paint the fretboard side marker dots. I also compare and contrast the side marker dot pattern on my 2004 Burns Red Special and Guyton RS Transporter and show two techniques worth considering for ebonising the oak fretboard: Liberon spirit wood dye and black cyanoacrylate superglue. Future videos will cover other important techniques including veneer work, grain filling, staining and working with Rustins Plastic Coating.
In the third video I demonstrate using a 5 mm diameter brad point wood auger to drill the short section from the underside of the tenon through into the main channel routed out to accommodate the truss rod itself. All wood routing was previously done using my Stepcraft 2/840 CNC machine. This neck cutting was recently completed and the cut object remains attached in its surrounding frame. I took the opportunity to rout a rebate for the auger shaft to pass through.
The fourth video illustrates all the equipment required, and processes involved in making a single action compression style truss rod for a Red Special replica guitar with only basic workshop equipment and limited facilities.
The next video is an introduction to a series of videos which illustrate all the techniques required to finish the Red Special body including veneering, grain filling, staining and lacquering with Rustins Plastic Coating (RPC).
The second video in the series on finishing the guitar body covers the process of veneering.
The third video in the series on finishing the guitar body covers grain filling and staining the mahogany marquetry veneer with black Jecofil and Rustins red mahogany wood dye.
The fourth and final video in the series on finishing the guitar body covers all aspects of Rustins Plastic Coating (RPC) including making up batches, applying it to mahogany veneer, flatting back with graded abrasive papers then burnishing/polishing to a gloss finish.