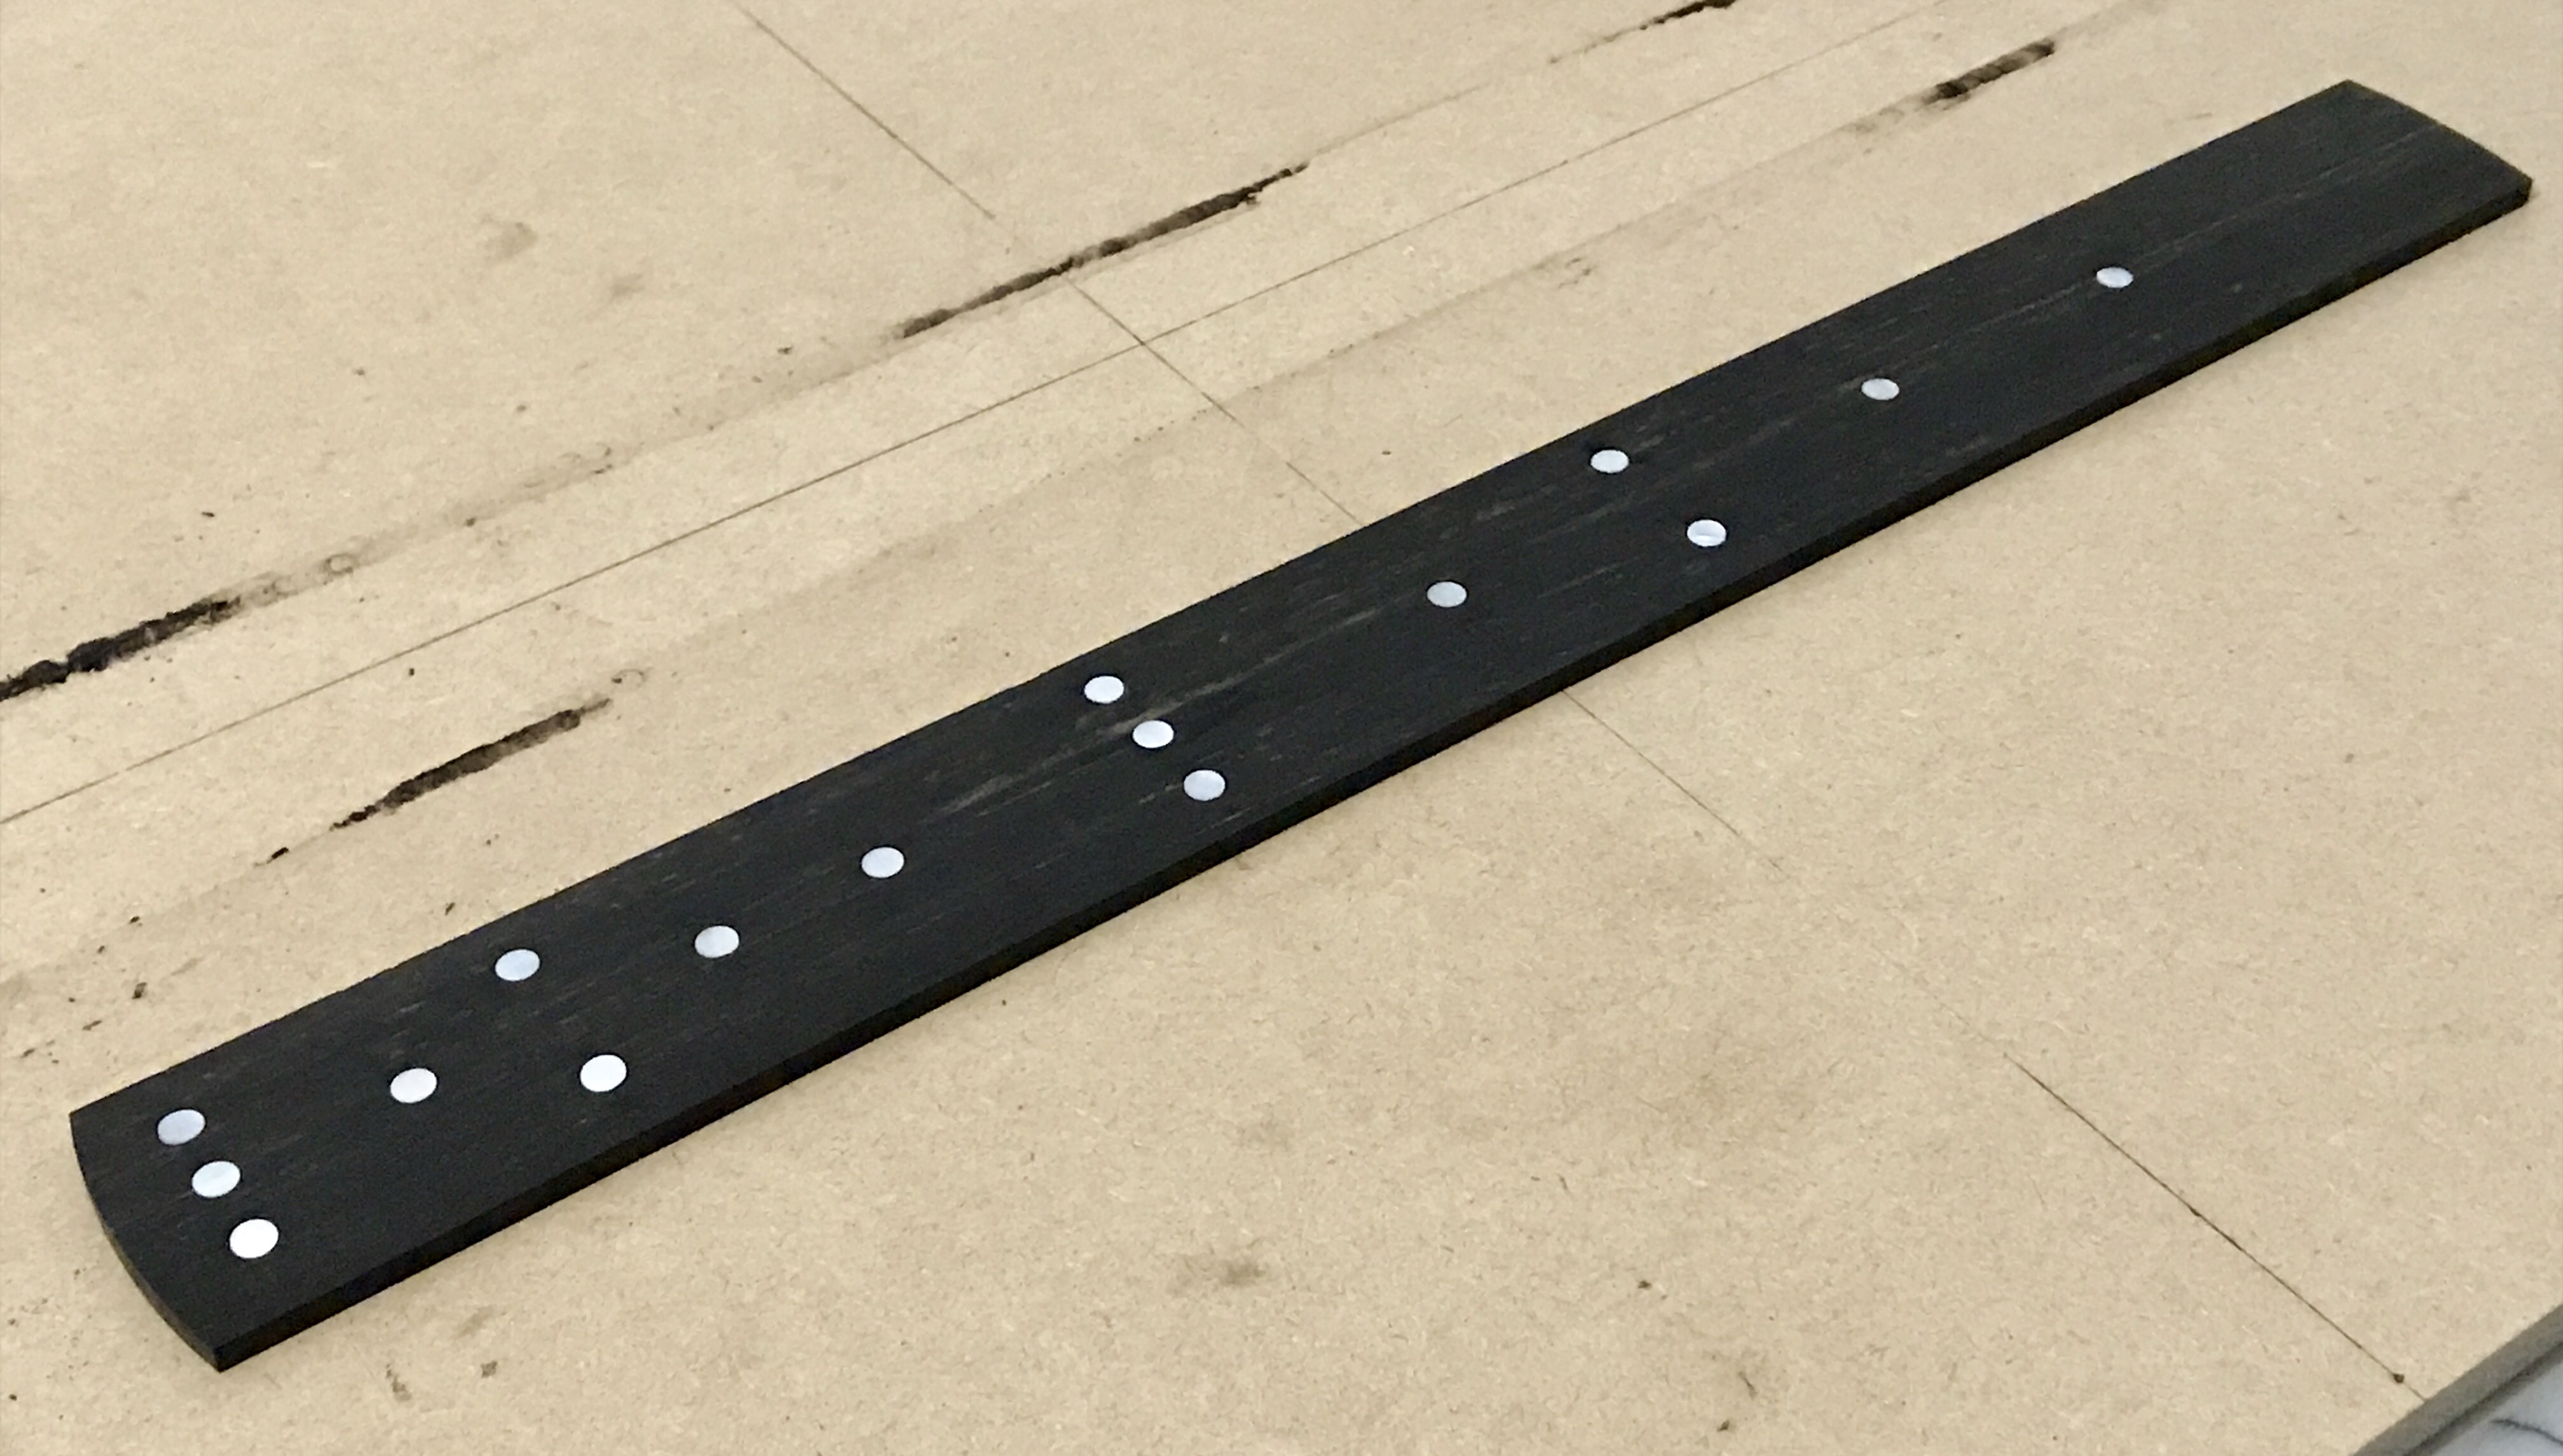
On my 3/4 scale ‘1975’ Brian May Red Special build, I manually radiused an ebony blank to 7 1/4″ using a StewMac aluminium radiusing beam with 3M Stikit Gold self-adhesive abrasive paper. This took a long time, was hard physical work and is prone to error if proper care is not exercised so I was determined to deploy CNC as fully as possible on my next project. I considered keeping the build as authentic as possible by making an oak fretboard, painting it black and lacquering over it with Rustins Plastic Coating as Brian did and avoiding a lot of effort and risk of making a mess of it by going with ebony as Brian intended to do. So I made my first CNC cut attempt on an ebony blank. I used the CNC machine to do three tasks:
(a) cut the tapered outline shape
(b) rough radius the fretboard to around 6.5 mm thick ready for final thickness sanding and
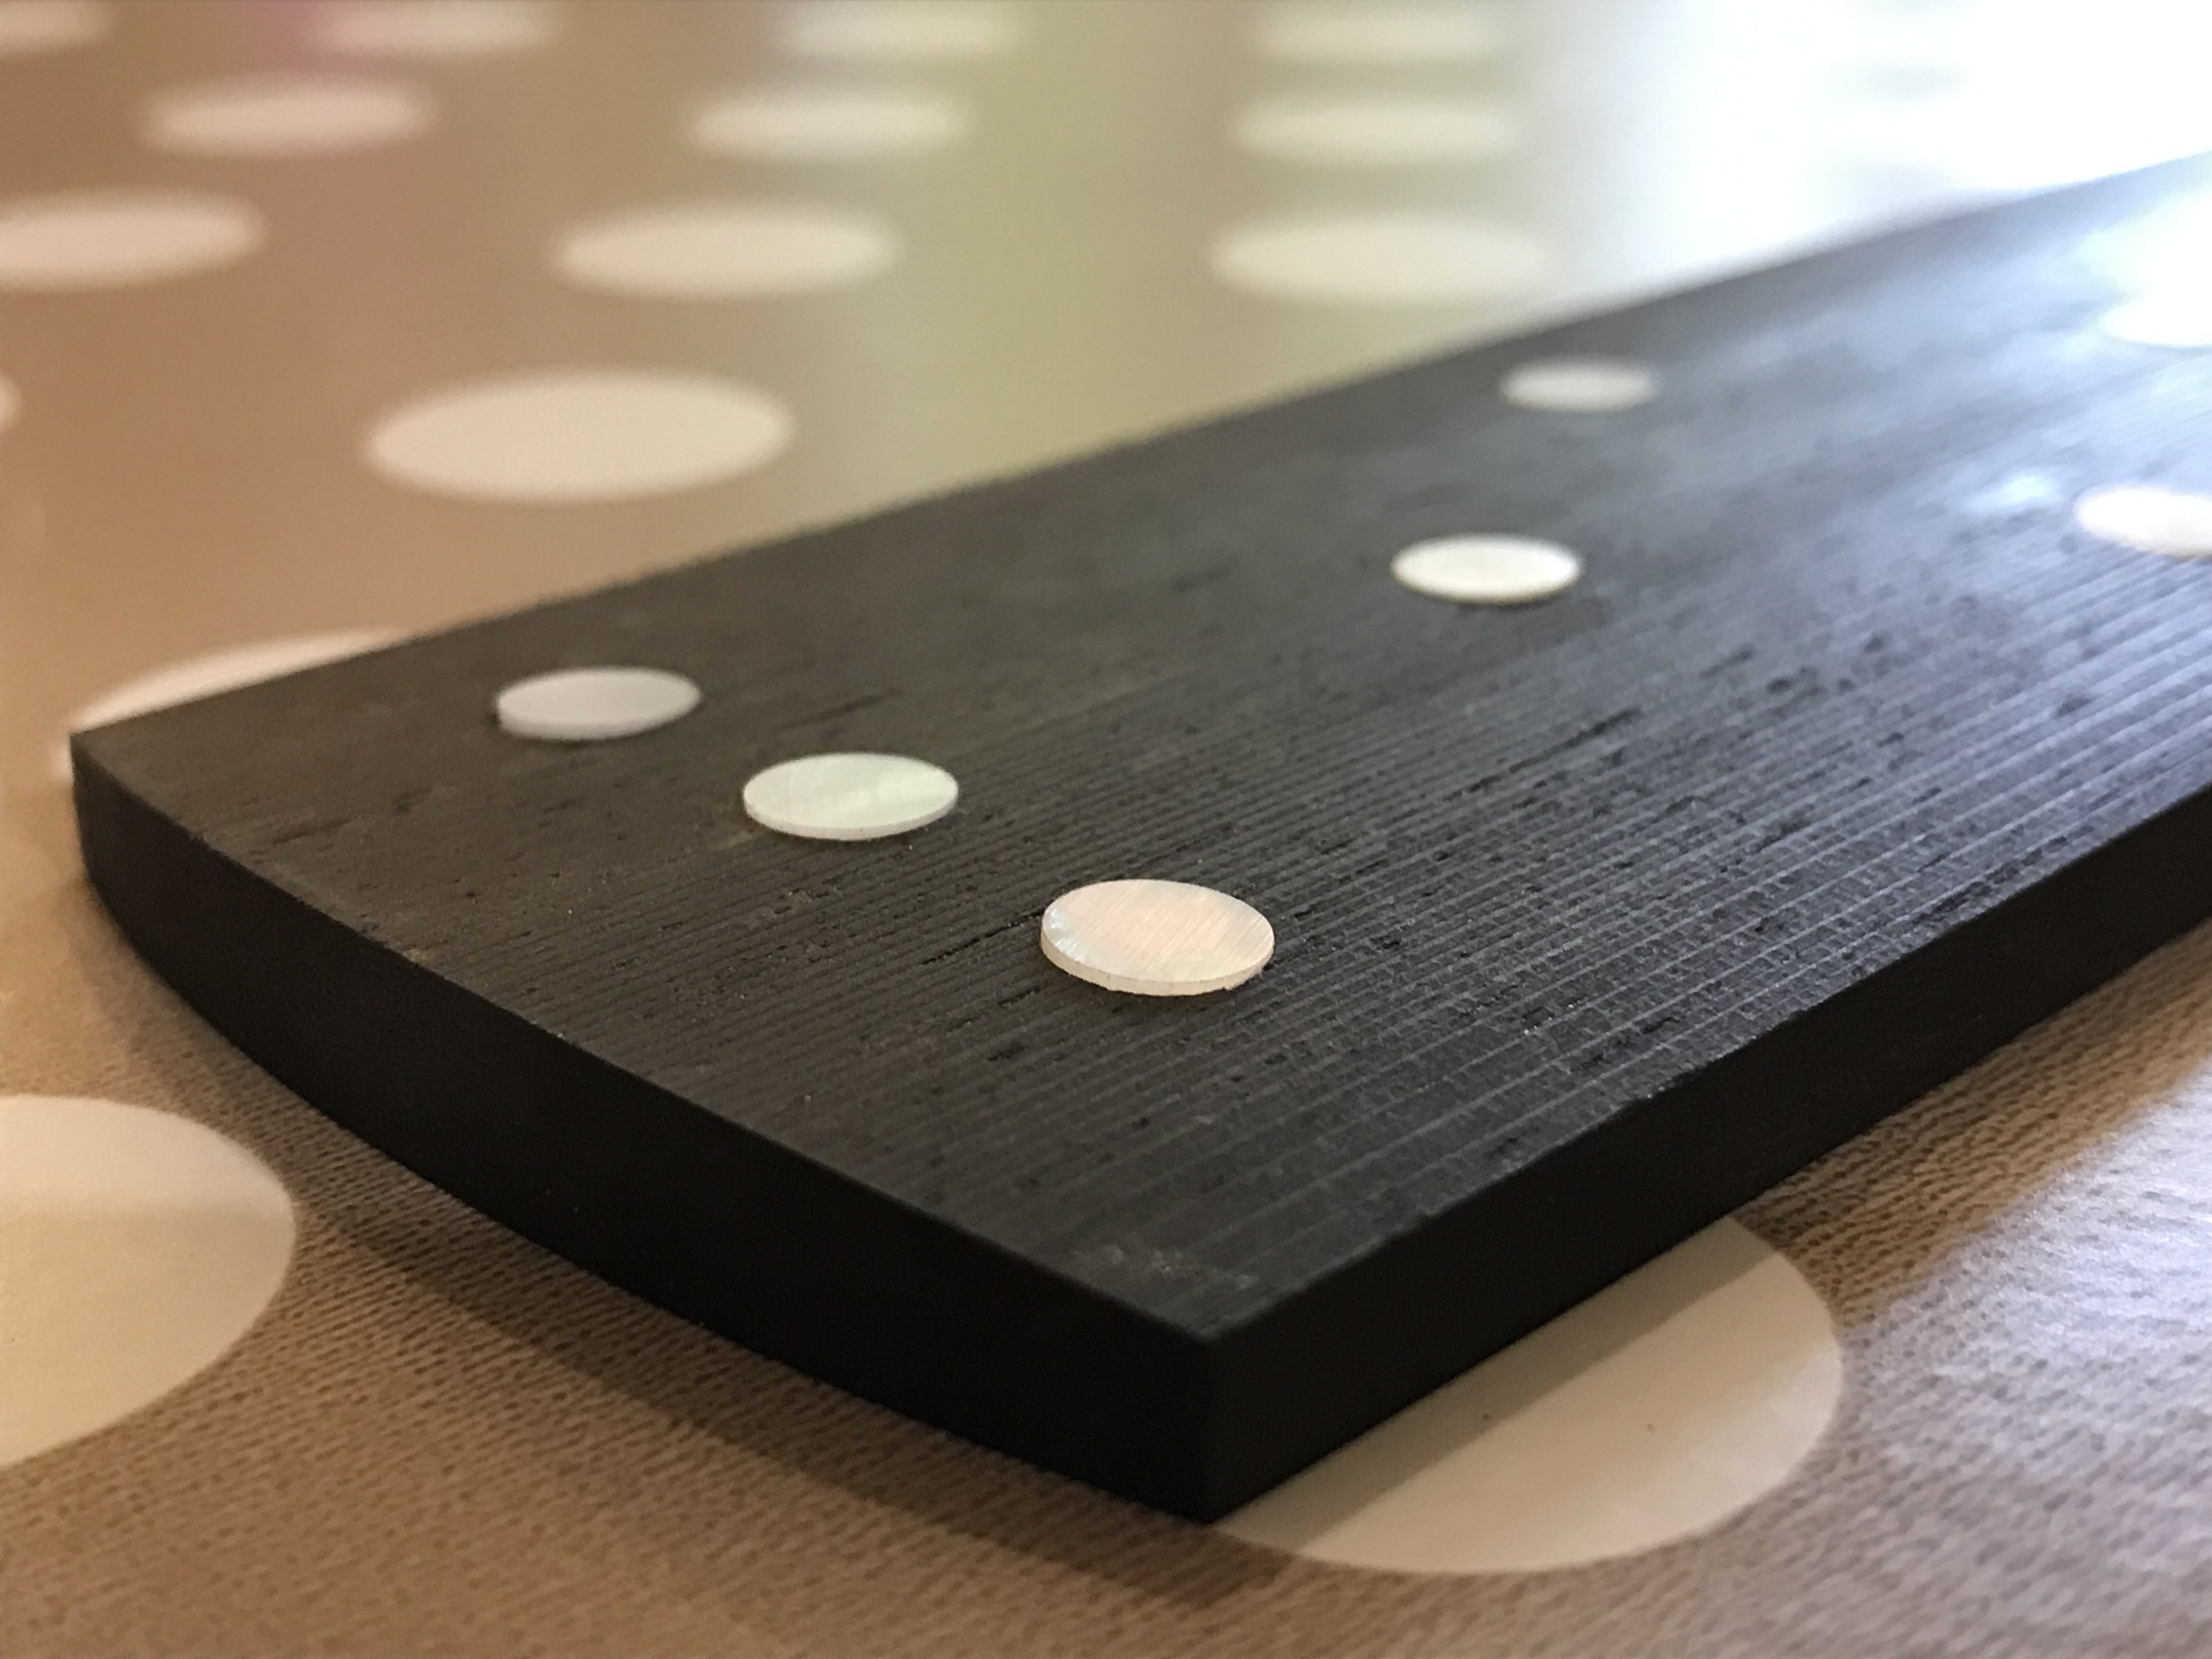
(c) drill 1/4″ (6.35 mm) diameter holes for the mother-of-pearl (MoP) marker dots.

The embedded video below (speeded up 8x) illustrates the cutting process; I subsequently edited the GCode for it to make the cutting process more efficient, e.g. drilling the marker dots separately using true arc toolpaths. The intention was to use a 6 mm ball nose end mill for the finishing paths but the GCode for the roughing toolpath included the finishing code too so the entire run is done using a 6 mm flat end mill. The first path is just to thickness the 7.7 mm ebony stock to 7.0 mm.
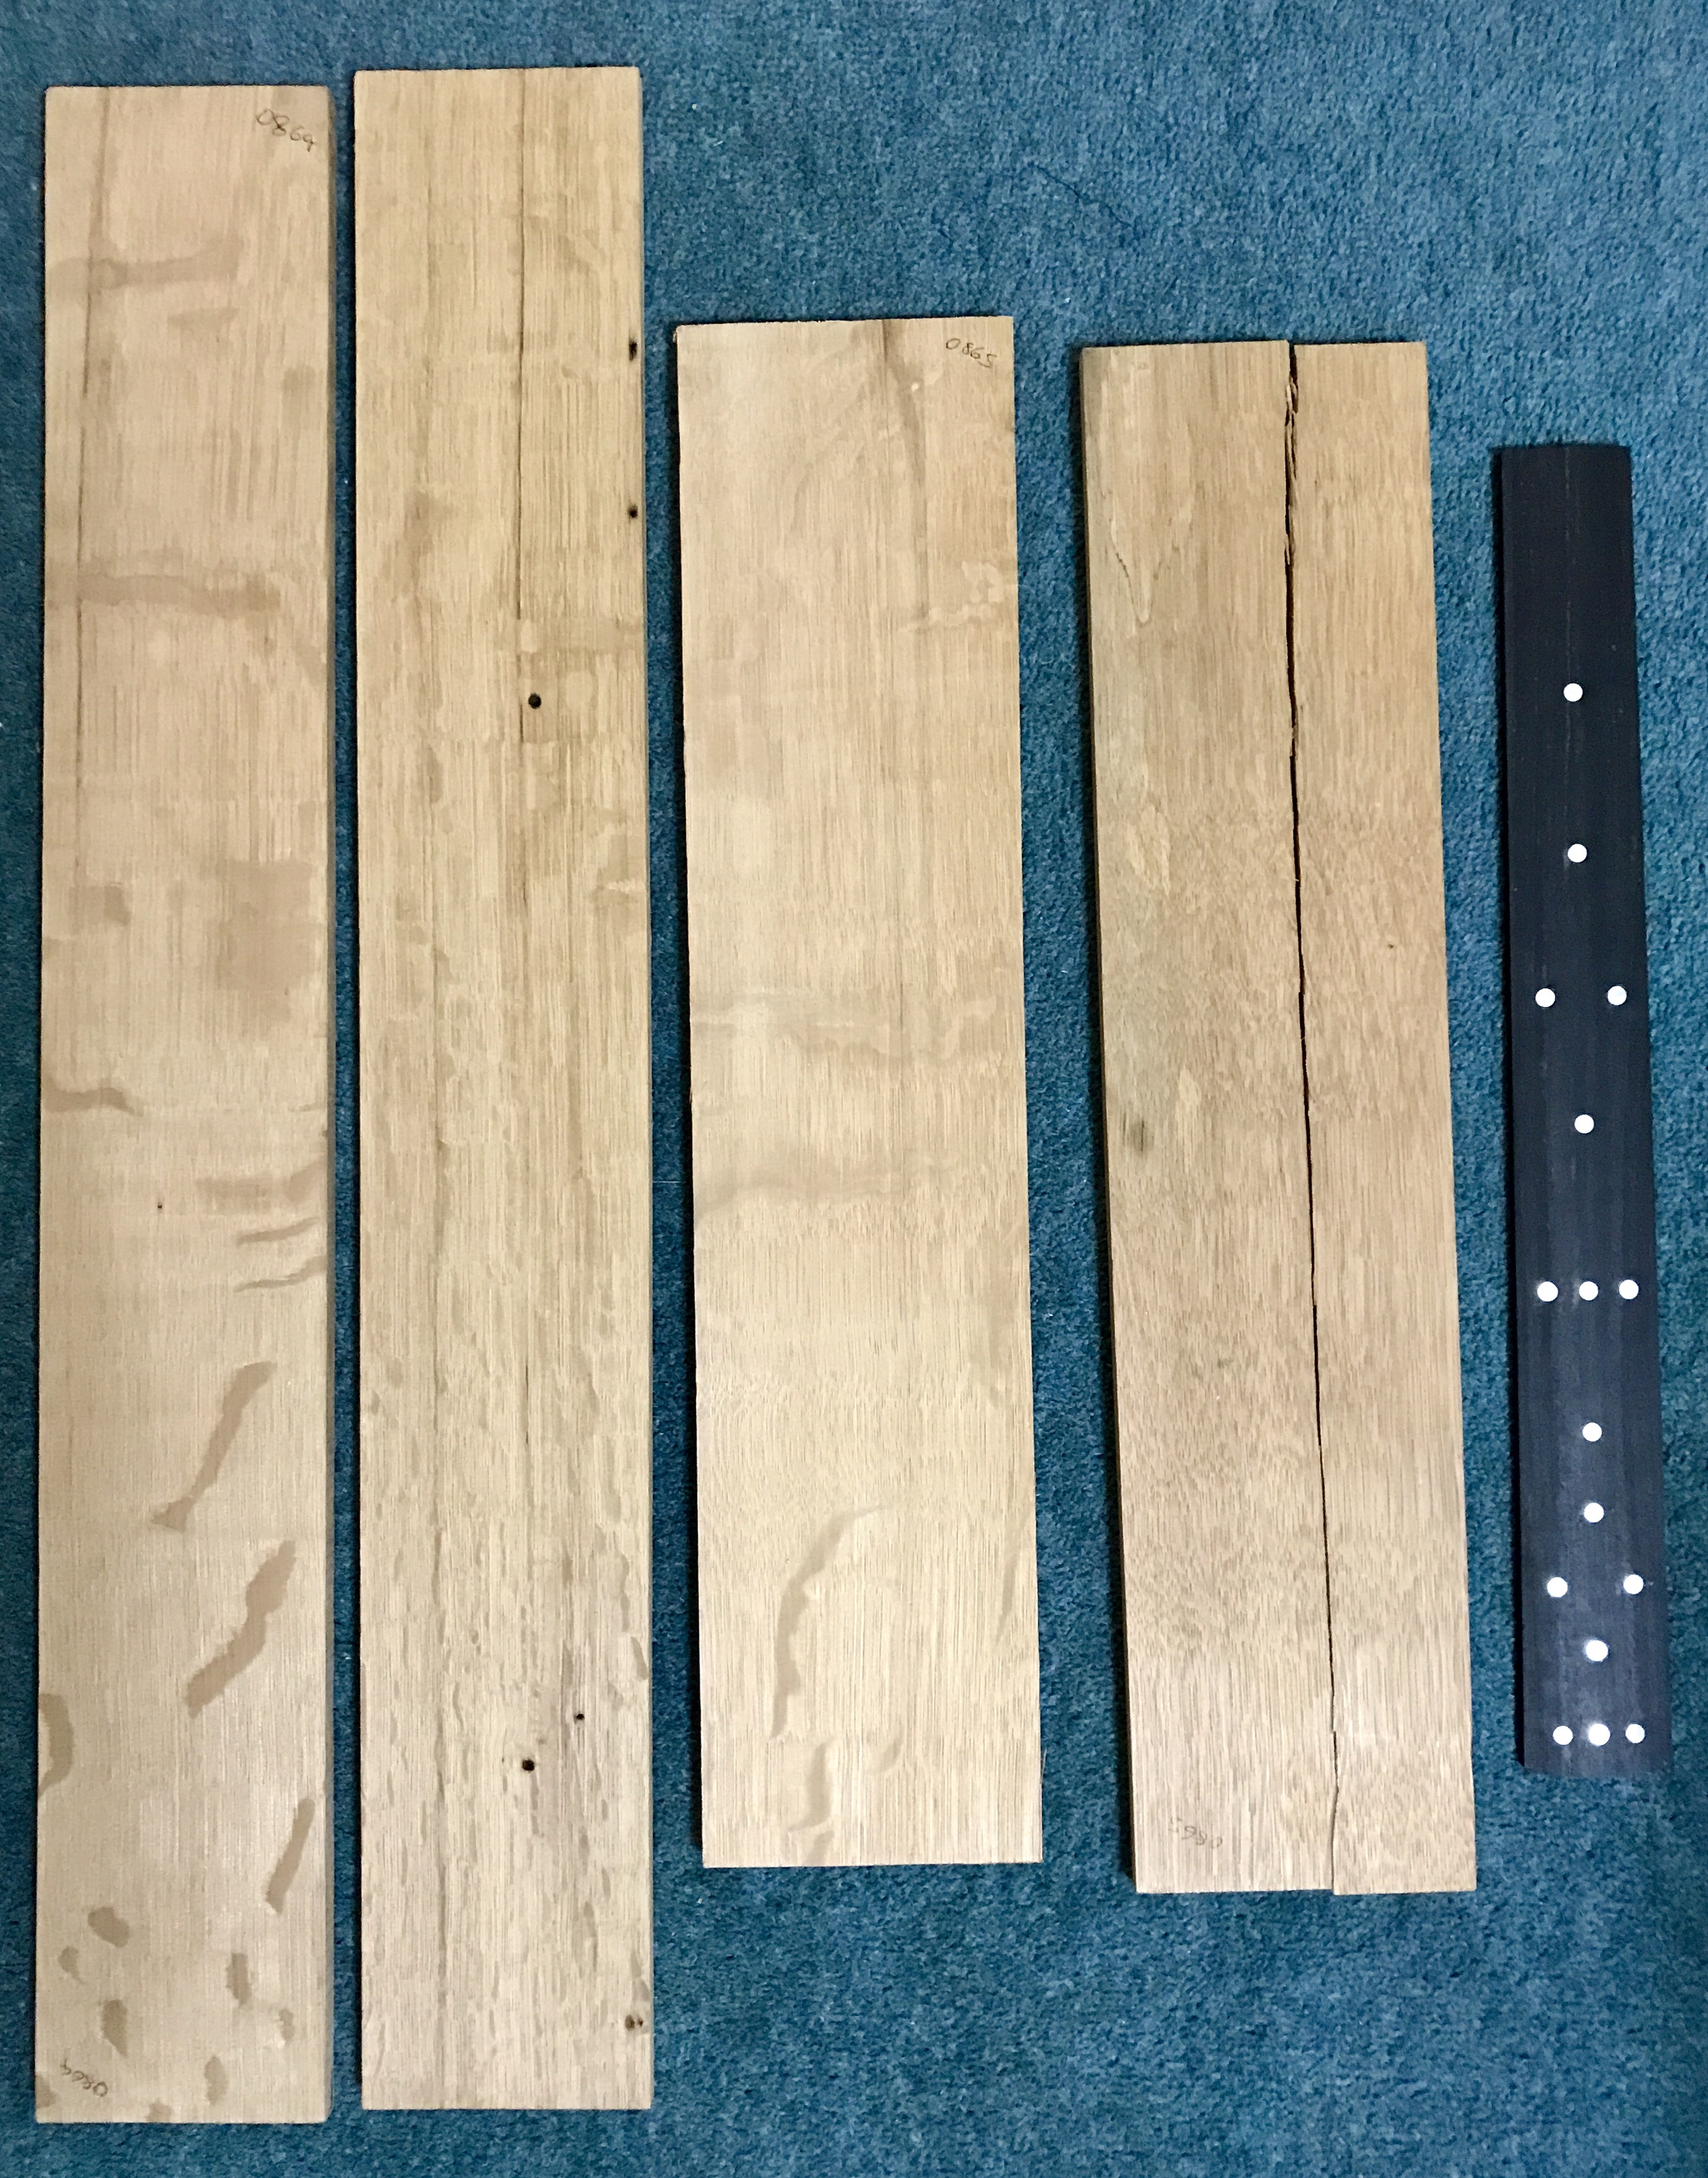
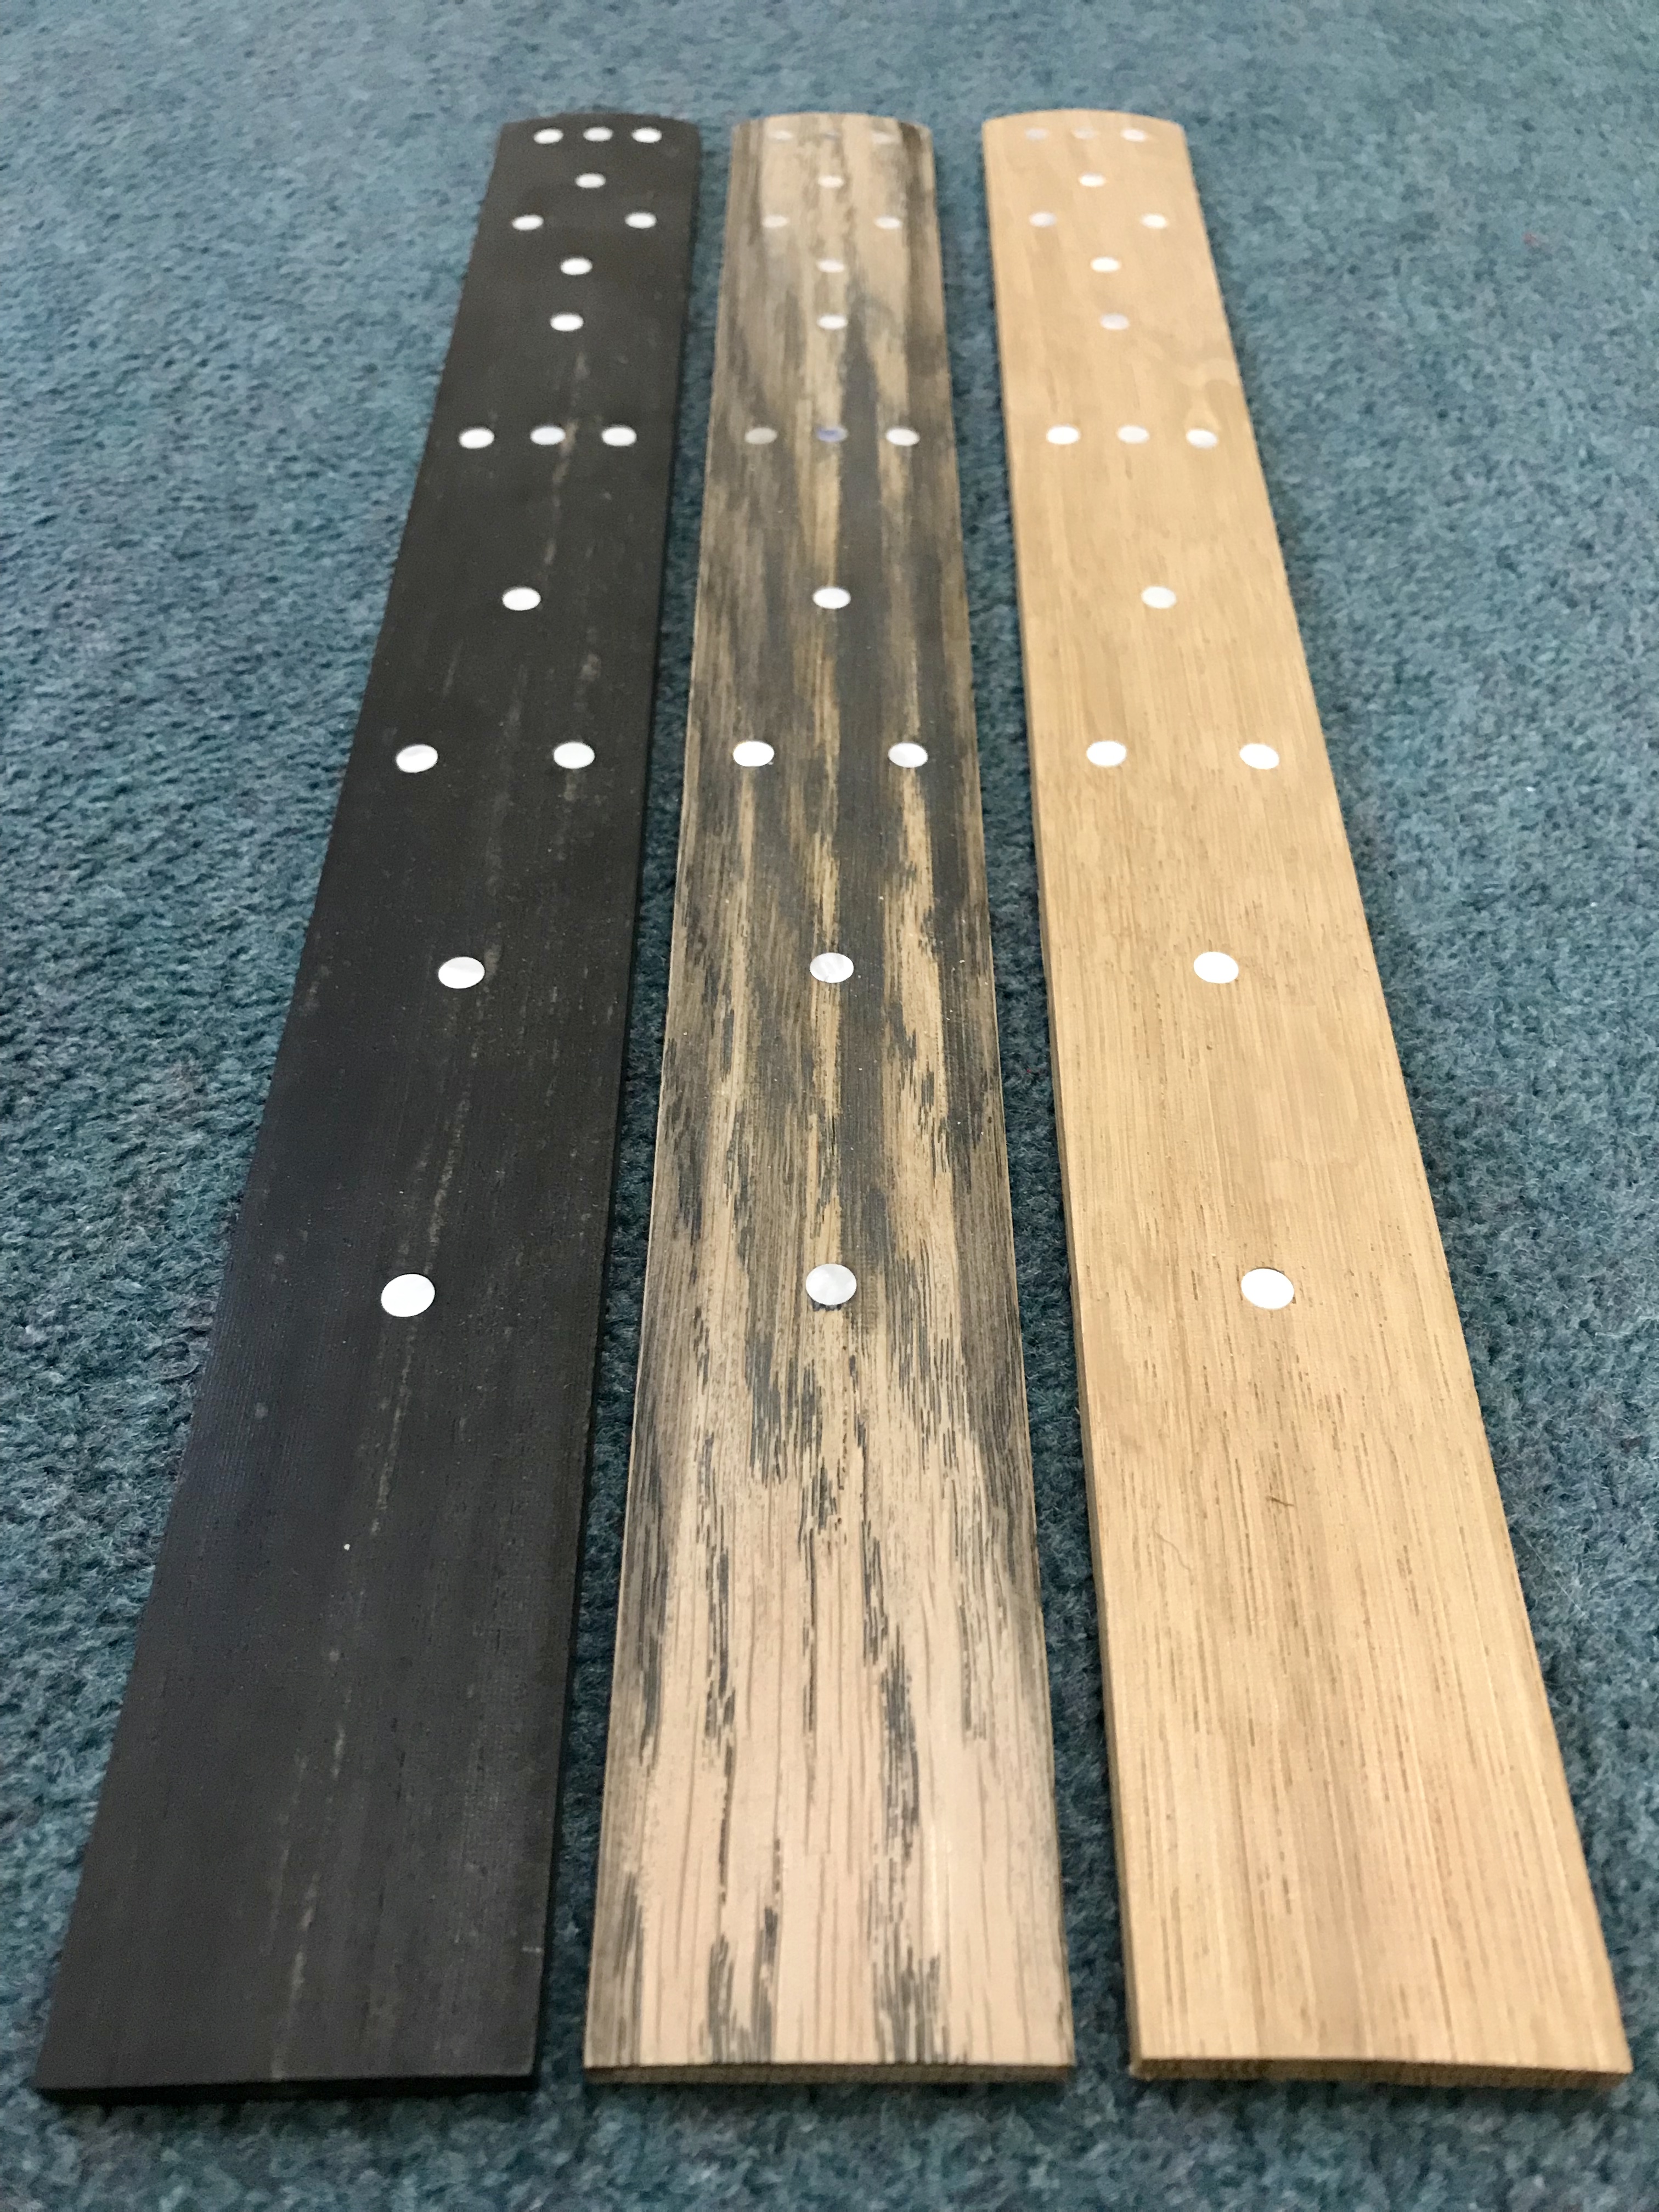
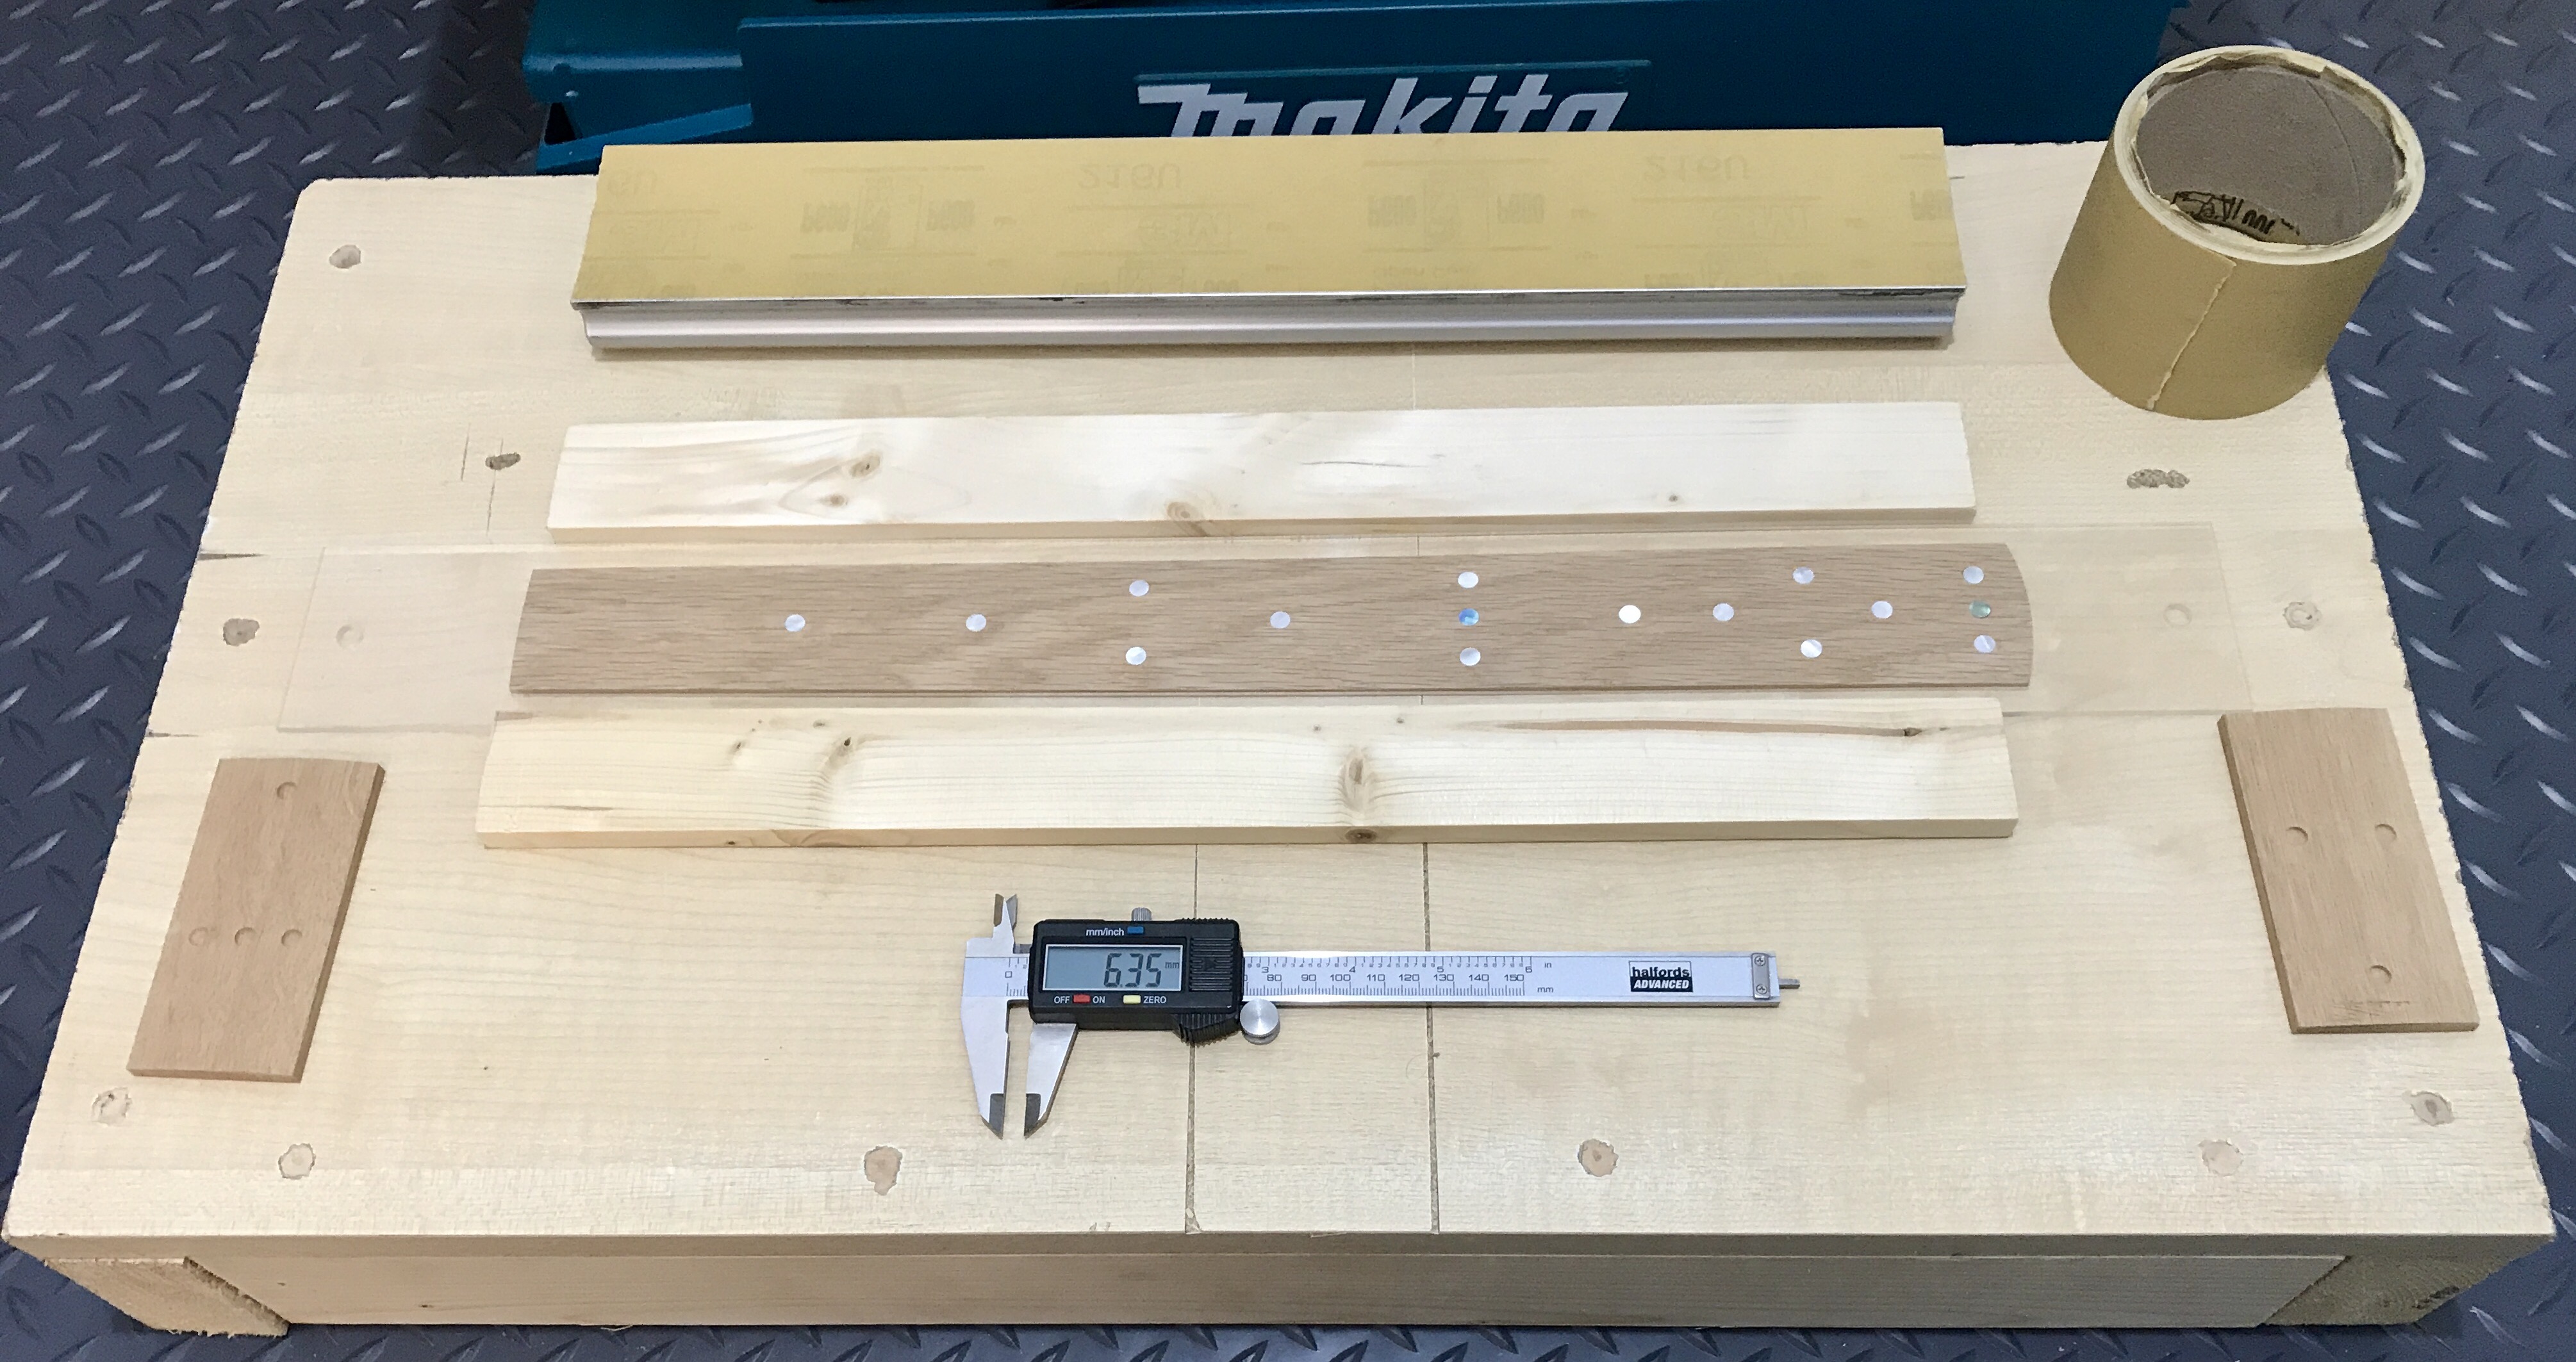
In parallel with the ebony fretboard plan, I sourced some vintage English oak from an item of old furniture for the fretboard and the oak insert in the lower body section, as Brian did. I spent a lot of time on eBay trying to find pieces of cheap, old furniture that could provide a 3/4″ thick slab for the body insert and a fretboard. Ultimately, the search proved unsuccessful but I did buy some quarter sawn oak boards suitable for making fretboards that had been reclaimed from a church. They have a pleasingly linear grain and are largely free of flaws. One board had split in the post but was still usable. The cut board with marker dot holes drilled pictured below weighed 73 grams and had a lightweight feel like balsa wood. By contrast the Indian ebony board with MOP dots inserted weighs 164 grams; the density is 1.17 g/cm^3. I then worked out the densities and got 0.65 g/cm^3 for the modern European oak I bought for the body inserts and 0.53 g/cm^3 for this reclaimed church oak.

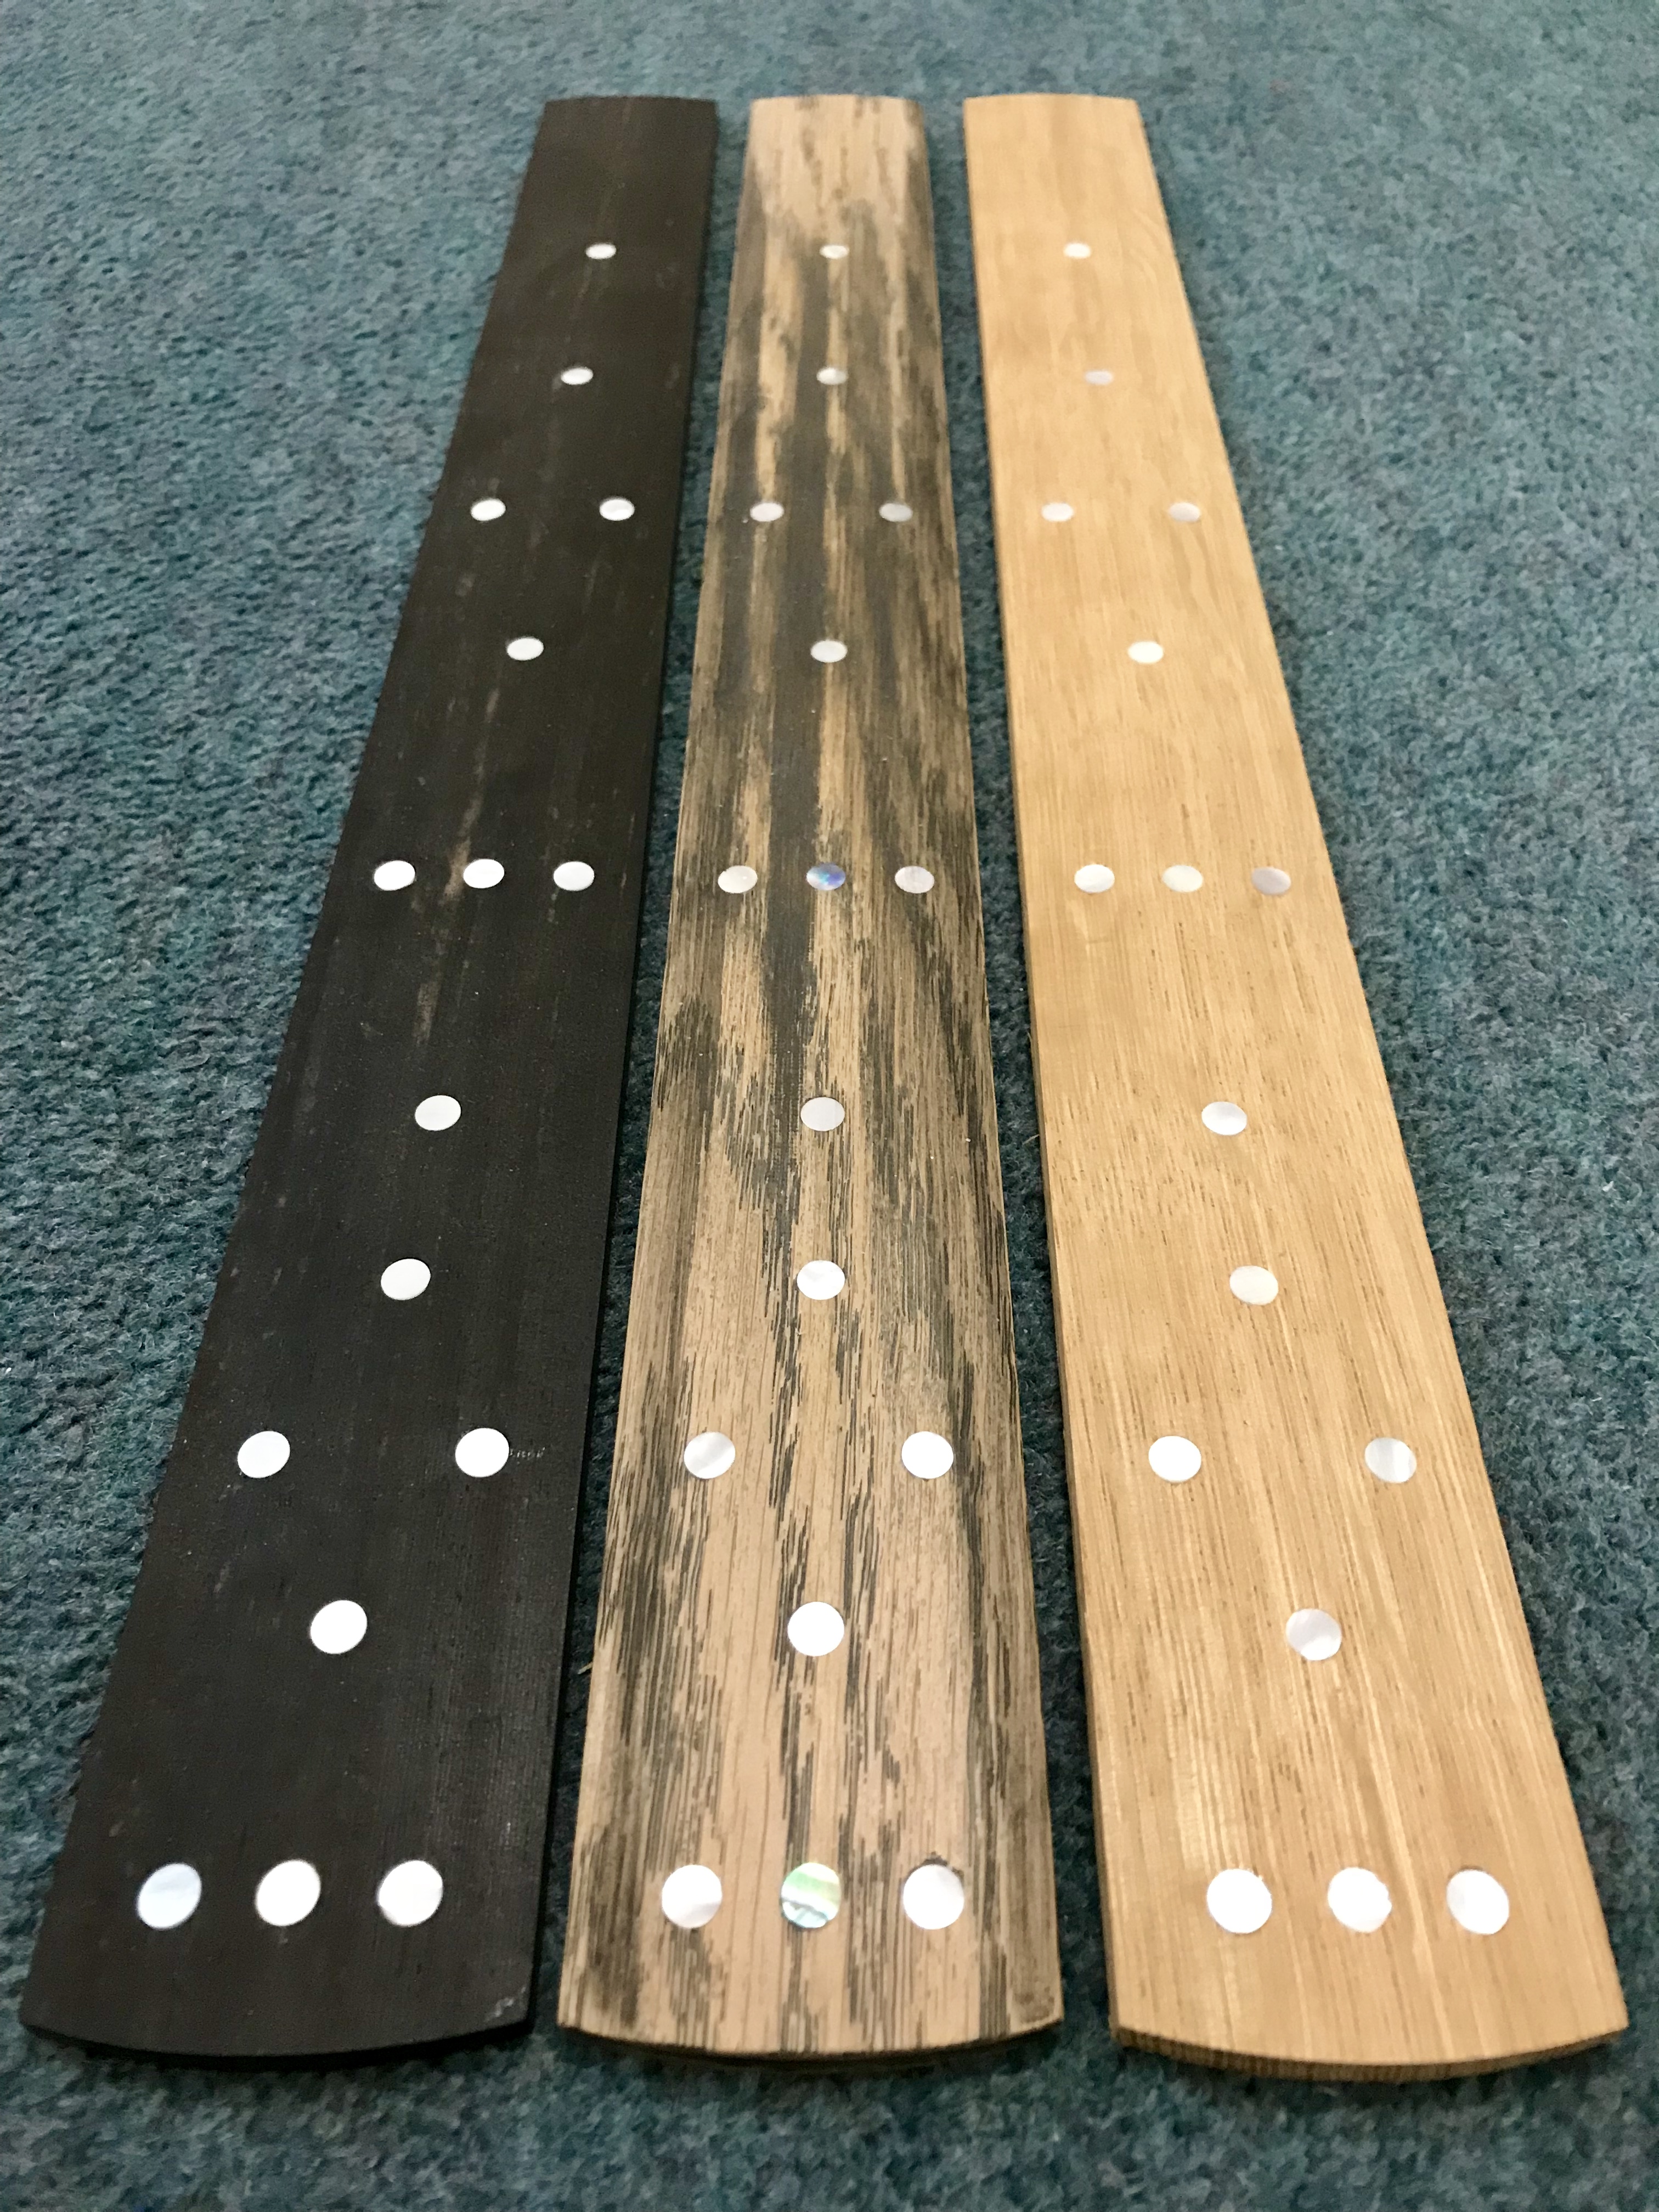
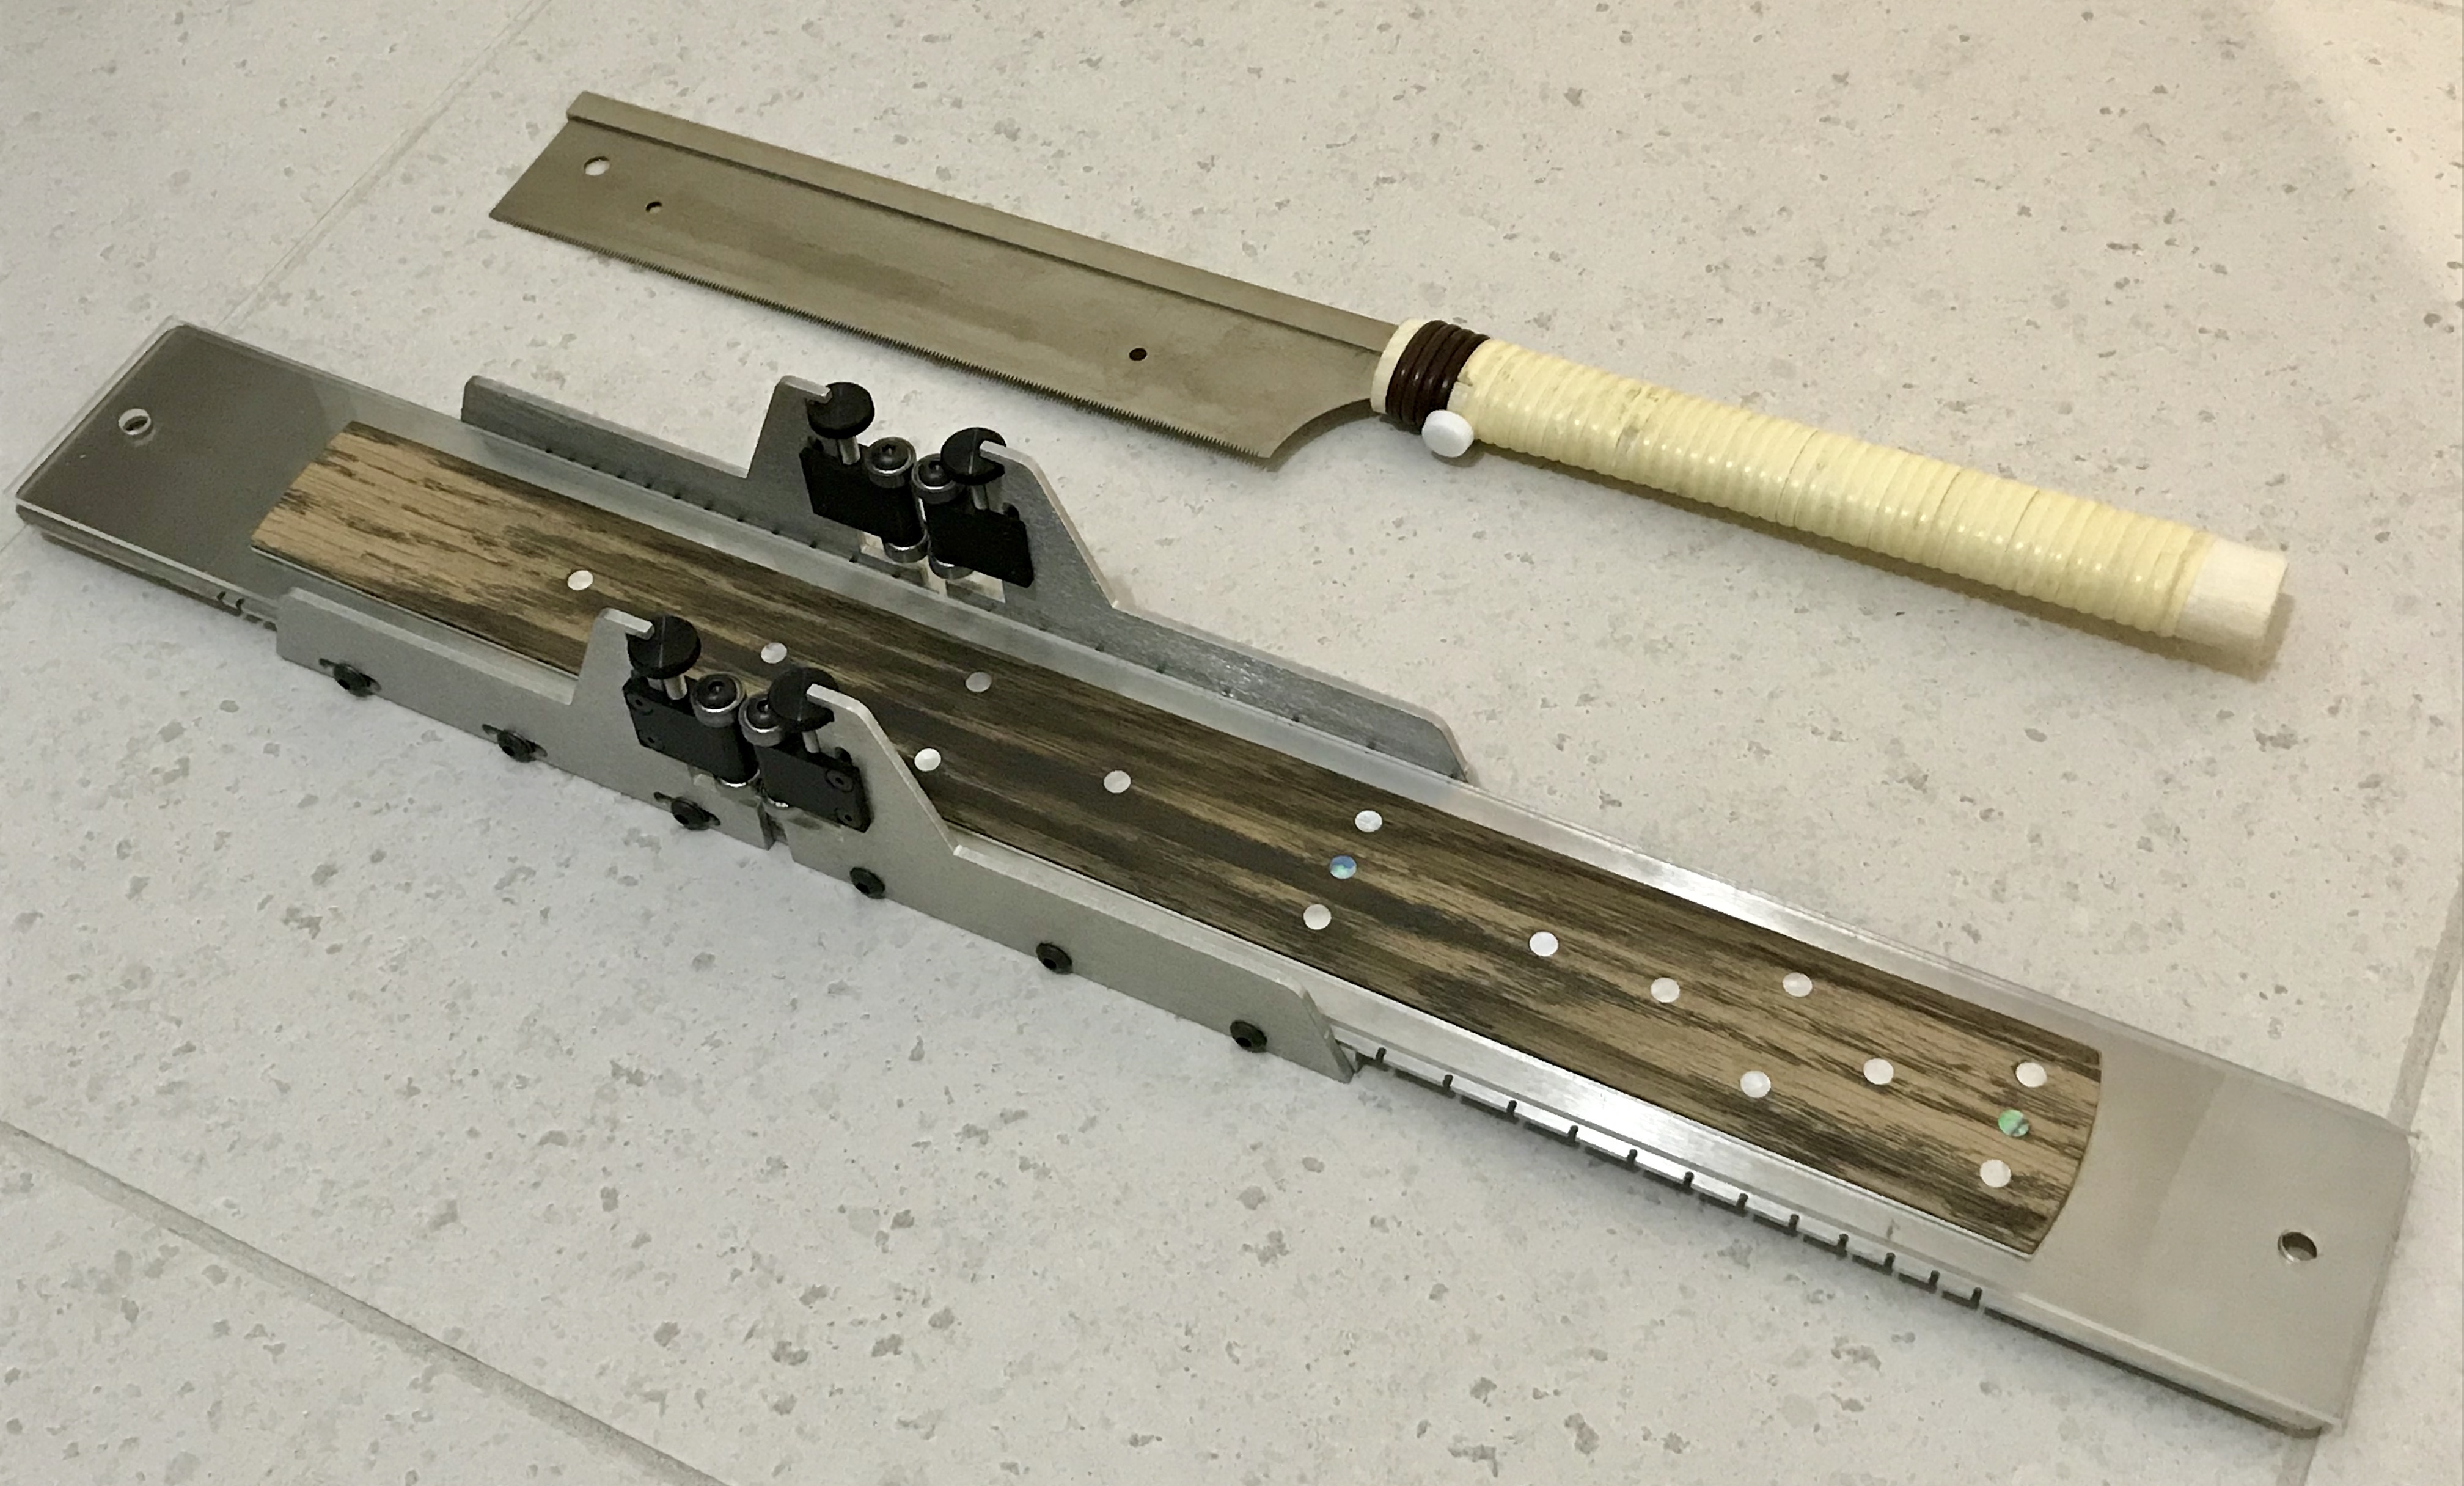
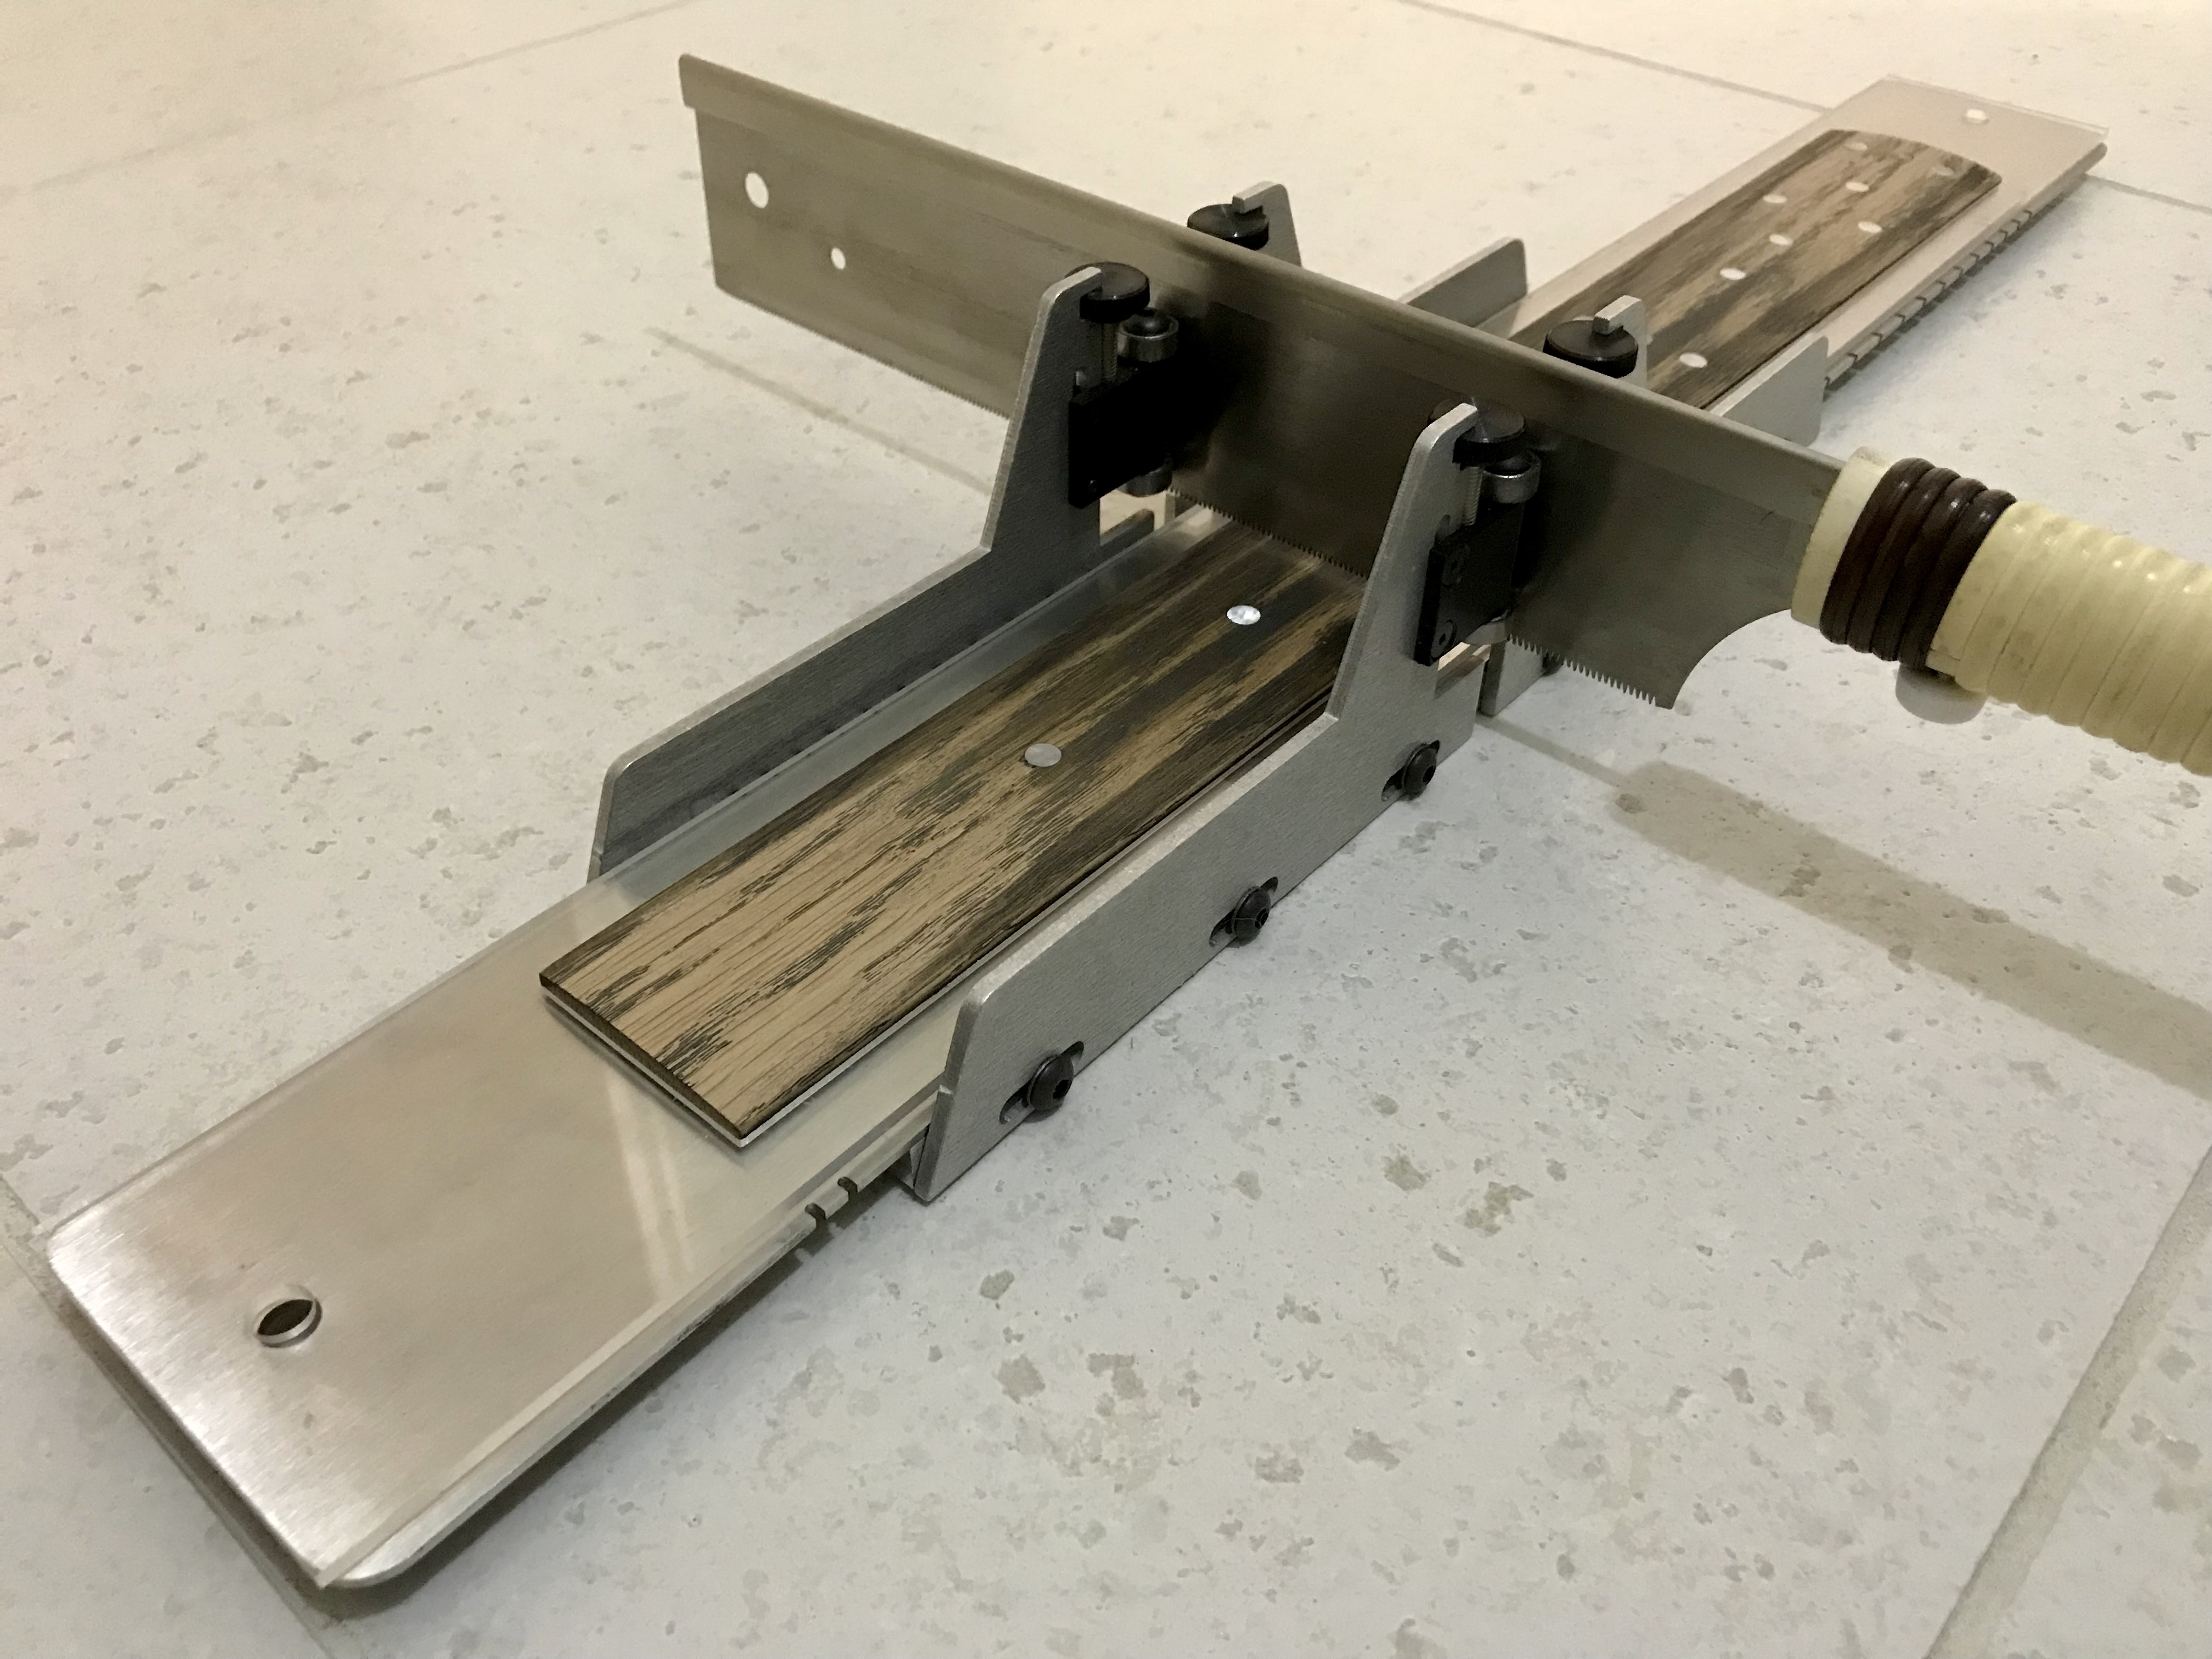
I used variations on the assemblies illustrated in the images below to final radius the fretboards to 6.35 mm (1/4″) thick at the apex both on and off the neck. I attached 3M Stikit Gold self-adhesive abrasive paper to the StewMac 7 1/4″ radius aluminium radiusing beam. In the off-neck radiusing assembly, I aligned the fretboard using a clear acrylic template I cut separately on the CNC machine and secured it to a makeshift table with double-sided adhesive tape.

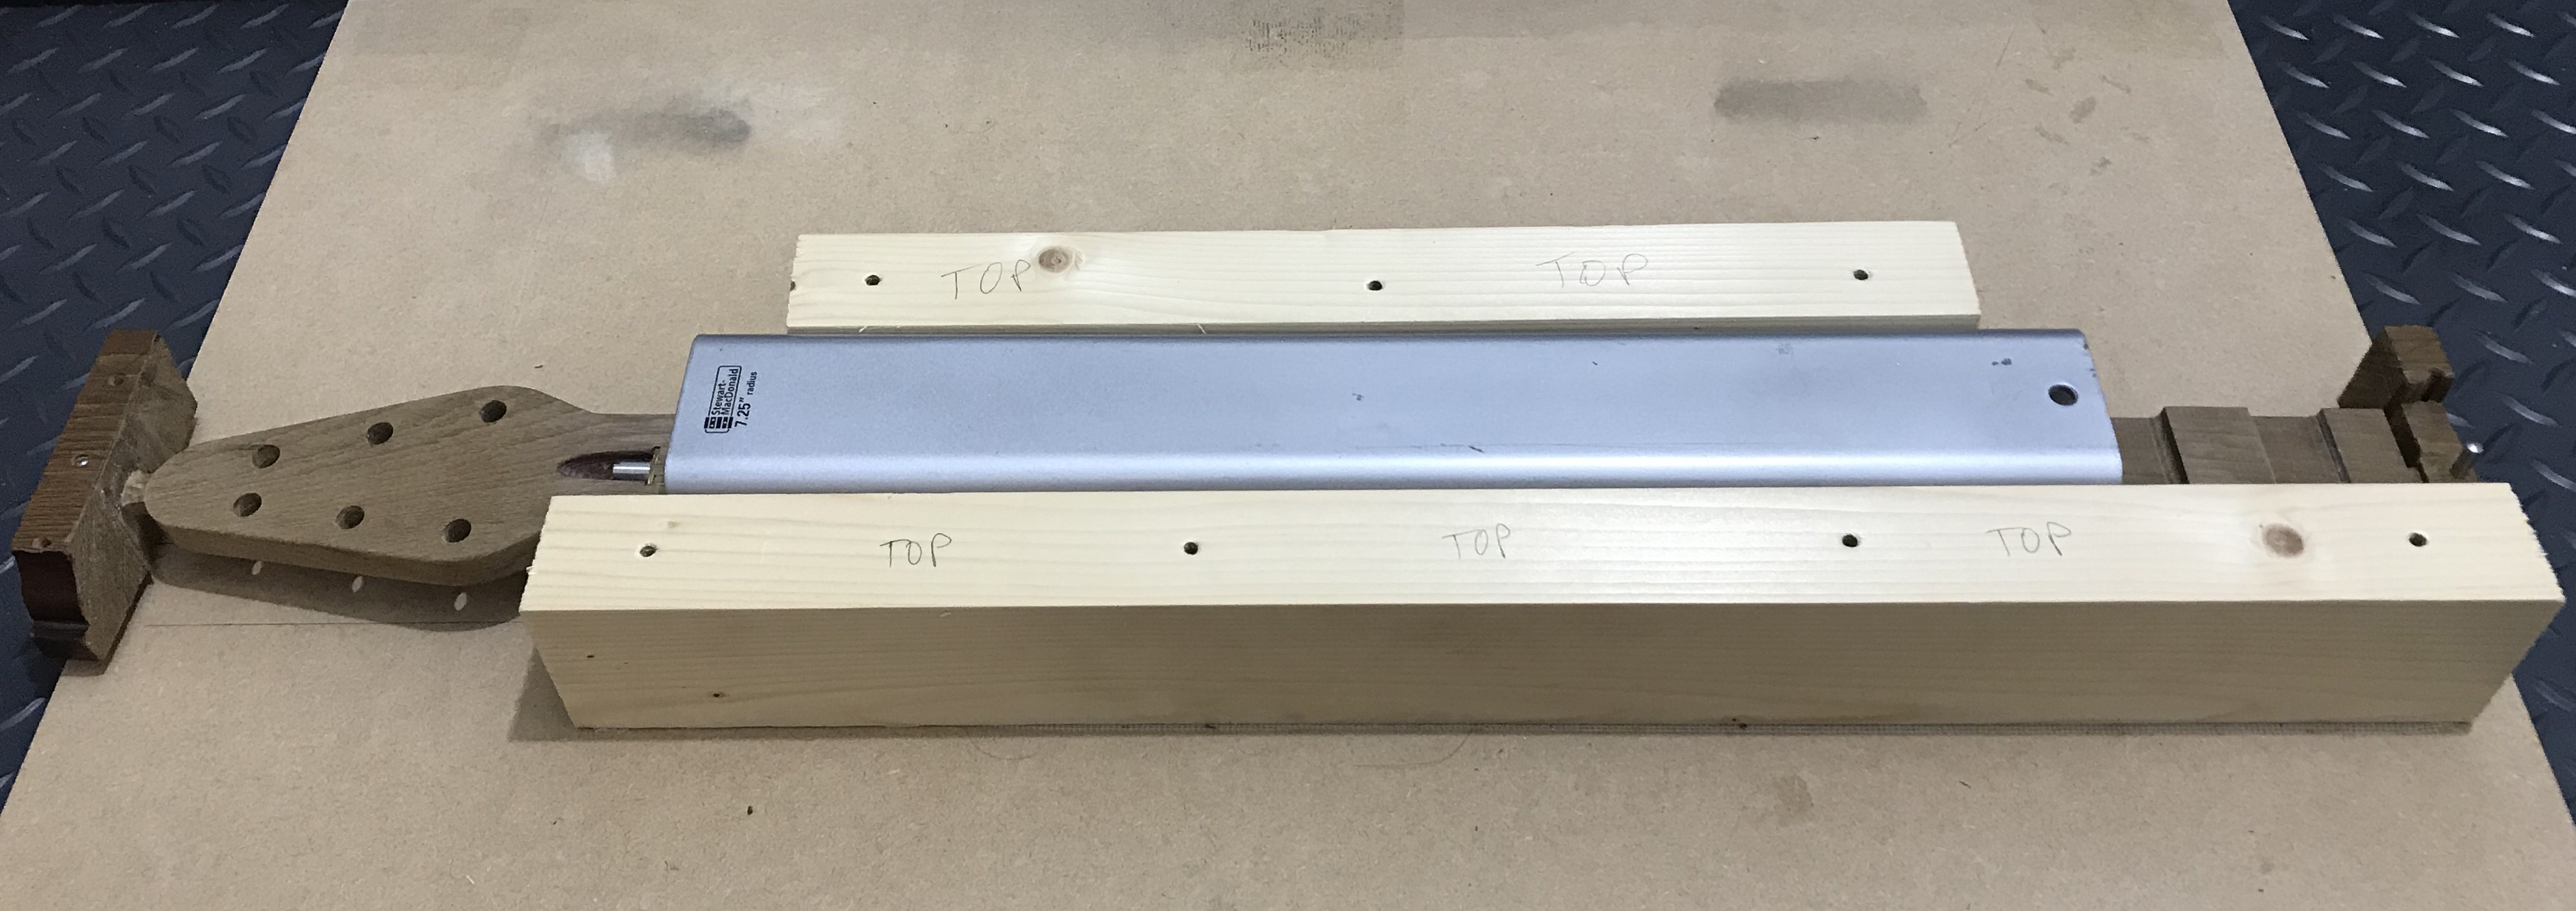
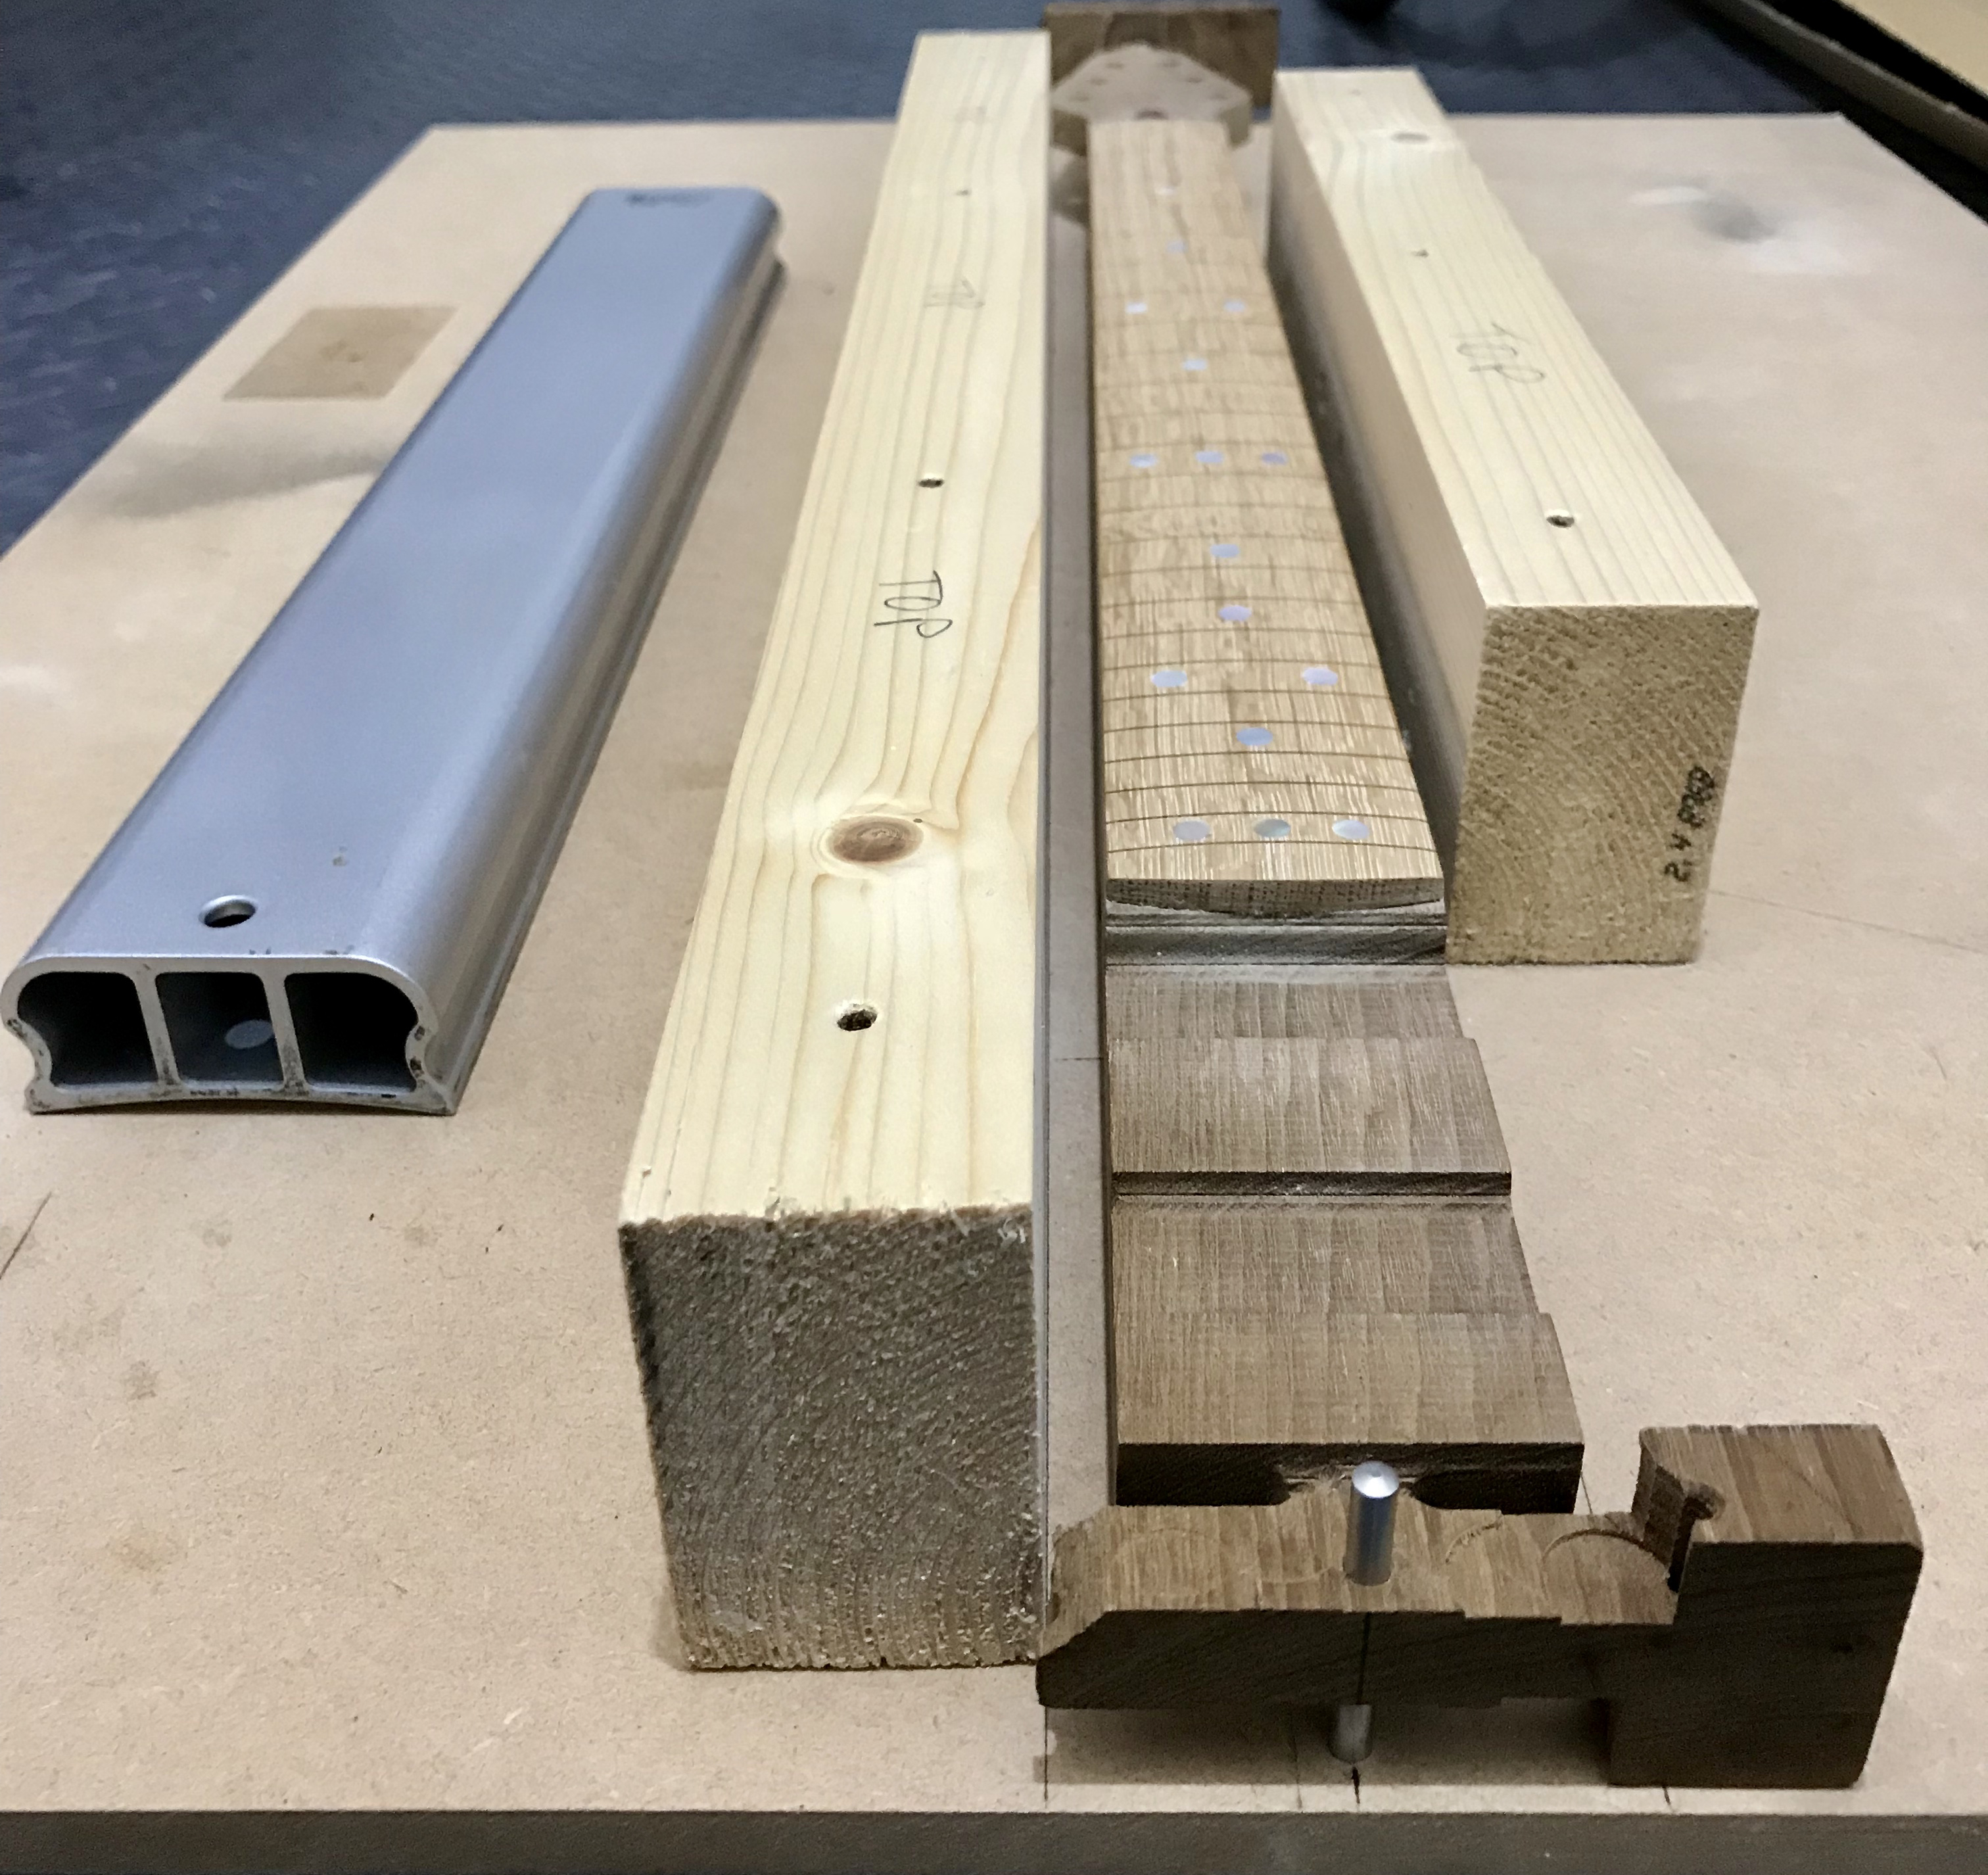
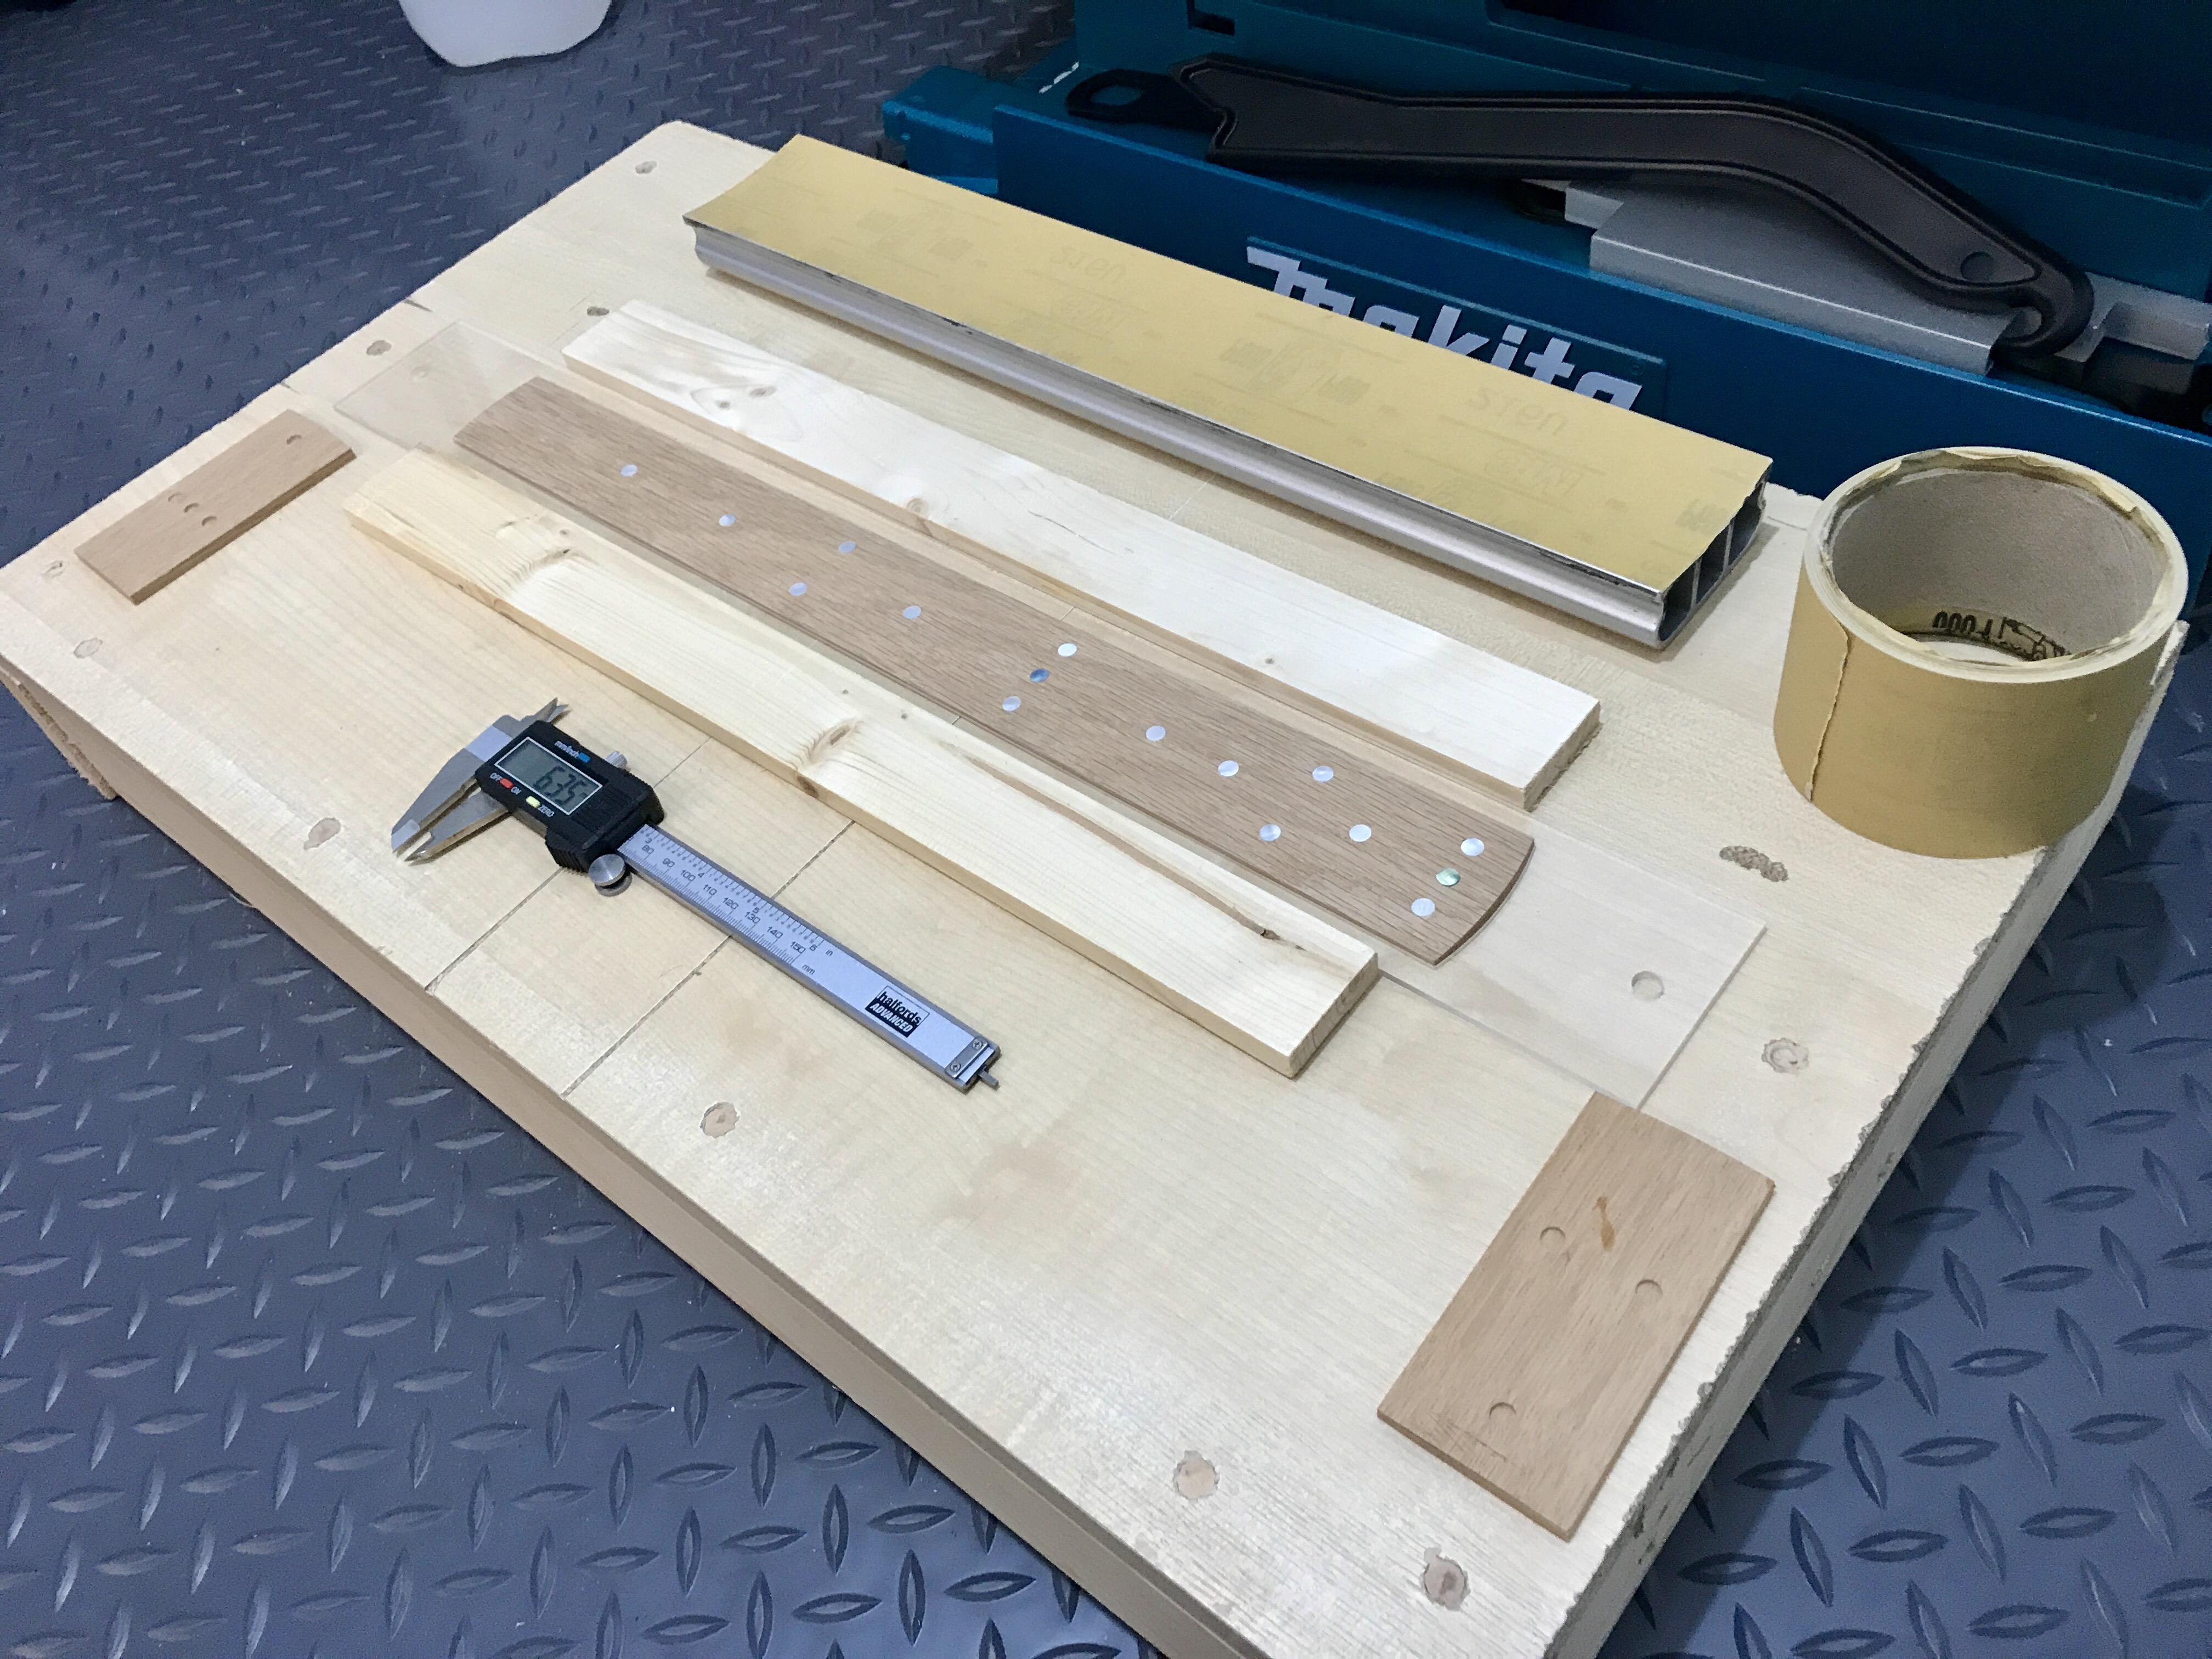
I placed some offcuts of unradiused fretboard to the left and right sides to prevent the beam tilting over at the edges and leaving them slightly thinner than the rest. I glued in the marker dots prior to final radiusing. I bought some highly figured Paua shell dots to try to find some distinctive ones for the 24th fret. I was unconvinced by the final result so I used this fretboard as a practice item and carried on to grain fill it with Jenkins brand black Jecofill grain filler and flat that back using 600 grit 3M Stikit abrasive paper. This is the state in which you see it in the picture gallery where it is placed on a custom made StewMac style slotting template which I designed and had laser cut from stainless steel. One edge has the traditional 24″ Brian May Red Special scale and the other edge has the 19″ scale I used for the 3/4 scale ‘1975’ Red Special replica. I also bought a StewMac fret slotting mitre box and Japanese fret saw for this first project.
- Thicknessing the 11.5 mm spruce stock to 7.00 mm using a 6.00 diameter solid carbide two flute flat nose end mill with 18,000 mm spindle speed and 2,500 mm/min XY feed rate in 1.5 mm depths per pass. Actual cut time 14 minutes. [Not shown]
- Drilling 2 mm deep holes for 1/4″ (6.35 mm) diameter mother-of-pearl fret marker dots using a 6.00 mm diameter solid carbide two flute flat nose end mill with 10,000 mm spindle speed and 750 mm/min XY feed rate in 0.5 mm depths per pass. Actual cut time 1m 51s.
- Cutting the outline using a 6.00 diameter solid carbide two flute flat nose end mill with 18,000 mm spindle speed and 2,500 mm/min XY feed rate. The outline toolpath was generated in MeshCAM using the ‘pencil cleanup’ finishing toolpath option and then the output G Code copied and pasted for each pass (seven passes at 1.00 mm depth per pass). Actual cut time 3m 28s.
- Initial (rough) radiusing to 6.50 mm thick at the crown using a 6.00 diameter solid carbide two flute ball nose end mill with 18,000 mm spindle speed and 2,000 mm/min XY feed rate. Stepover is 1.5 mm. Actual cut time is 10m 05s. [This section is speeded up x2]
- Inserting the 1/4″ (6.35 mm diameter), 1.3 mm thick mother-of-pearl fret marker dots manually. Actual time 3 minutes. [This section is speeded up x4]
- Final radiusing to 1/4″ (6.35 mm) using a 6.00 mm diameter solid carbide ball nose end mill at 18,000 rpm spindle speed, 2,000 mm/min XY feed rate. Stepover is 0.5 mm. Actual cut time 28m 20s. [This section is speeded up x4.]
- Cutting the fret slots with a 0.6 mm diameter solid carbide flat nose end mill, 10,000 rpm spindle speed, 600 mm/min XY feed rate. Actual cut time 14m 49s. [This section is speeded up x2]
For the marker dot drilling toolpath, the initial and final radiusing toolpaths and the fret slotting toolpath, I wrote the G Code myself (instead of using MeshCAM software to generate it) using the G18 command to generate arcs in the XZ plane and G02 and G03 commands for clockwise and counterclockwise arcs.
The wood is spruce tonewood left over from the blockboard assembly. This is another test cut; the final fretboard will be cut from oak. The video is also on my YouTube channel. The total time to execute this job was 1h 15m.
I began work to redesign the neck and fretboard in 2023 and in May 2024 I repaired a fretboard which had a marker hole drilled too deep and which had mother of pearl marker dots which were too thin. I made a video illustrating the drilling out and replacement of these marker dots:
Next article:
Part 27: Final Quality Blockboard
Previous article:
Parts 17-22: The Neck
