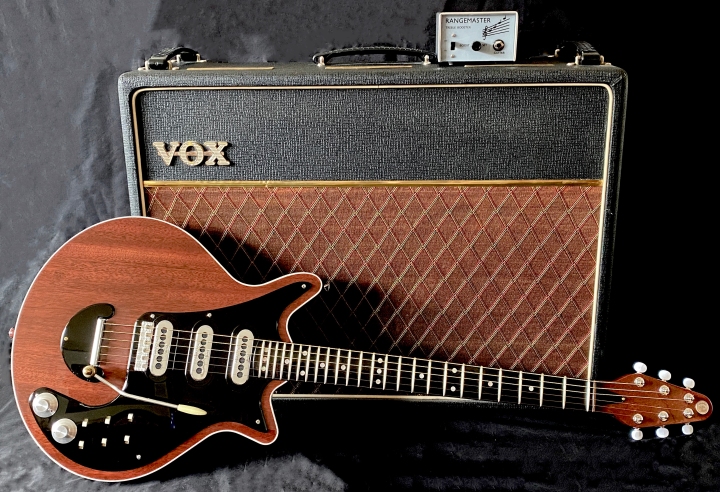


In the articles in this section, I describe my three year long project to make a replica Brian May Red Special guitar, faithful to the original in construction method, shape, size and colour with a full NOS vintage electronic component suite including Jeanrenaud DPDT parallel slide switches, Adeson “original BM/Guyton specification” Tri-Sonic pickups and a long tenon neck made from a vintage mahogany fireplace.
What is absolutely not authentic on this project was the use of modern computer aided design (CAD) and tooling methods (CNC). My aim was not to produce a relic instrument or one with a home made look. Quite the opposite in fact; I desired a finished product with quality, commercial look and feel to it if possible, perhaps I could aim for a home-made Guyton! However, I was prepared to tolerate the inevitable mistakes that will result from being an amateur, inexperienced guitar builder as Brian and Harold had to do.
One of the quotations from the Red Special book I can most identify with is shown below. My other favourite quotation credited to Brian is “If a job’s worth doing, it’s worth overdoing. That’s the Queen philosophy”. Below is a reverse chronological list of the illustrated articles I wrote for each part of this project. It has more parts than Pink Floyd’s Shine On You Crazy Diamond.
“a lot of swearing went on, but eventually we got there. Quite often we would slip up and something would go wrong, and we’d think the whole thing was ruined. But we’d find some way around it and repair it”
Brian May from Brian May’s Red Special: The Story of the Home-Made Guitar That Rocked The World, Carlton Books, October 2014, page 19
Follow-up Post 2: Tools & Tips
Follow-up Post 1: Materials, Parts & Suppliers
Red Special Fixings and Fasteners
Part 60: Electronics Wiring, 07 June 2020
Part 59: Initial Setup (Setting the Playing Action and Pickup Installation), 31 May 2020
Part 58: Making the Bakelite String Spacer, 16 May 2020
Part 57: Control Cavity Copper Foil Shielding, 01 May 2020
Part 56: Body Assembly Preparations, 26 January 2020
Part 55: Body Assembly, 19 January 2020
Part 54: Fretwork, 18 August 2019
Part 53: Finishing Progress, 22 June 2019
Part 52: Test Assembly, 01 January 2019
Part 51: Guitar Body Finishing, 09 and 26 November 2019
Part 50: Fretboard Finishing, 09 and 26 November 2019
Part 49: Neck & Fretboard Finishing, 28 September 2018
Part 48: Drilling the Body and Neck Holes, 20 August 2018
Part 47: Marrying the Body and Neck, 13 August 2018
Parts 44-46: Edge Binding Preparation, Pre-Shaping and Application, 26 July to 07 August 2018
Part 43: Neck and Fretboard Assembly, 26 July 2018
Part 42: Making a Veneer Scoring Tool, 03 February 2018
Part 41: Electronic Components Assembly, 19 December 2017
Part 40: Neck Assembly Preparation, 30 November 2017
Parts 37-39: Making the Truss Rod, 30 November 2017
Parts 34-36: Veneering the Body, 10 November 2017
Parts 31-33: Body Assembly, 09 November 2017
Parts 29-30: Veneering and Staining Tests, 09 November 2017
Part 28: The Body (Final Quality CNC Cut), 09 November 2017
Part 27: Final Quality Blockboard, 06 November 2017
Parts 23-26: The Fretboard, 06 November 2017
Parts 17-22: The Neck, 04 November 2017
Parts 13-16: Pickguard Set, 28 October 2017
Parts 8-12: Aluminium Sheet Parts, 27 October 2017
Parts 5-7: Upper Oak Insert, 25 October 2017
Parts 3-4: Body Section Test Cuts, 21 October 2017
Parts 1-2: Timber Preparation, 21 October 2017
Red Special Design Research, 19 October 2017
