Although I have owned this Stratocaster for several years, the previous owner had set up the tremolo and action very well so I never needed to make any adjustments. However, the change of string gauge to the Brian May 0.009 to 0.042 set, fitting of non-standard taller roller bridge saddles and vintage Burns Tri-Sonic pickups necessitated a full setup from first principles. Setting up any floating tremolo guitar is straightforward and follows the same basic principles. I described the same process for my Burns conversion here: https://dsgb.net/projects/burns/set-up/
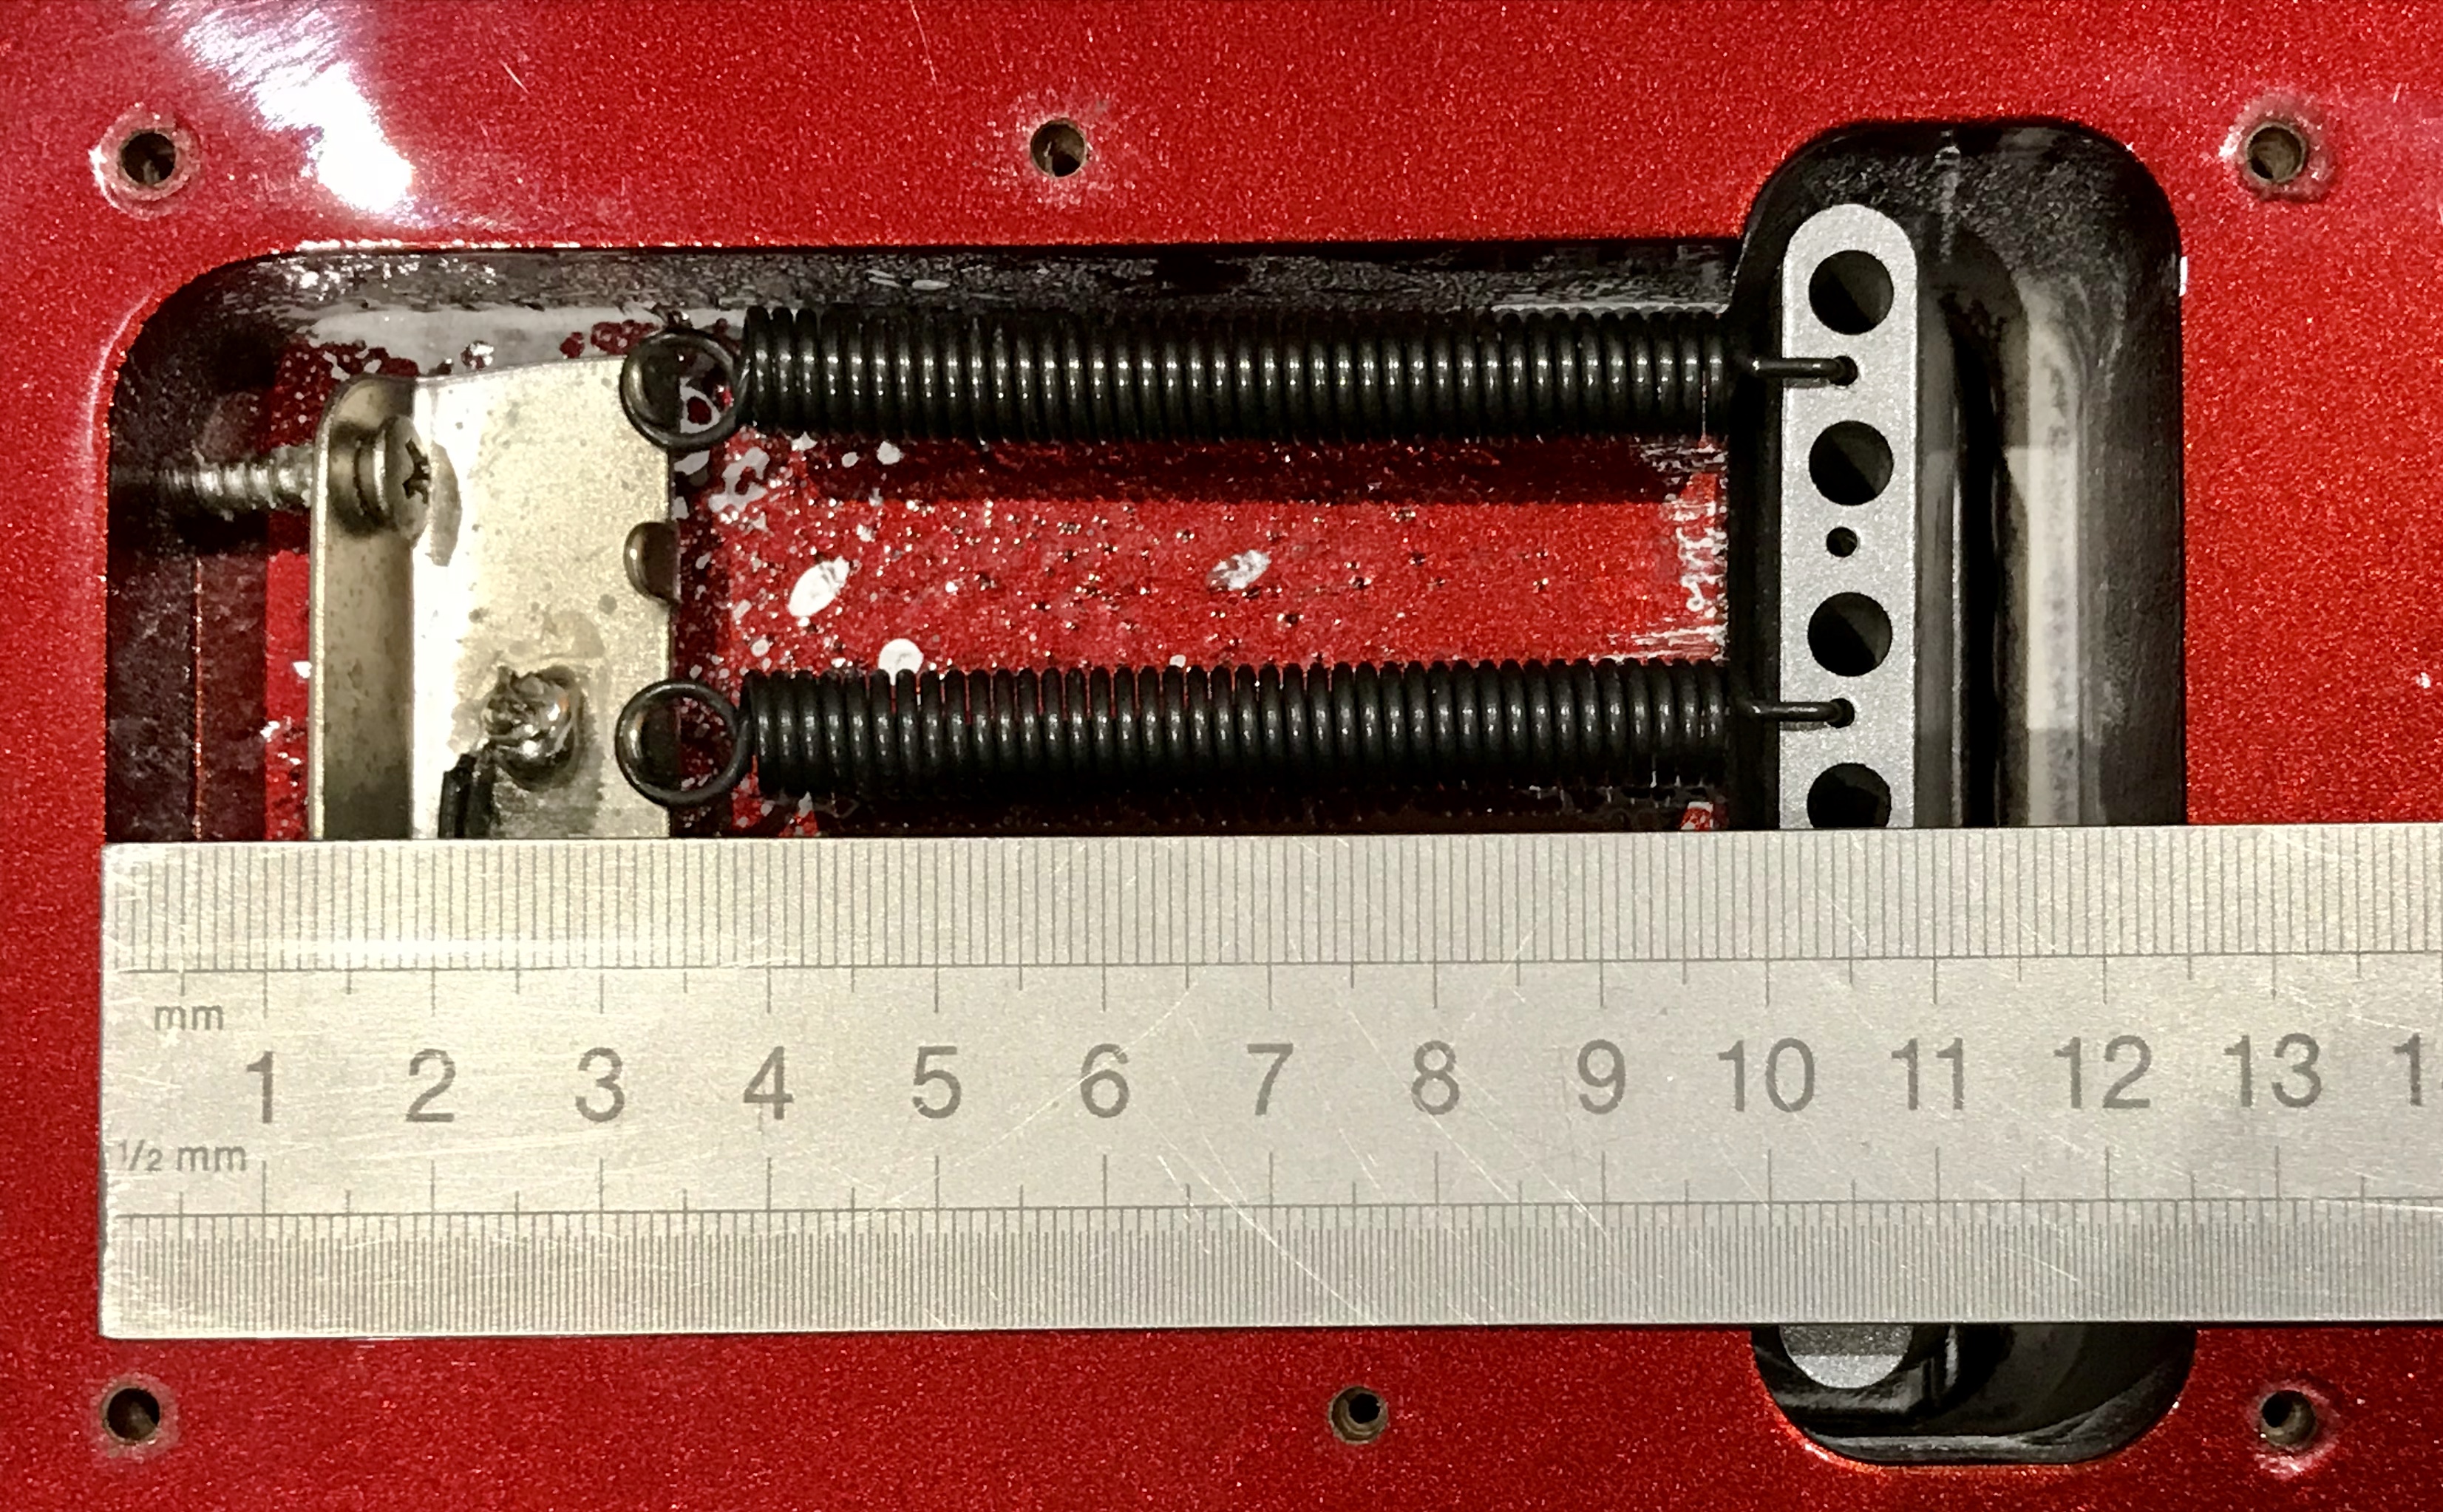
1. Balance the Tremolo Block
- String up the guitar with your preferred string gauge. The total string tension is approximately 79 lbs for a .009 to .042 set preferred by Brian May (Optima Gold 2028BM). I use the equivalent Rotosound British Steels 9 Super Light set.
- Tune the strings to pitch and check whether the tremolo plate is balanced approximately parallel to the guitar body. A gap of 1/8” (3.2 mm). This also requires the height of the two pivot screws at the front of the tremolo plate to be adjusted.
- Adjust the spring tension as required by tightening or loosening the two screws securing the claw plate at the back of the guitar.
- Repeat steps 2 and 3 as required.
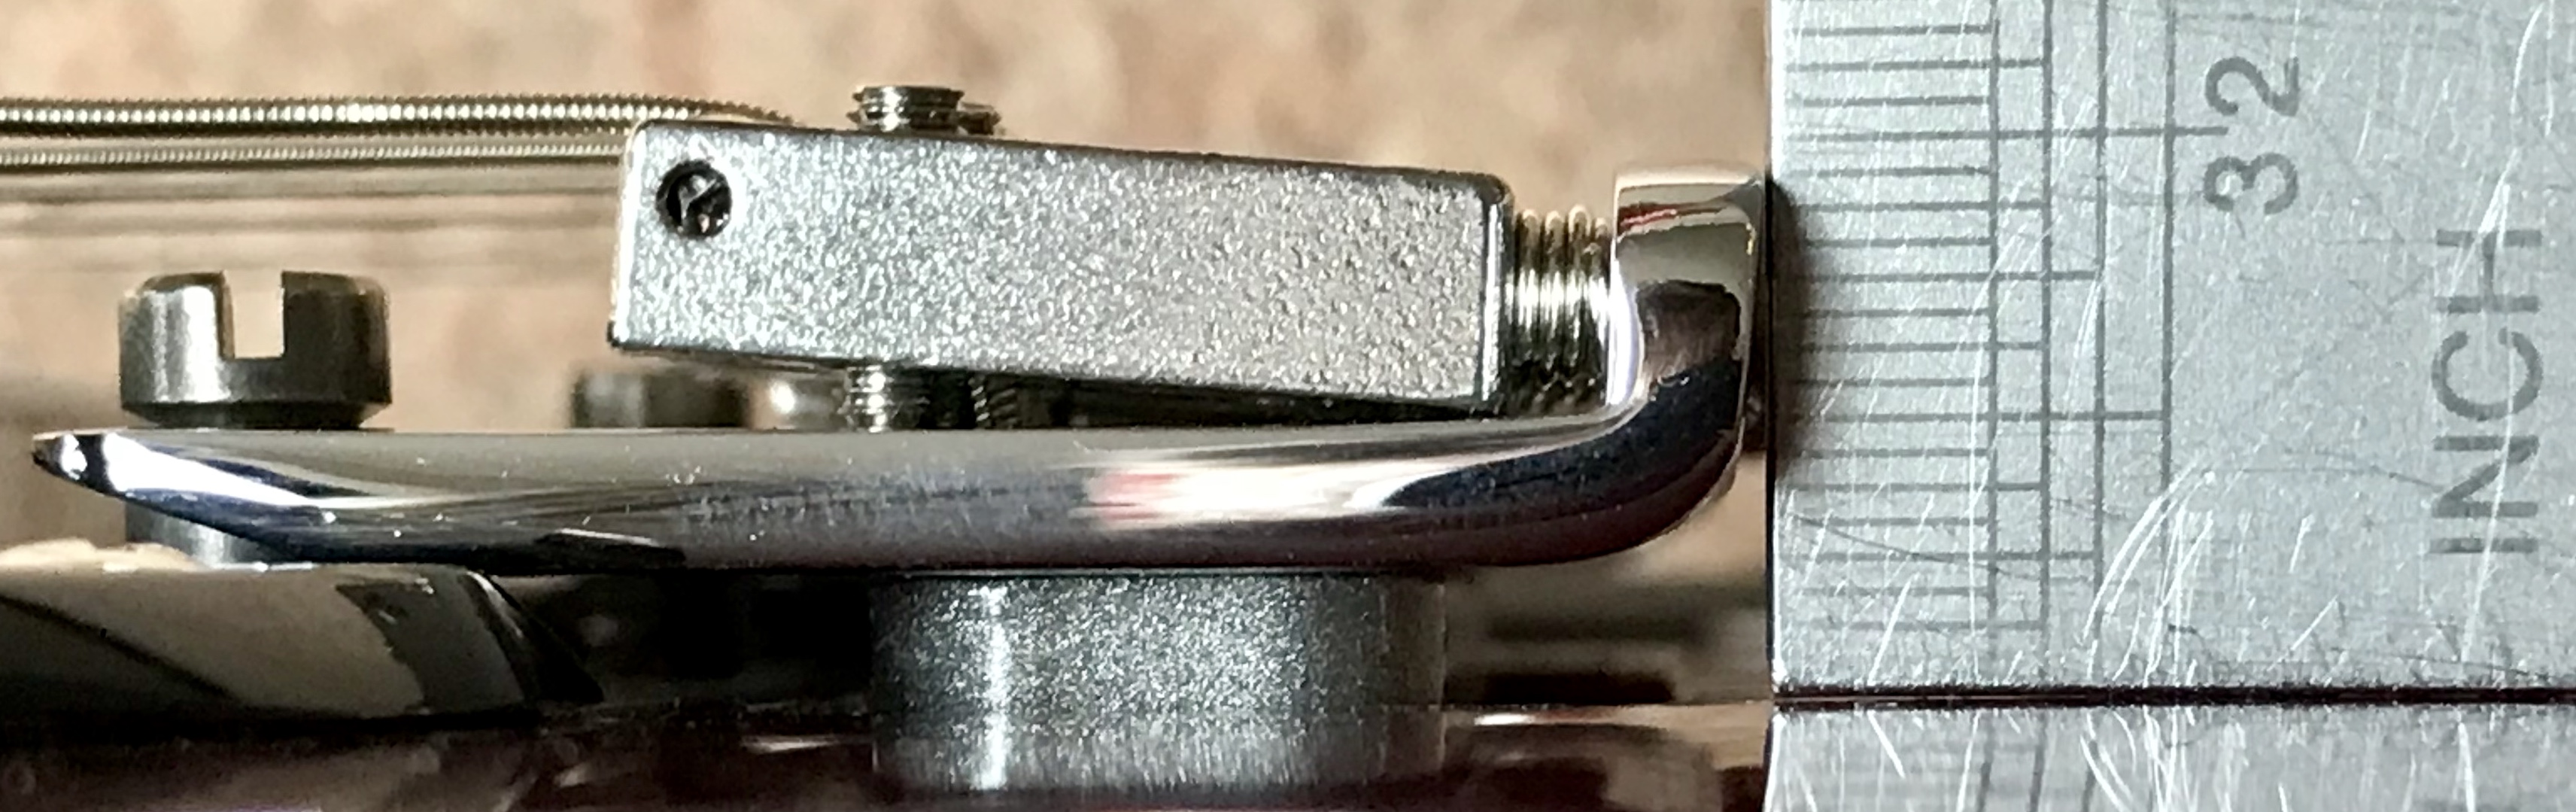
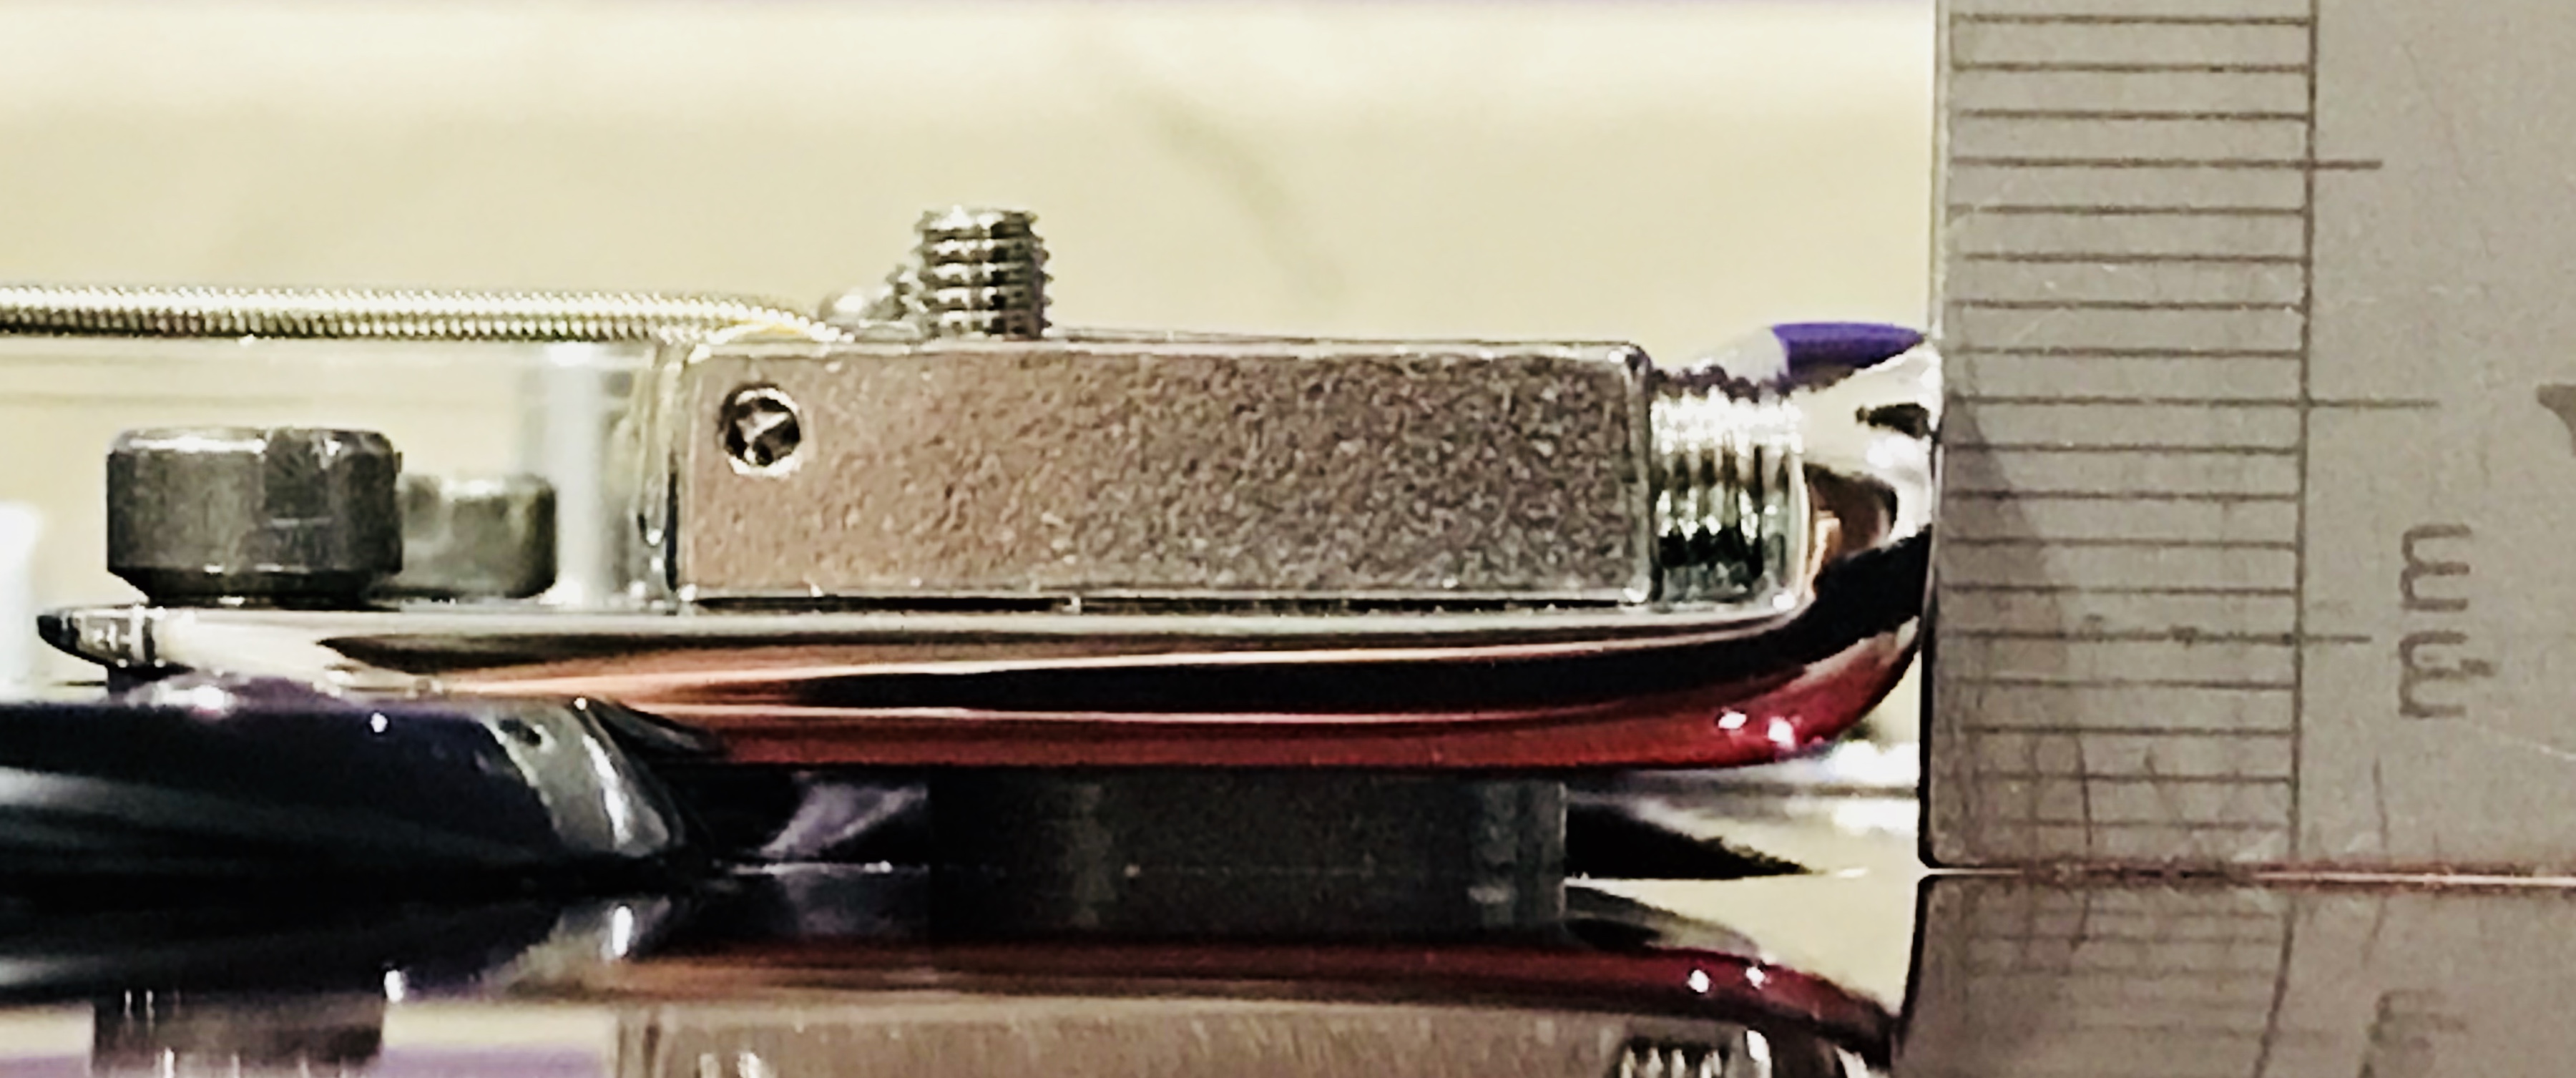
2. Set the Playing Action
- Decide on your preferred string action height. I get on quite well with the standard Fender action of 4/64″ (1/16″, 1.6 mm) at the 17th fret. Generally, action heights vary by no more than 0.4 mm so that a low action would be 1.2 mm and a high action would be 2.0 mm.
- Tune the strings to pitch (iterative process for a floating tremolo).
- Adjust the bridge saddle height set screws with a hex key and check the distance between the string and fret crown at the 17th fret using an appropriate implement. I used a 1/16″ or 1.5 mm drill bit.
- Repeat steps 2 and 3 as required. On completion, the bridge saddles will describe an arc approximately following the fretboard radius.
3. Set the Intonation Correction
- Tune each open string to pitch.
- Check the pitch at the first octave (12th fret).
- If flat at the 12th fret, move the bridge saddle closer to the nut (reduce the distance between the vibration nodes) by turning the spring-loaded adjusting screw. If sharp, move further away from nut (increase the distance between the vibration nodes). “flat/forward, sharp/back”.
- Repeat steps 2 and 3 as required until the open string and octave are both at the correct pitch, neither sharp nor flat.
For reference. The roller contact points were then at the following distances from the back of the nut: low E (650.5 mm), A (650 mm), D (649 mm), G (649.5 mm), B (649 mm), top E (648.5 mm) compared to a nominal 647.7 mm for a 25.5” scale.
4. Set the Pickup Heights Relative to the Strings
Rather than use springs between the mounting lug and the underside of the pickguard to facilitate height adjustment, I prefer to make a custom sized spacer, stand-off or shim. I usually use PTFE rod with a 3.5 mm hole drilled through the centre, although wooden dowel does the same job. Once I have set the playing action to my preference, I have no requirement to change the set-up of the guitar so I prefer to have the pickups rigidly coupled to the pickguard. This is the next best situation after mounting them directly to the guitar body as they are in the original Red Special.
It is only necessary to set the heights relative to the top and bottom E strings because adjustment is only possible at the side mounting lugs because Tri-Sonic pickups do not have individually adjustable pole pieces. Secondly, the principal constraint on maximum pickup height is the point where they contact the lowest strings (top and bottom E) when they are fretted at the highest fret (fret 24 on a Red Special guitar and fret 22 on a Fender Stratocaster).
To estimate the required spacer height requires two measurements and knowledge of the recommended distance between either the fretted, or unfretted strings. Greg Fryer published some measurements of the distance between the pickups and the unfretted strings on Brian’s original Red Special when he dismantled and restored it in 1998. I find that this set-up yields satisfactory results when deployed on Tri-Sonics with Brian May electromagnetic characteristics. It is certainly a good starting point for any Red Special guitar set-up. The exact measurements can be varied iteratively from there depending on the exact output of the pickups and signal chain which you are using. With the mechanical set-up described in parts 1, 2 and 3 above complete, I measured the distance from the pickguard surface to the underside of the string and the distance from each pickup mounting lug to the top of the casing. To obtain the required spacer height, I used the following expression:
Spacer = Pickup Height – (Pickguard-to-Unfretted String – Pickup-to-Unfretted-String) – Pickguard Thickness
I then used the uncorrected spacer heights as a guide to prepare the pickguard for final checks with the strings tuned to pitch. Some minor adjustments were required and I deemed a measurement less than 0.5 mm (measured by eye with an engineering ruler) acceptable. The actual spacer heights I ended up using are within 1.0 mm of the estimated values.
Essentially, the pickup heights end up staggered, approximately following the angle subtended by the fretted or unfretted E strings. Bear in mind that Brian uses the middle and bridge pickups in phase as a default configuration around 80% of the time. The neck and middle pickups are used out of phase in the Bohemian Rhapsody solo. The current induced in each pickup coil by the vibrating string(s) will vary as a result of string vibration amplitude so it follows that the bridge pickup will have a lower induced current in it because it is nearer the node of the vibrating string where the amplitudes will be lower. The opposite is true for the neck pickup. Clearly, strings will vibrate in complex ways during playing as various harmonics are generated, but to a first approximation, having the neck pickup slightly lower than the middle and the bridge slightly higher will go some way to balancing the outputs of each pickup. Incidentally, there are some interesting videos on YouTube where people have placed cameras inside an acoustic guitar while they are playing it; the vibration modes of the strings are clearly visible.
Next article:
Part 8: The KAT PCB
Previous article:
Part 6: Assembly and Testing
