J. On Rock(!) beach, Cornwall, in summer 2019, I explained the story of my one and only failed attempt at building a replica Brian May Red Special guitar in 2004/05 that ultimately ended up as firewood. Doug was curious to see if he could supply a Red Special kit of CNC cut component parts from which a knowledgeable enthusiast with good handicraft skill could make an authentic Brian May Red Special replica. He had refined his designs and learned lessons from his own build which would facilitate such a project.
I initially dismissed it, suggesting I had no time. I was already working on a project to replicate Brian May’s original leather belt strap and buckle for the soon to be announced limited run of 21 Guyton Time Warp Brian May Red Special replicas and I wanted to focus on that, along with being a father and working a full time job.
However, my interest was piqued and I ended up asking Doug many questions as to how we would do it, what I would need to provide, how it would work, etc.
D. This is the story of Jon’s Red Special guitar. Born in Cornwall, made in Devon…


D. The Cornish have a saying, which illustrates my approach to many things in life. It’s also now a draught beer from St Austell Brewery: “proper job”. [Other excellent beverages from Cornwall are available]. This is similar to Brian May’s philosophy which he carried forward into his contributions to Queen: “if a job is worth doing, it’s worth overdoing”.


J. I supplied all the parts and consumables for the build and the CNC machine, plus some other items to help Doug with his build and some of other ideas we had. This also included making up my own blockboard to be used in the project to the same dimensions that Doug had used so it was compatible with his CNC tool paths.
I then started to think about the decisions I had to make on how I wanted the guitar to look, what woods did I want to make the blockboard from, pickups, hardware, veneer, screw types and so on. I was able to source a suitable vintage mahogany mantelpiece on eBay from which provided sufficient timber for two neck blanks. I decided on pine core blockboard as this had been used in the Guyton Red Specials. I sourced some European kiln dried oak for the fretboard and upper and lower body sections.


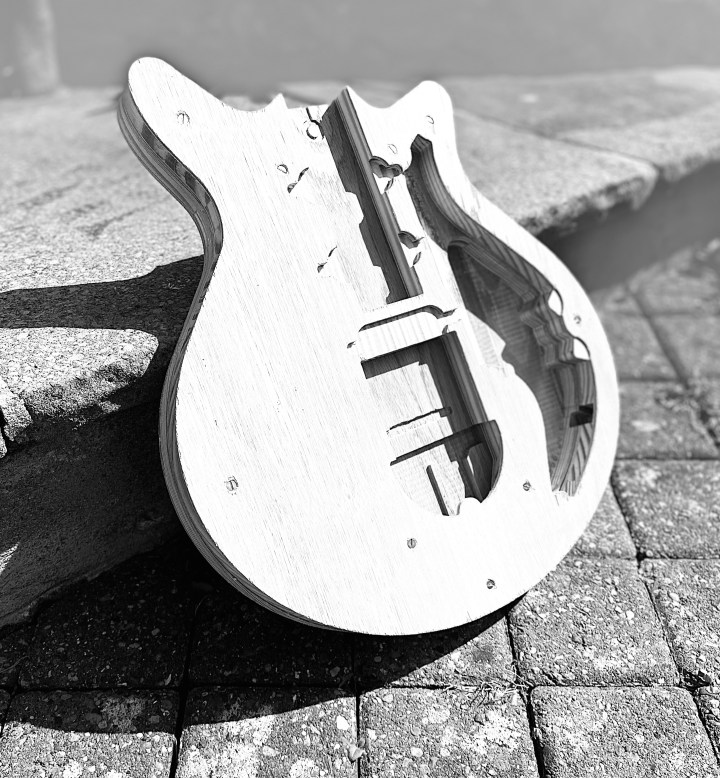
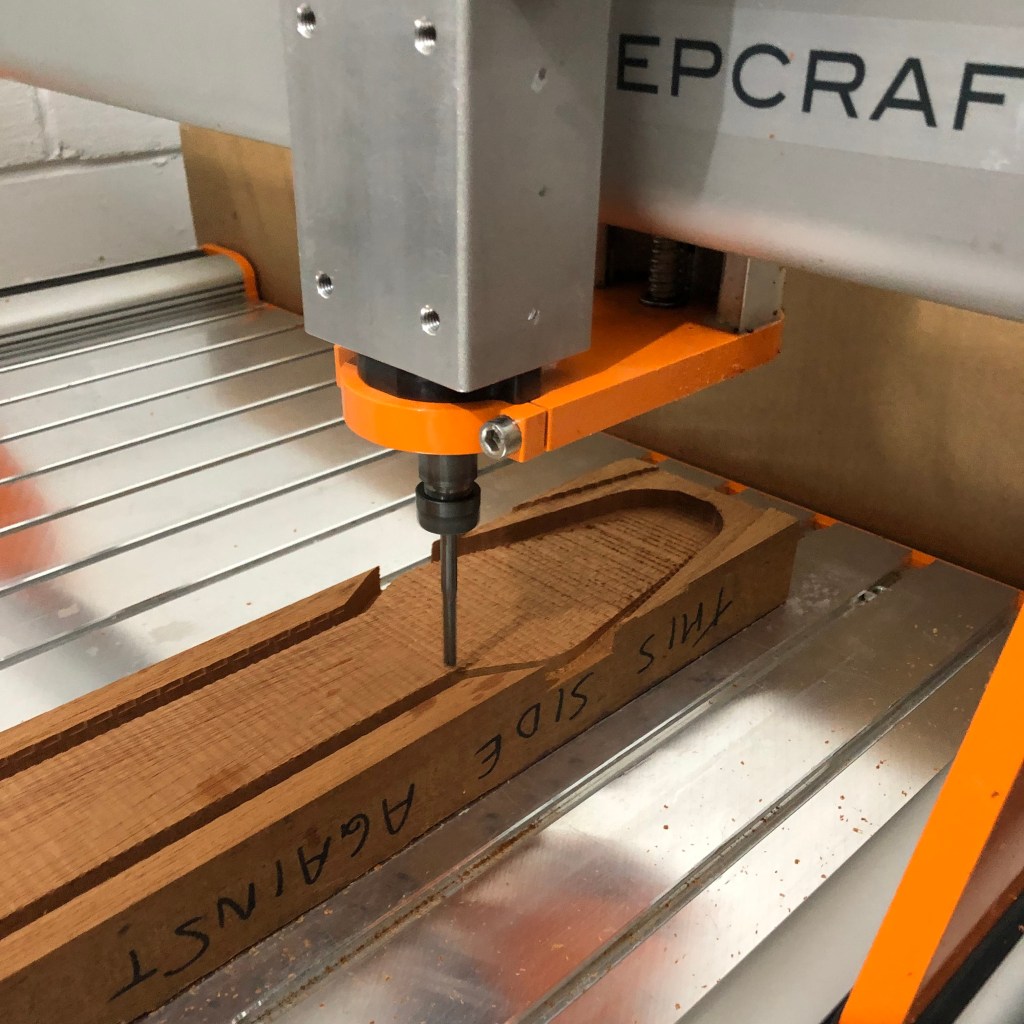
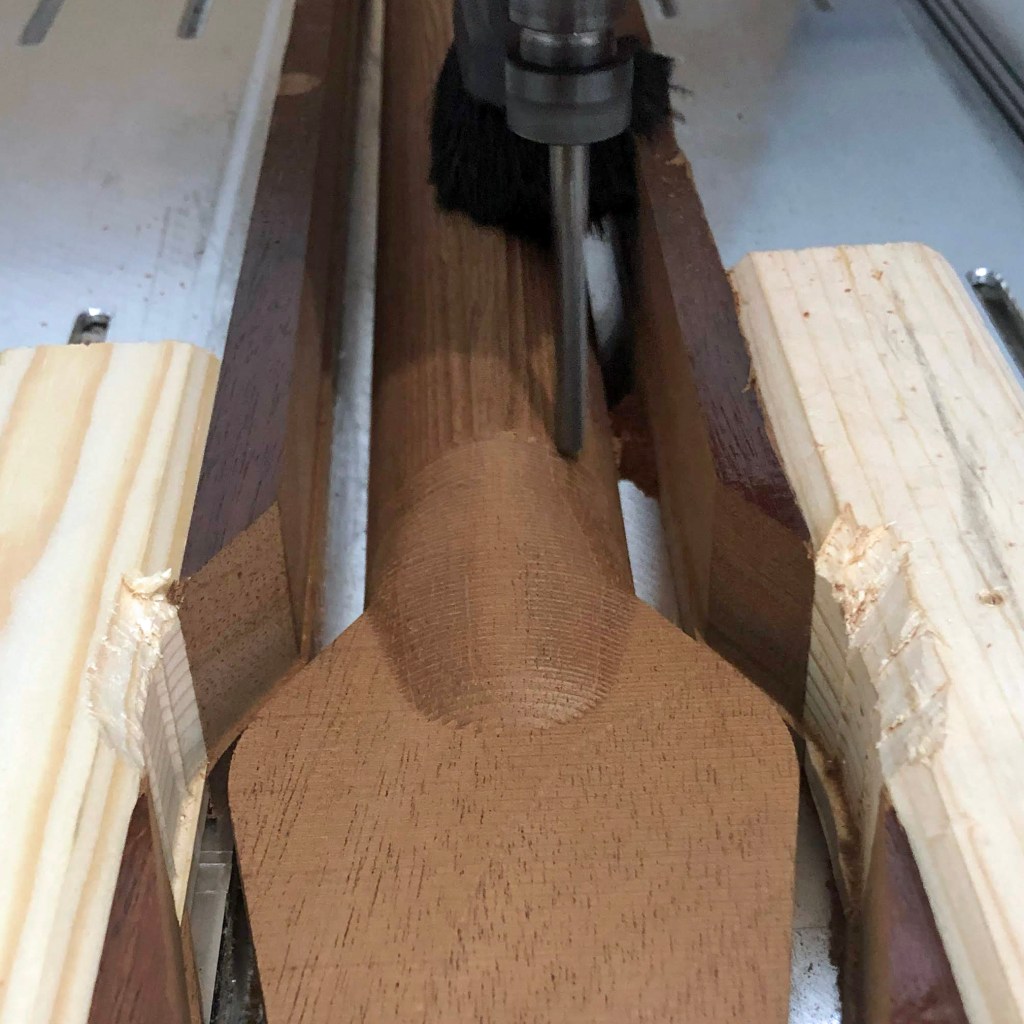
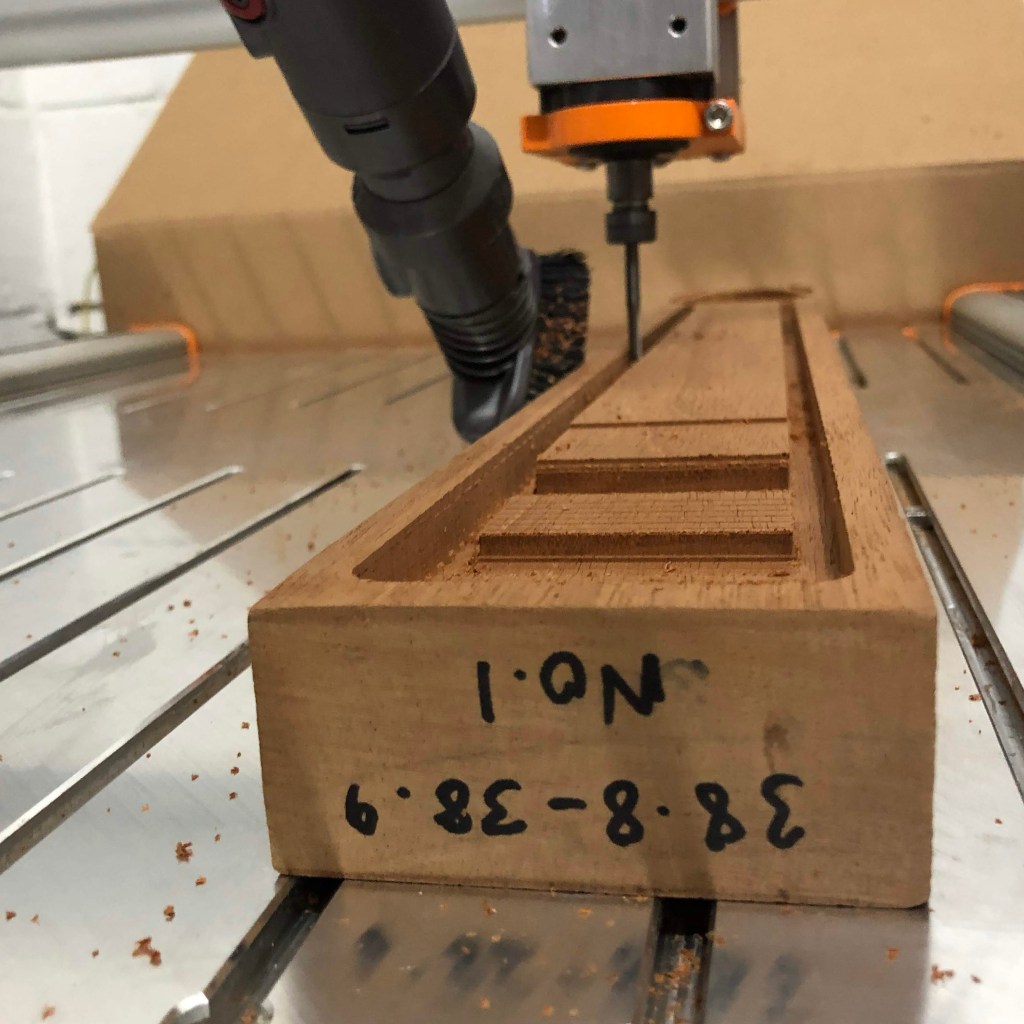
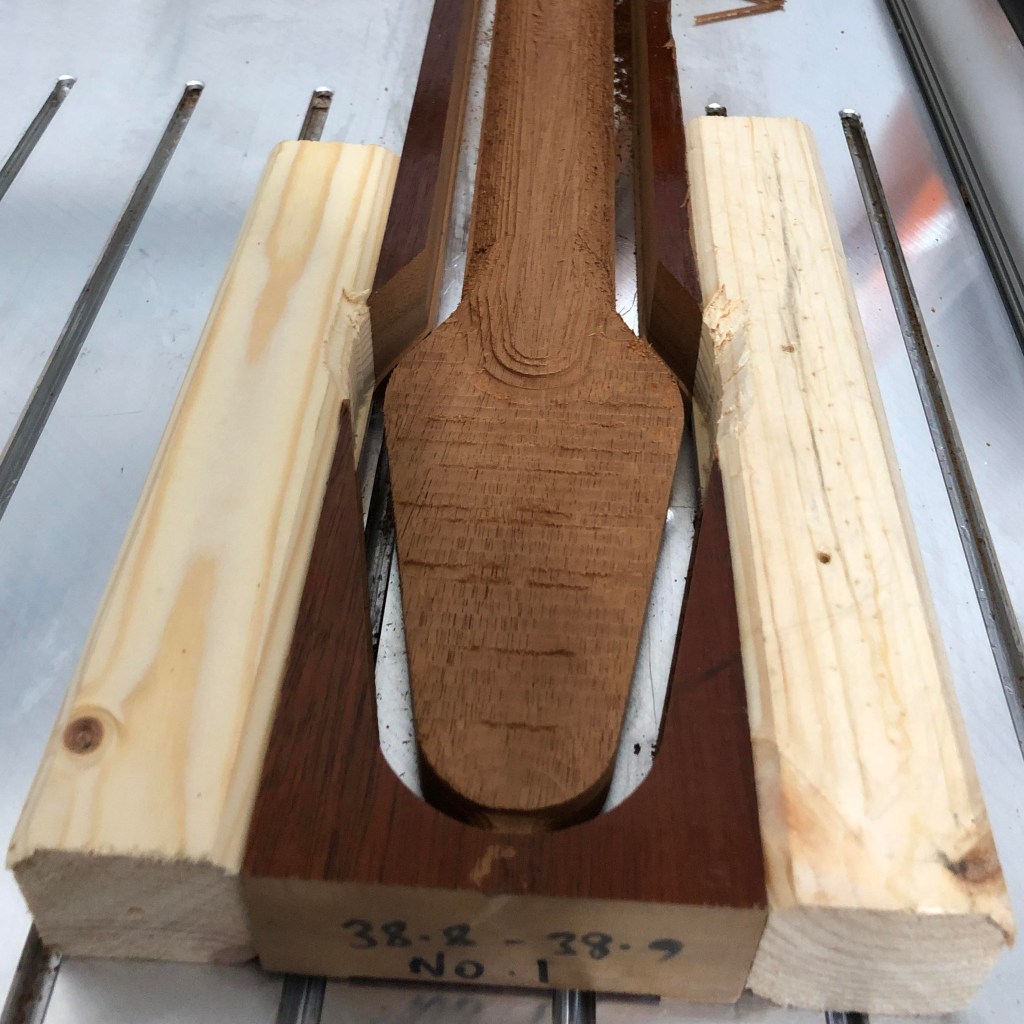
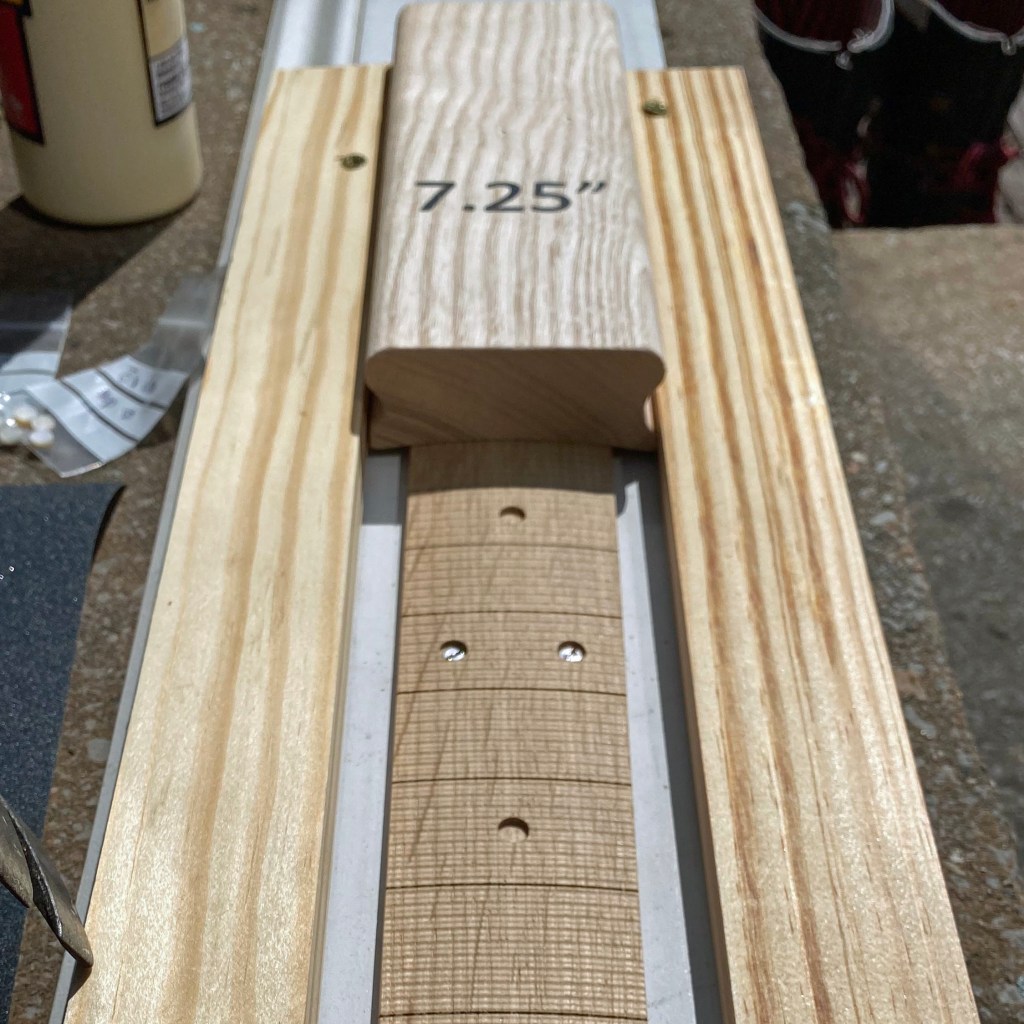
J. Cutting the neck would be the most challenging job to execute because it had to be cut on both sides and they had to align perfectly. This is something we discussed at length before the project and we had come up with a plan to have a large L-shaped alignment bracket made from aluminium to align the wood to the machine axes. This was bolted to the machine bed and offered us a constant to work to when aligning the mahogany stock.
The timber was aligned and secured in place on the deck with superglue, one dot in each corner and a further two at the mid point along the side, tool paths loaded. We then aligned the zero point and took a note of the x, y and z co-ordinates to return to should anything go wrong so that we could return to them to start over. And off we go…
“The CNC machine sprang into life and the cutter started to craft my guitar neck. My dream of building a Red Special began.”


D. Since visiting Japan in September 1997 for a scientific conference, I have admired Japanese culture and philosophies and try to seek out kaizen. We conceived various templates and jigs including one to align the fretboard to the neck blank and another to assist veneer trimming. I CNC cut these from clear perspex. I re-purposed some unsatisfactory blockboard sections and oak dowel to make a jig to align the upper and lower guitar body sections.
kaizen [kʌɪˈzɛn]
NOUN
a Japanese business philosophy of continuous improvement of working practices, personal efficiency, etc.


J. The Red Special kit consisted of the following items (some redundancy offered scope for tests):
1 Mahogany neck blank – attached to supports
3 Oak fretboards, radiused and slotted to 24″ scale
1 Upper body section
1 Lower body section
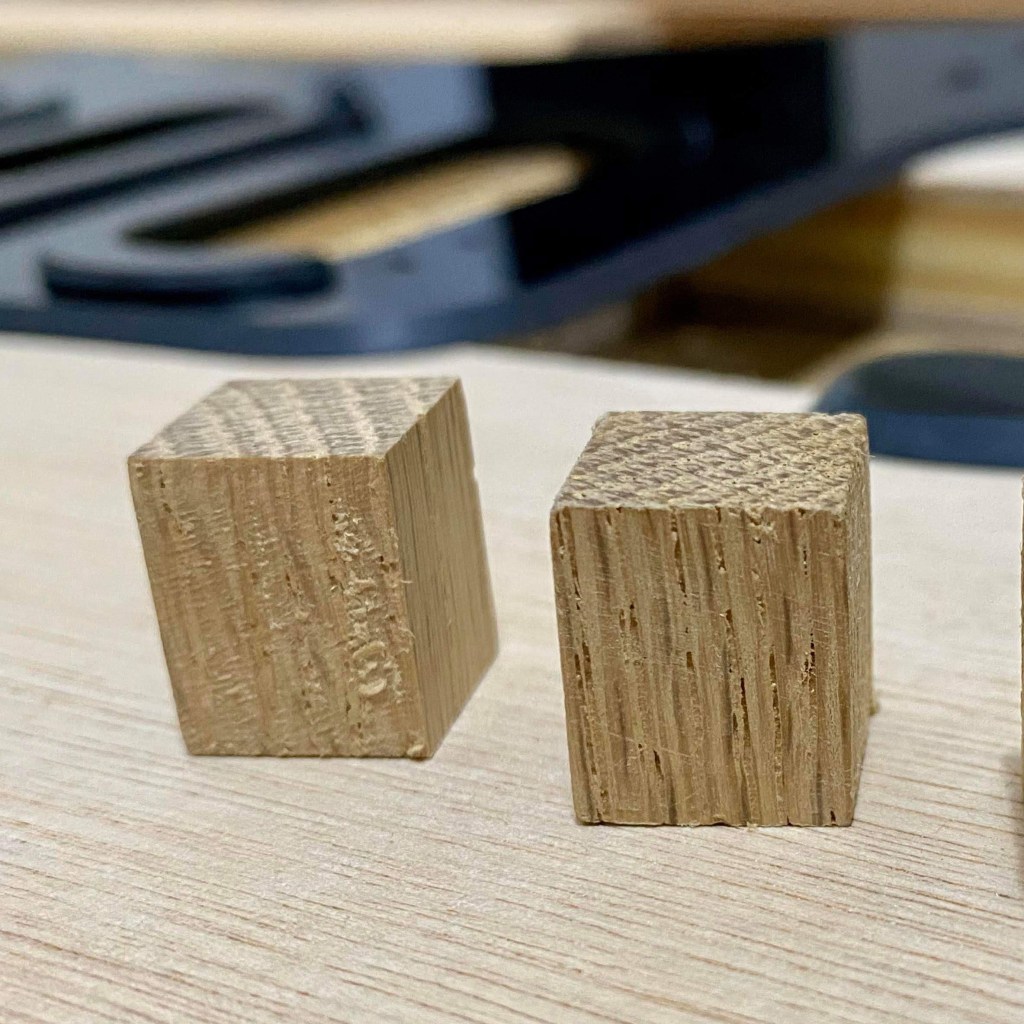
3 Small oak blocks – attached to support
1 Plastics set complete with 2x lots of pickup surrounds
1 Bakelite nut blank
3 Oak cuboid pot/cap plate mounts
2 Oak cavity supports
2 Mild steel truss rod assemblies with securing loop hot forged and brazed closed by Doug
Doug also provided his CAD design sketches and STL files to allow me to get switch plates and pot plates water jet cut from aluminium sheet. I sourced tremolo hardware from Ron Smith’s Cybershop. The aluminium roller bridge saddles were made by Luke Holwerda.


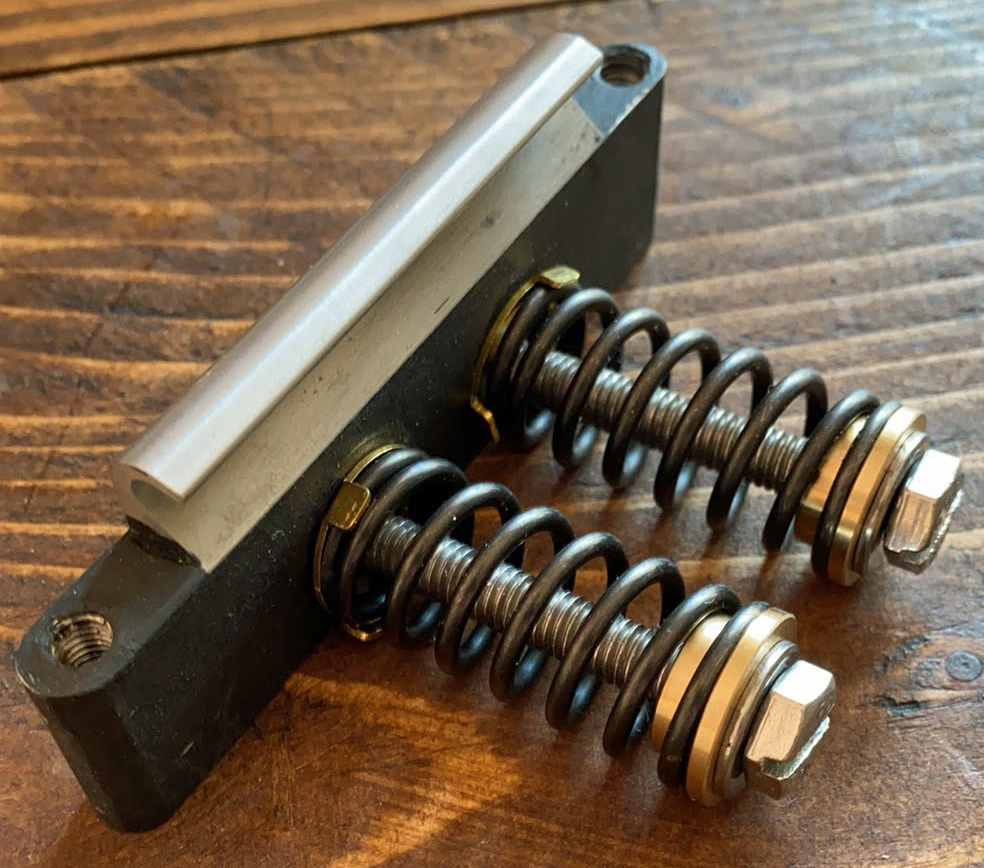


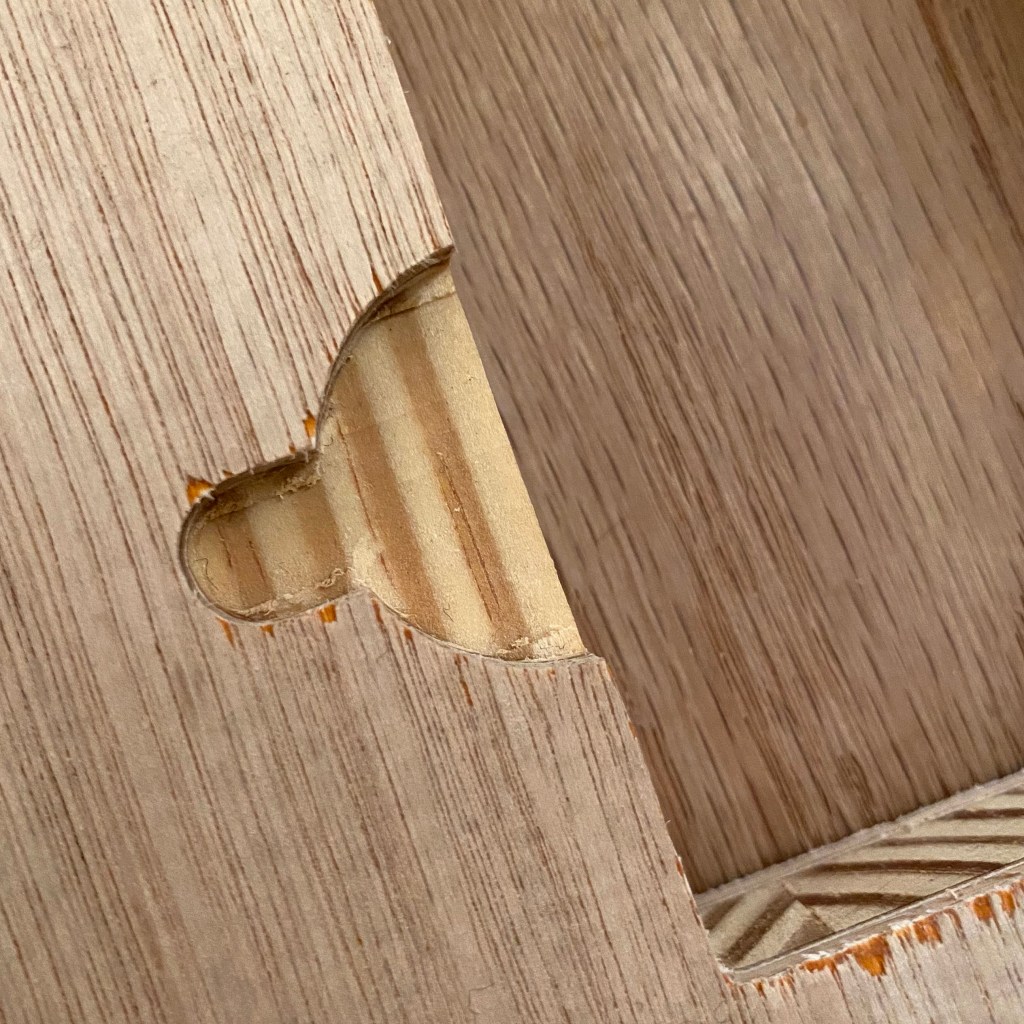
J. To secure the tremolo bolt retaining bar, I glued it in place with araldite to prevent movement and ensure a tight fit. My thoughts being that it that would be beneficial if the resonance of the surrounding wood was transmitted to it to optimise sustain.
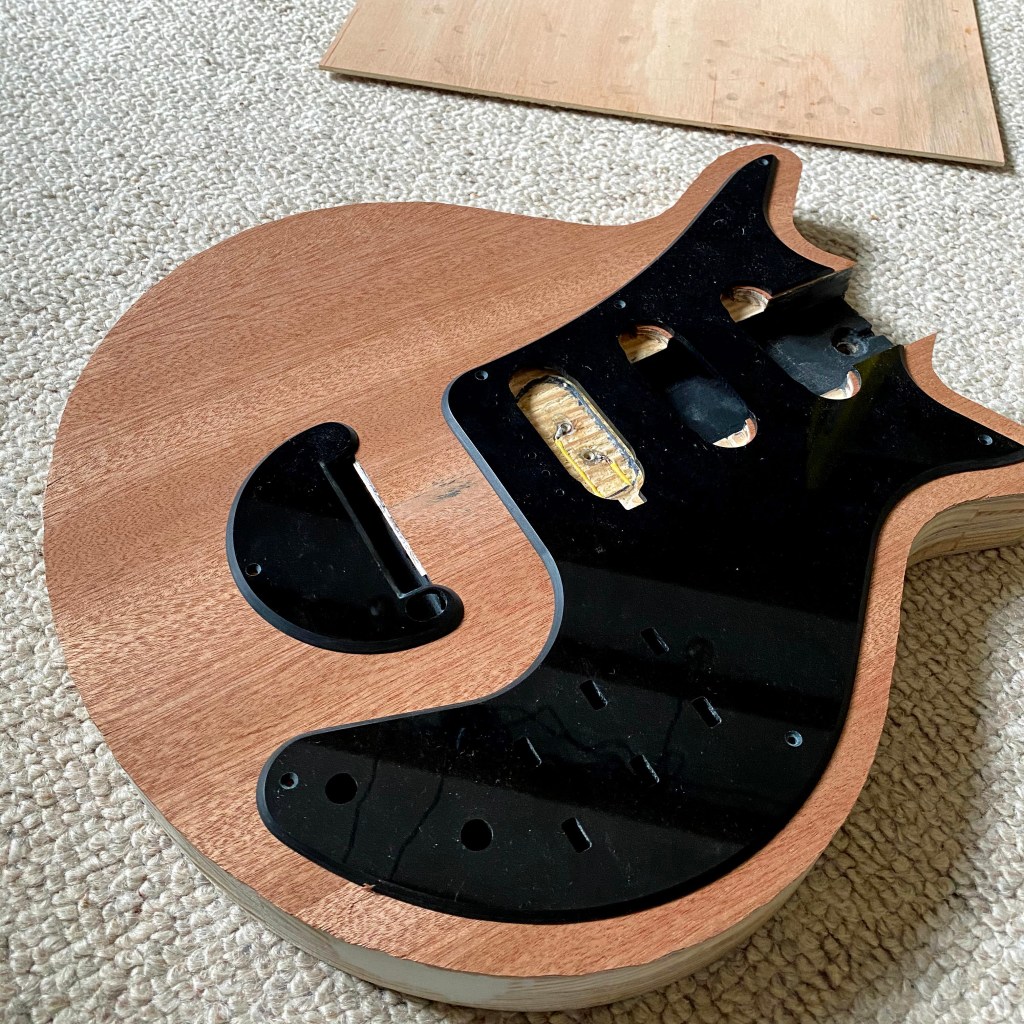
With the top piece of oak aligned with the bolt retainer in place, I then offered up the top section of blockboard and matched the two halves together. This required some additional fettling to make all the levels flush. Doug had supplied me with a template to help join the two sections of the body together and keep the edges flush all around. This helped me to align the two halves and then drill through for the screws to hold the two sections together. I used a drill press where it could reach and a hand drill where it couldn’t.
With the two sections screwed together I drilled through and attach the knife edge to the top half and bottom half of oak. I also wanted to attach the body with the two repair washers and machine screws and nuts as per the original guitar.
I then disassembled the body halves and drilled the holes for the polarity posts. My rationale was that once the guitar was glued and screwed together it would be more difficult to execute correctly. My plan was to do as much as I could to ensure the body required minimal drilling post assembly. Again with this in mind I also painted the internal cavities.
Next up was a final dry fit before disassembling and preparing to glue the three sections together. This was a fairly straightforward task but still required some careful planning to avoid misalignment. With the body sections glued up and clamped, I installed the screws to secure it in place and left it for 24 hours clamped and weighted.
It was decision time for me at this point. I wanted an accurate replica but had been deliberating as to how much work I wanted to put in to making it close. A couple of conversations with Luke Holwerda and I was persuaded to add the finer details now.


J. I studied the photos in the Red Special book and decided to install Hank rivet nuts under the pickups with connecting wires cut off as per the original guitar. I noticed a repair job of what looked like two misplaced holes under the neck pickup to the outer edges. I decided to drill and fill them with araldite, as I believed this was what Harold and Brian would have done.
D. Brian originally made his own pickups using Eclipse magnets before removing them and retro-fitting the Burns Tri-Sonic pickups he bought for nine guineas at the Burns showroom in St Giles Circus, London. Julian Hemingway has made a replica of the early version of the Red Special with his own version of the larger, home made pickups. Subsequently, Andy Guyton made a Red Special for Brian’s 70th birthday with an ebony fretboard (as originally intended) and a set of similar replica pickups made by Ade Turner of Adeson. I understand that these are wound to the same electromagnetic characteristics of his Burns Tri-Sonics but visually resemble Brian’s original home made pickups.


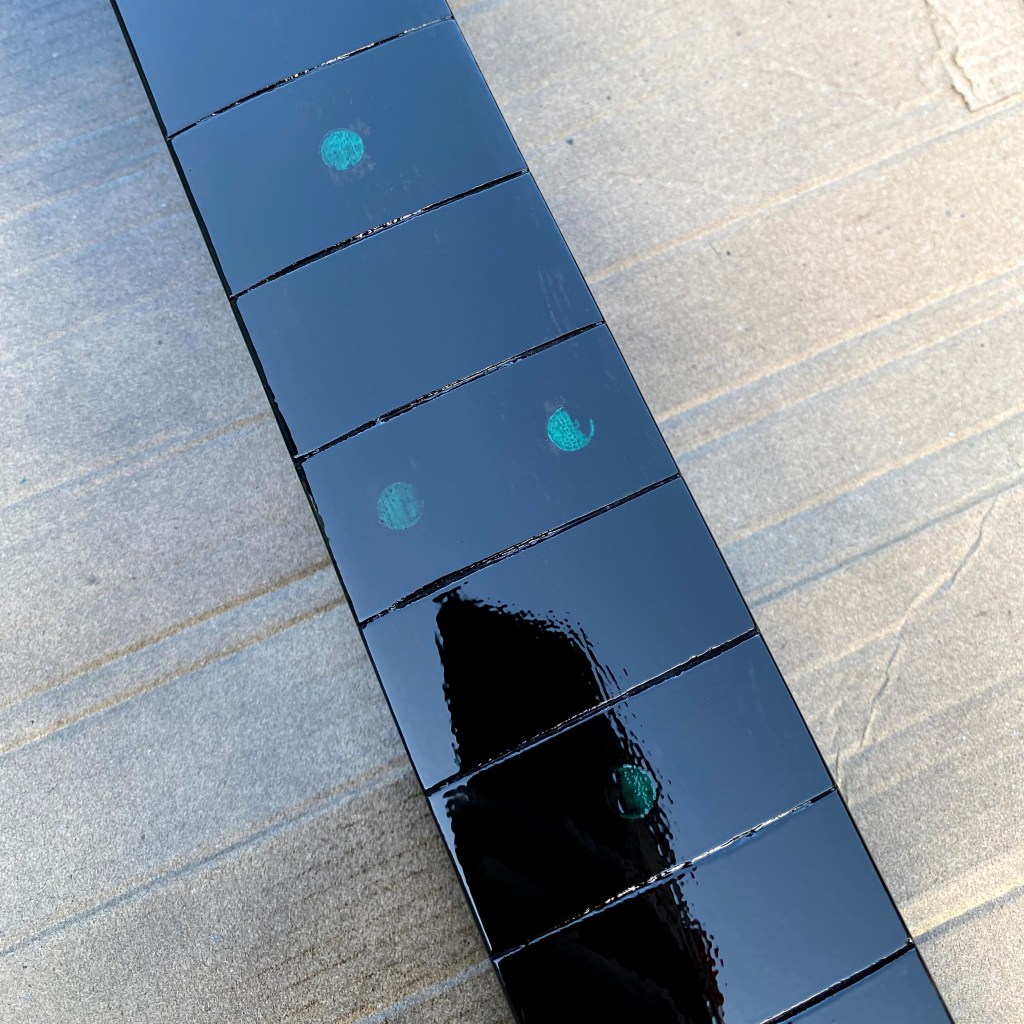
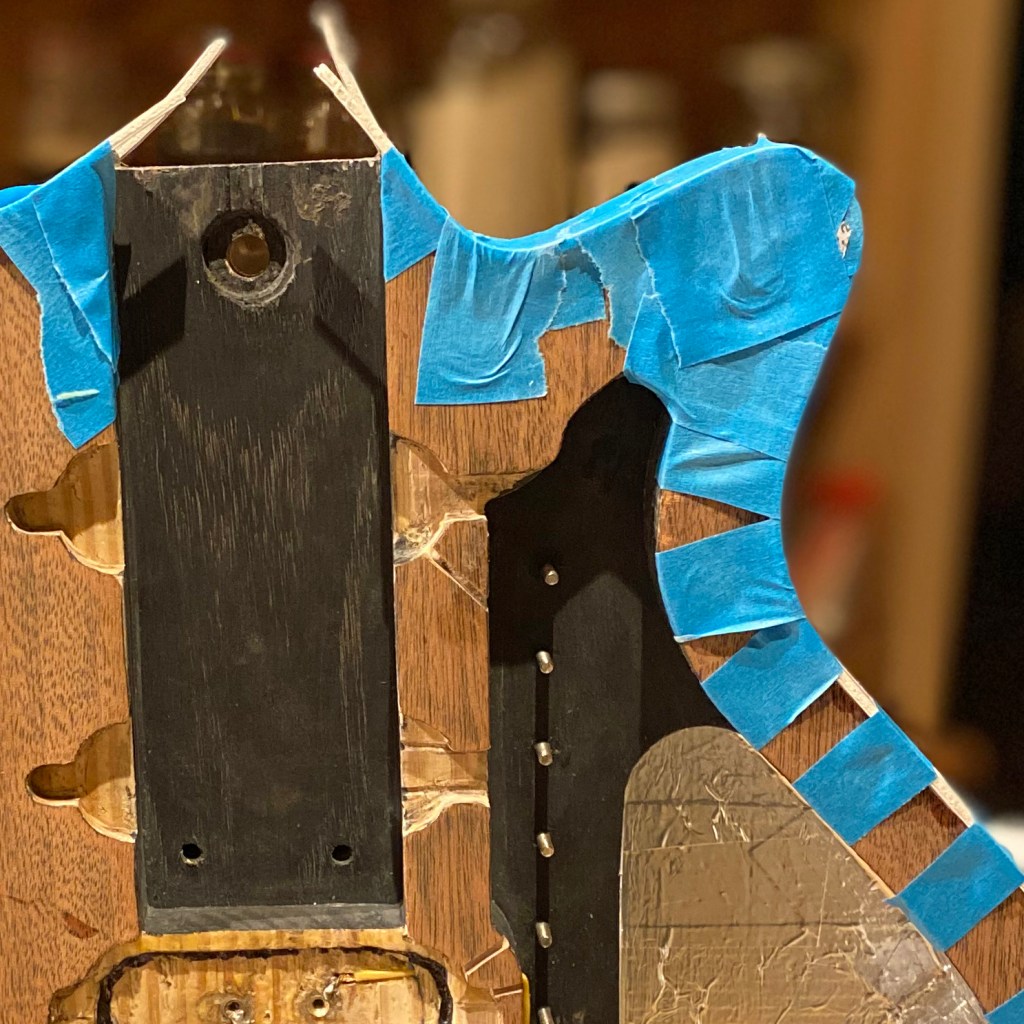
J. With the neck ready it was time to think about how to paint the fretboard. I had watched with some interest Doug’s build thread on his use of black superglue to rectify chip out. I applied black grain filler to the oak then black superglue. Ultimately, I flatted it back and then applied six coats of gloss black Plasti-Kote brand aerosol paint which yielded a very smooth finish when applied over the flatted superglue coats. I found using a blunt toothpick was suitable to remove the masking dots.


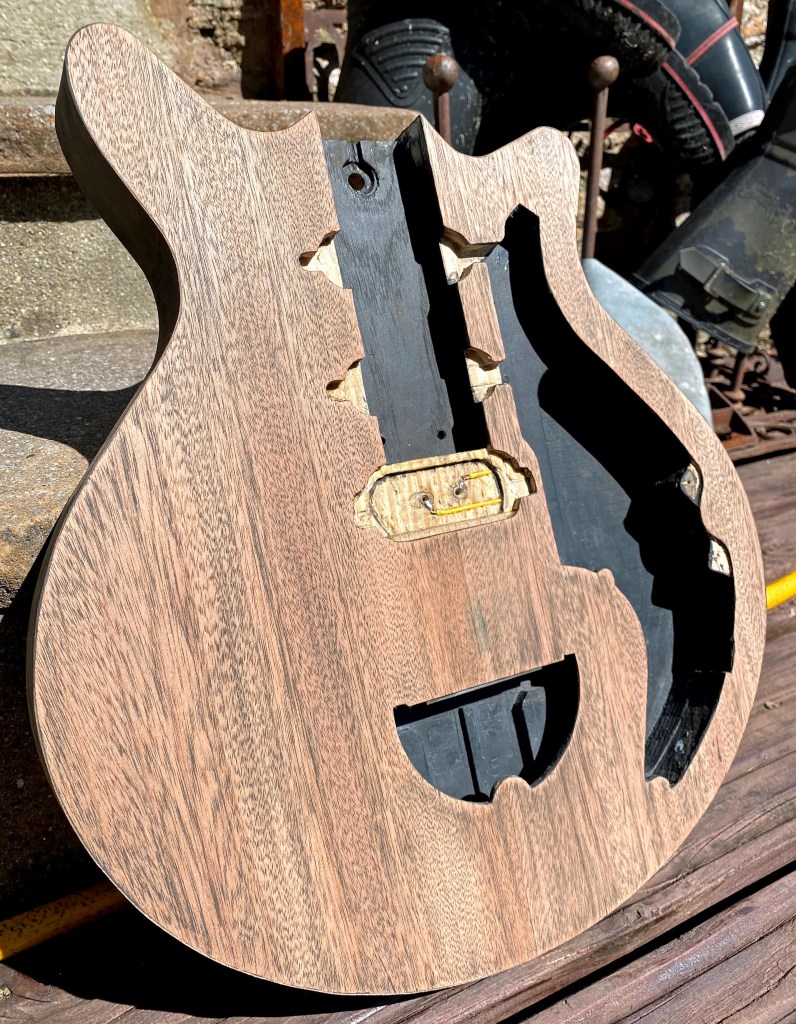
J. I selected the veneer carefully to match the appearance of the original Red Special as best I could. This meant cutting parts of veneer out and matching the seams in order to conceal gaps. In total, there are four sections on the back of the guitar and two on the front. I included the semi-circular repaired section on the rear of the original for an authentic appearance. Using the CNC cut perspex template mentioned earlier, I trimmed the excess off with a scalpel and carefully cut out the internal sections. Attaching the side veneer is a tricky step so should be planned carefully and tested before committing to the final guitar.


J. Using Doug’s StewMac bearing guided cutter with a 0.080″ (2.03 mm) bearing, I clamped the guitar to my work area so it didn’t move under the load of the router. This worked well and within thirty minutes I had cut the channels on top and bottom. I had to repair some veneer tear out but once dried and sanded it was barely noticeable. I was then hopeful that grain filler, which was to be applied later would hide it further.
J. To apply the binding, I heated it with a heat gun until it became pliable then fixed it in position with superglue and masking tape. The process was completed within half a day. When dry, I removed the tape then scraped the binding back flush with the body edges – a process which is surprisingly therapeutic. To make the larger section of binding that sits beneath the neck heel, I stuck four offcut strips together with acetone and then hand blended the profile I wanted with a utility blade and abrasive paper.


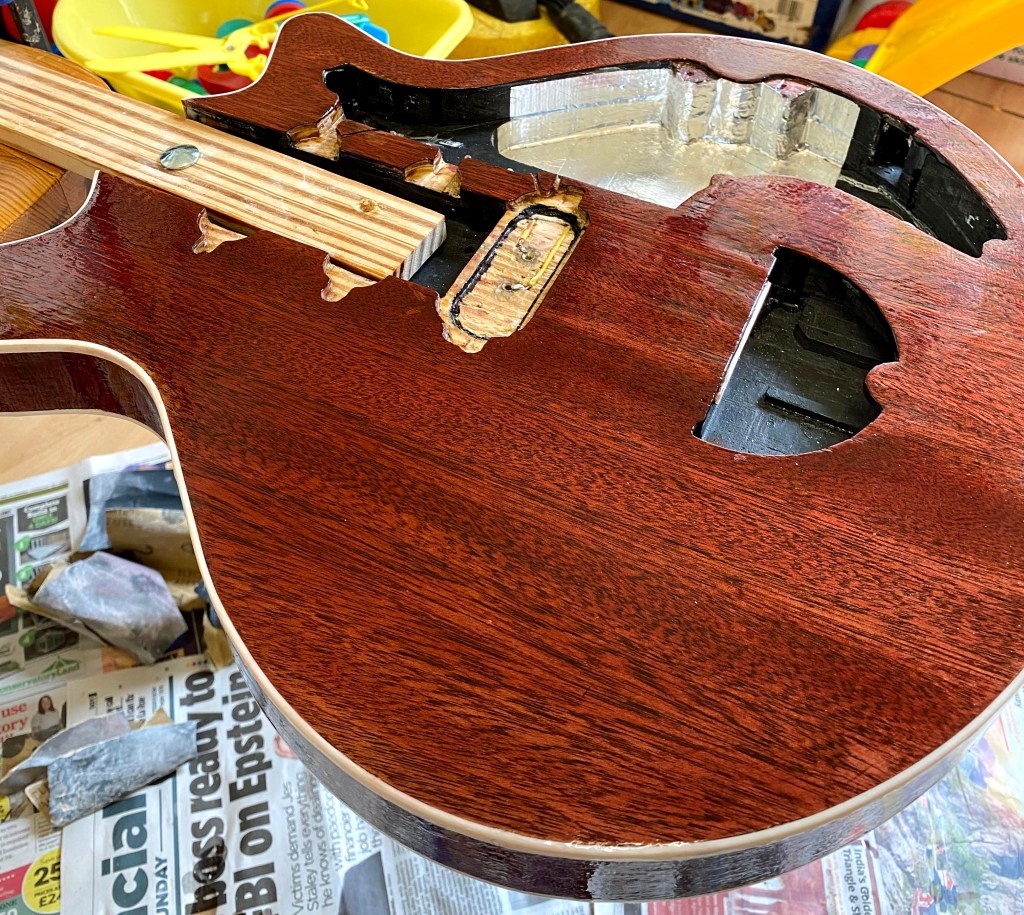


J. After evaluating several wood stains, I settled on Rustins Red Mahogany. I masked off my kitchen table and let my two children apply the stain to the back of the guitar with a brush. Supervised throughout the whole time, I thought this was a fitting way to create a memory for them of me working on the guitar and their involvement in it. I made up working quantities of Rustin Plastic Coating (RPC) in a glass jar and dedicated one brush to the task, which I left in the RPC after each use with some film around the top. Method as follows:
1. Lightly abrade the surface to provide a key
2. Apply one coat of RPC being careful to avoid runs
3. Wait four hours
4. Repeat
I followed this process four times a day for the next three days which yielded a total of twelve layers of RPC on the guitar neck and body. I let this harden for a week without touching it at all. After this time, the guitar had a pleasing sheen to it but required flatting back and polishing using a drill mounted polishing pad.
To avoid having to remove dried lacquer in the fret slots with the inherent risk of cracking, I recommend removing it with an absorbent cloth before it dries. This is also preferable to masking the fret slots.
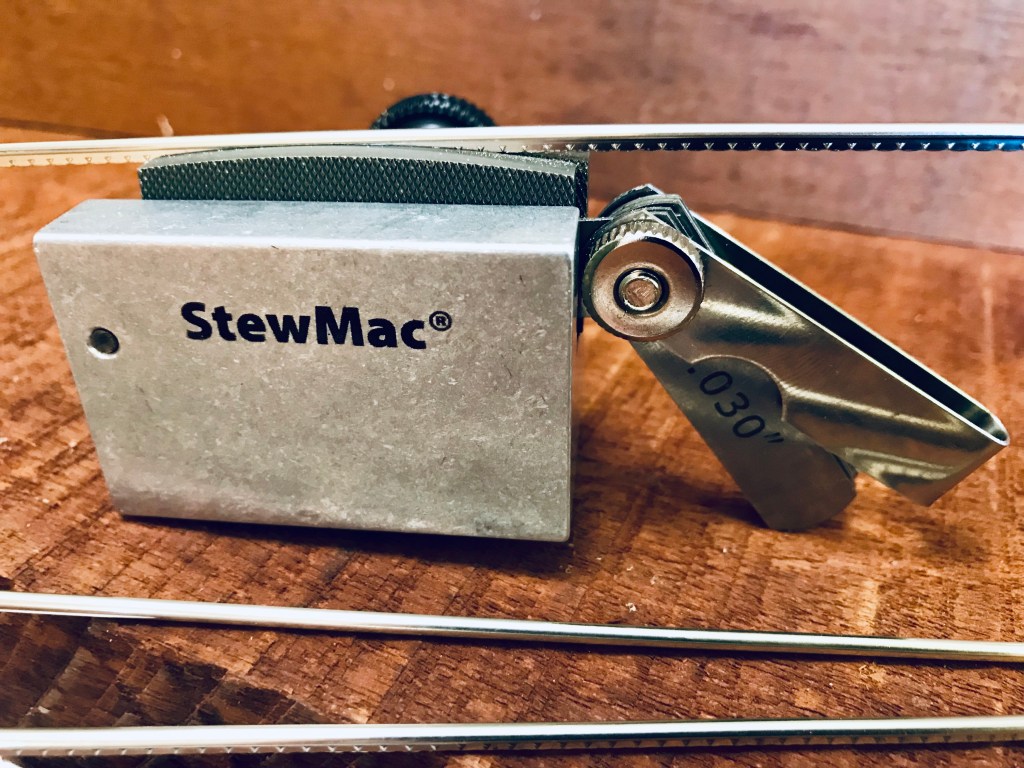
J. I purchased Hosco fretwire and radiused it with a StewMac fret bender. With the frets thus prepared, I put some superglue in the slot and tapped the fret home until it was level. I let the glue cure before snipping the excess fretwire off the ends and then dressing them with a fret edge dressing tool followed by a fret dressing file. I recommend watching the Guyton Guitars ‘Badger’ semi-acoustic fretting time lapse video (embedded below) to see how a master luthier approaches this. Doug has included some of his photographs from the fretwire preparation stage below.


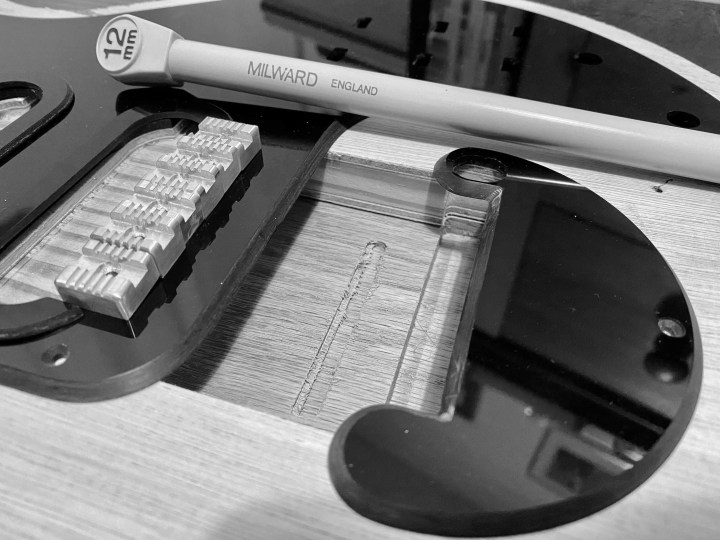
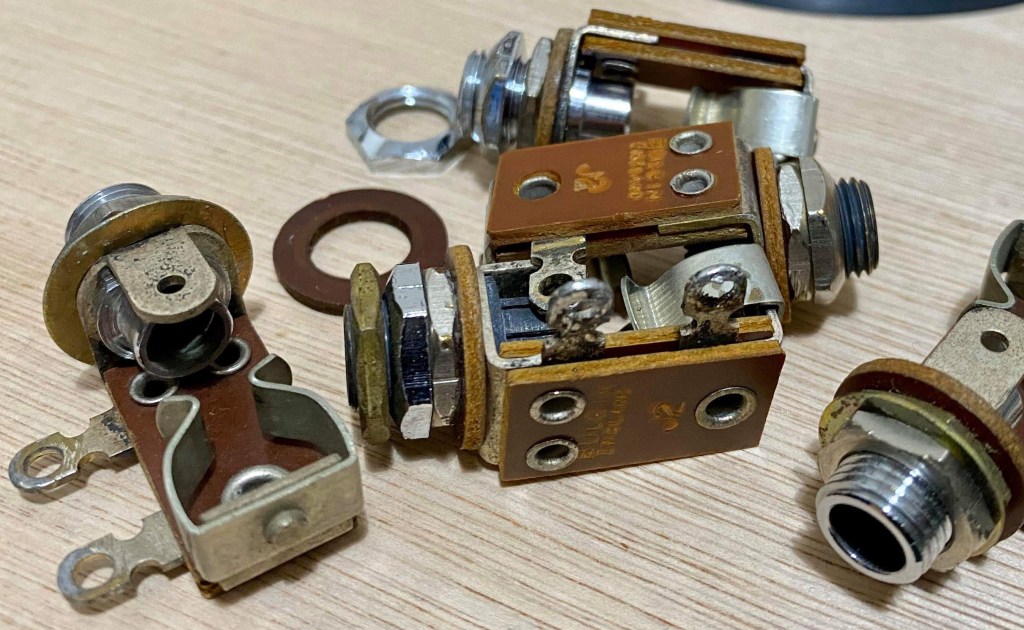
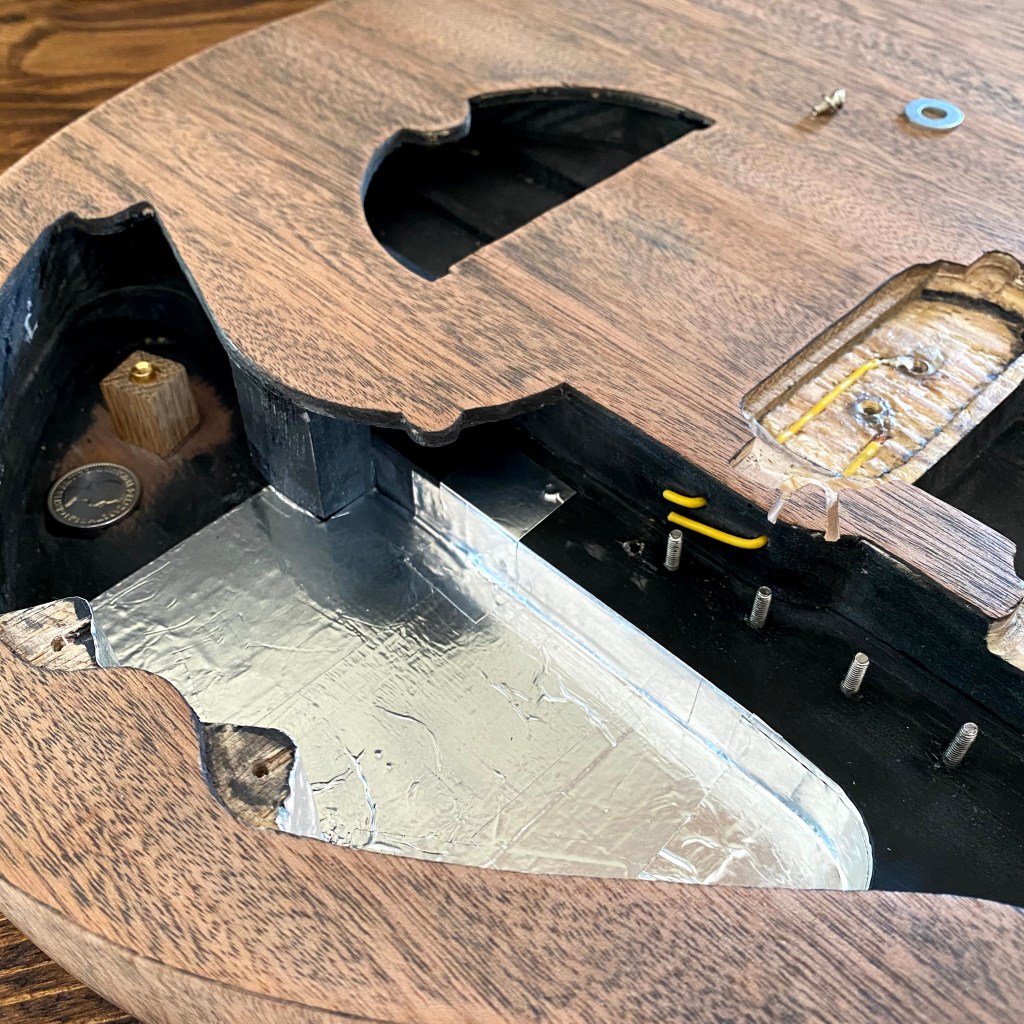
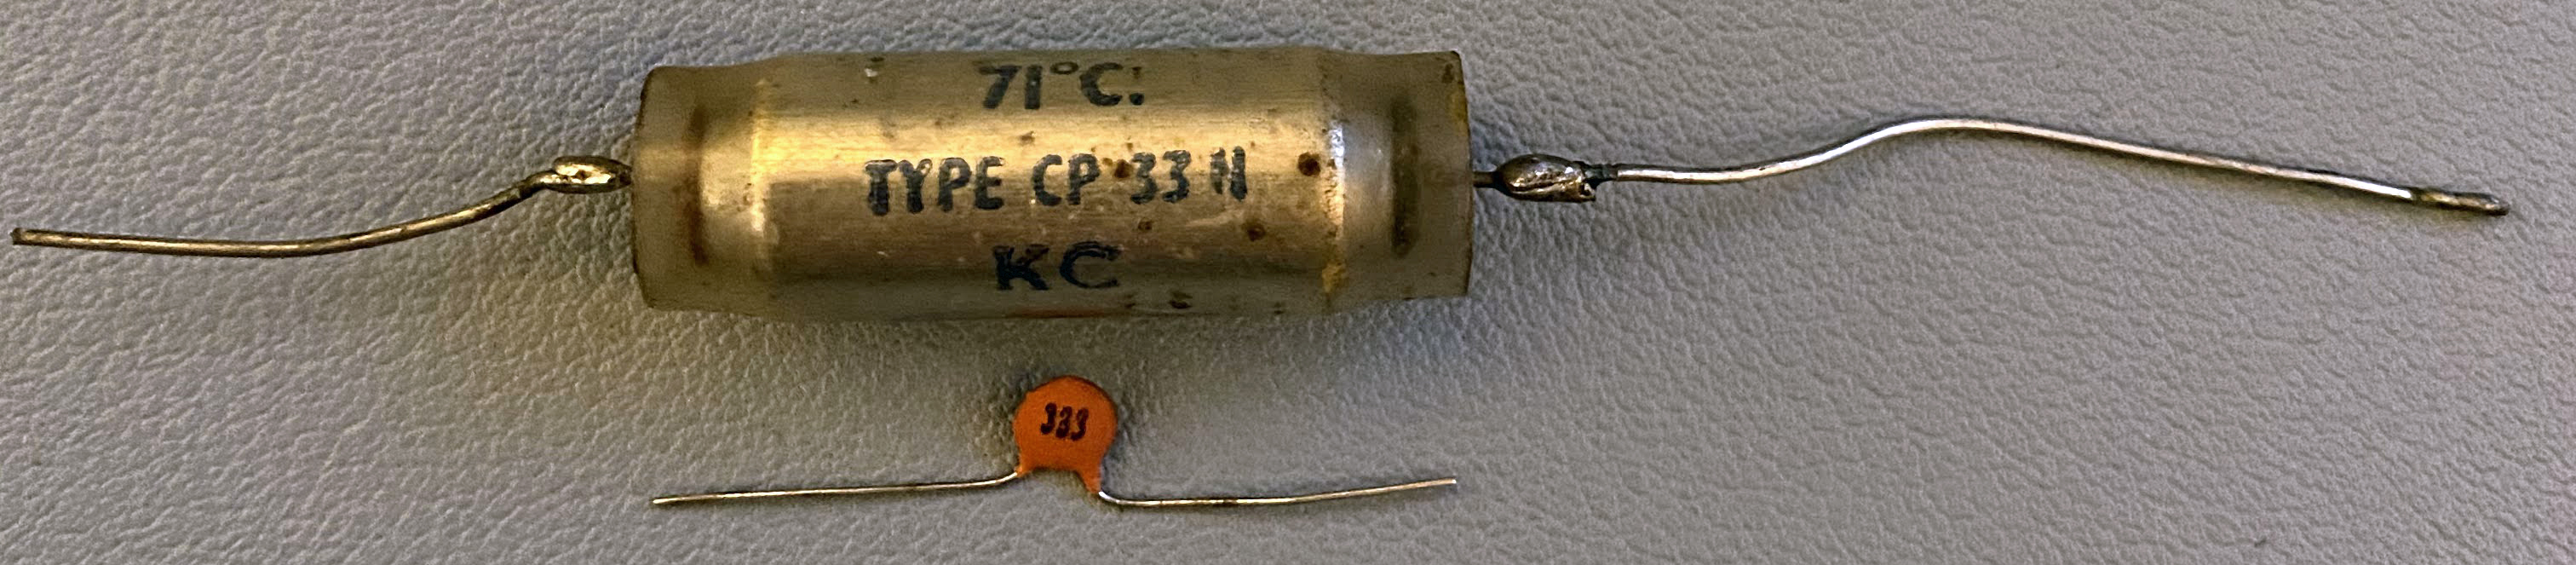
J. I had previously worked with a local water jet cutting company and sent them Doug’s switch frame and pot/cap plate drawing and had them cut out for me. This proved ideal as I ended up with many sets to practice on before finally choosing a suitably aged one (for a vintage aesthetic). I obtained a set of replica Jeanrenaud switches from Tim Grocott. I managed to find some vintage brown cloth wiring and attempted to replicate the wiring from the pictures in the Red Special book. I sourced a quantity of vintage items including Bulgin jack sockets, Omeg 220 kΩ and CTS potentiometers. I used an out-of-tolerance TCC Metalmite CP33N capacitor which I wired up but left disconnected beneath and hid a modern orange drop capacitor under the assembly.
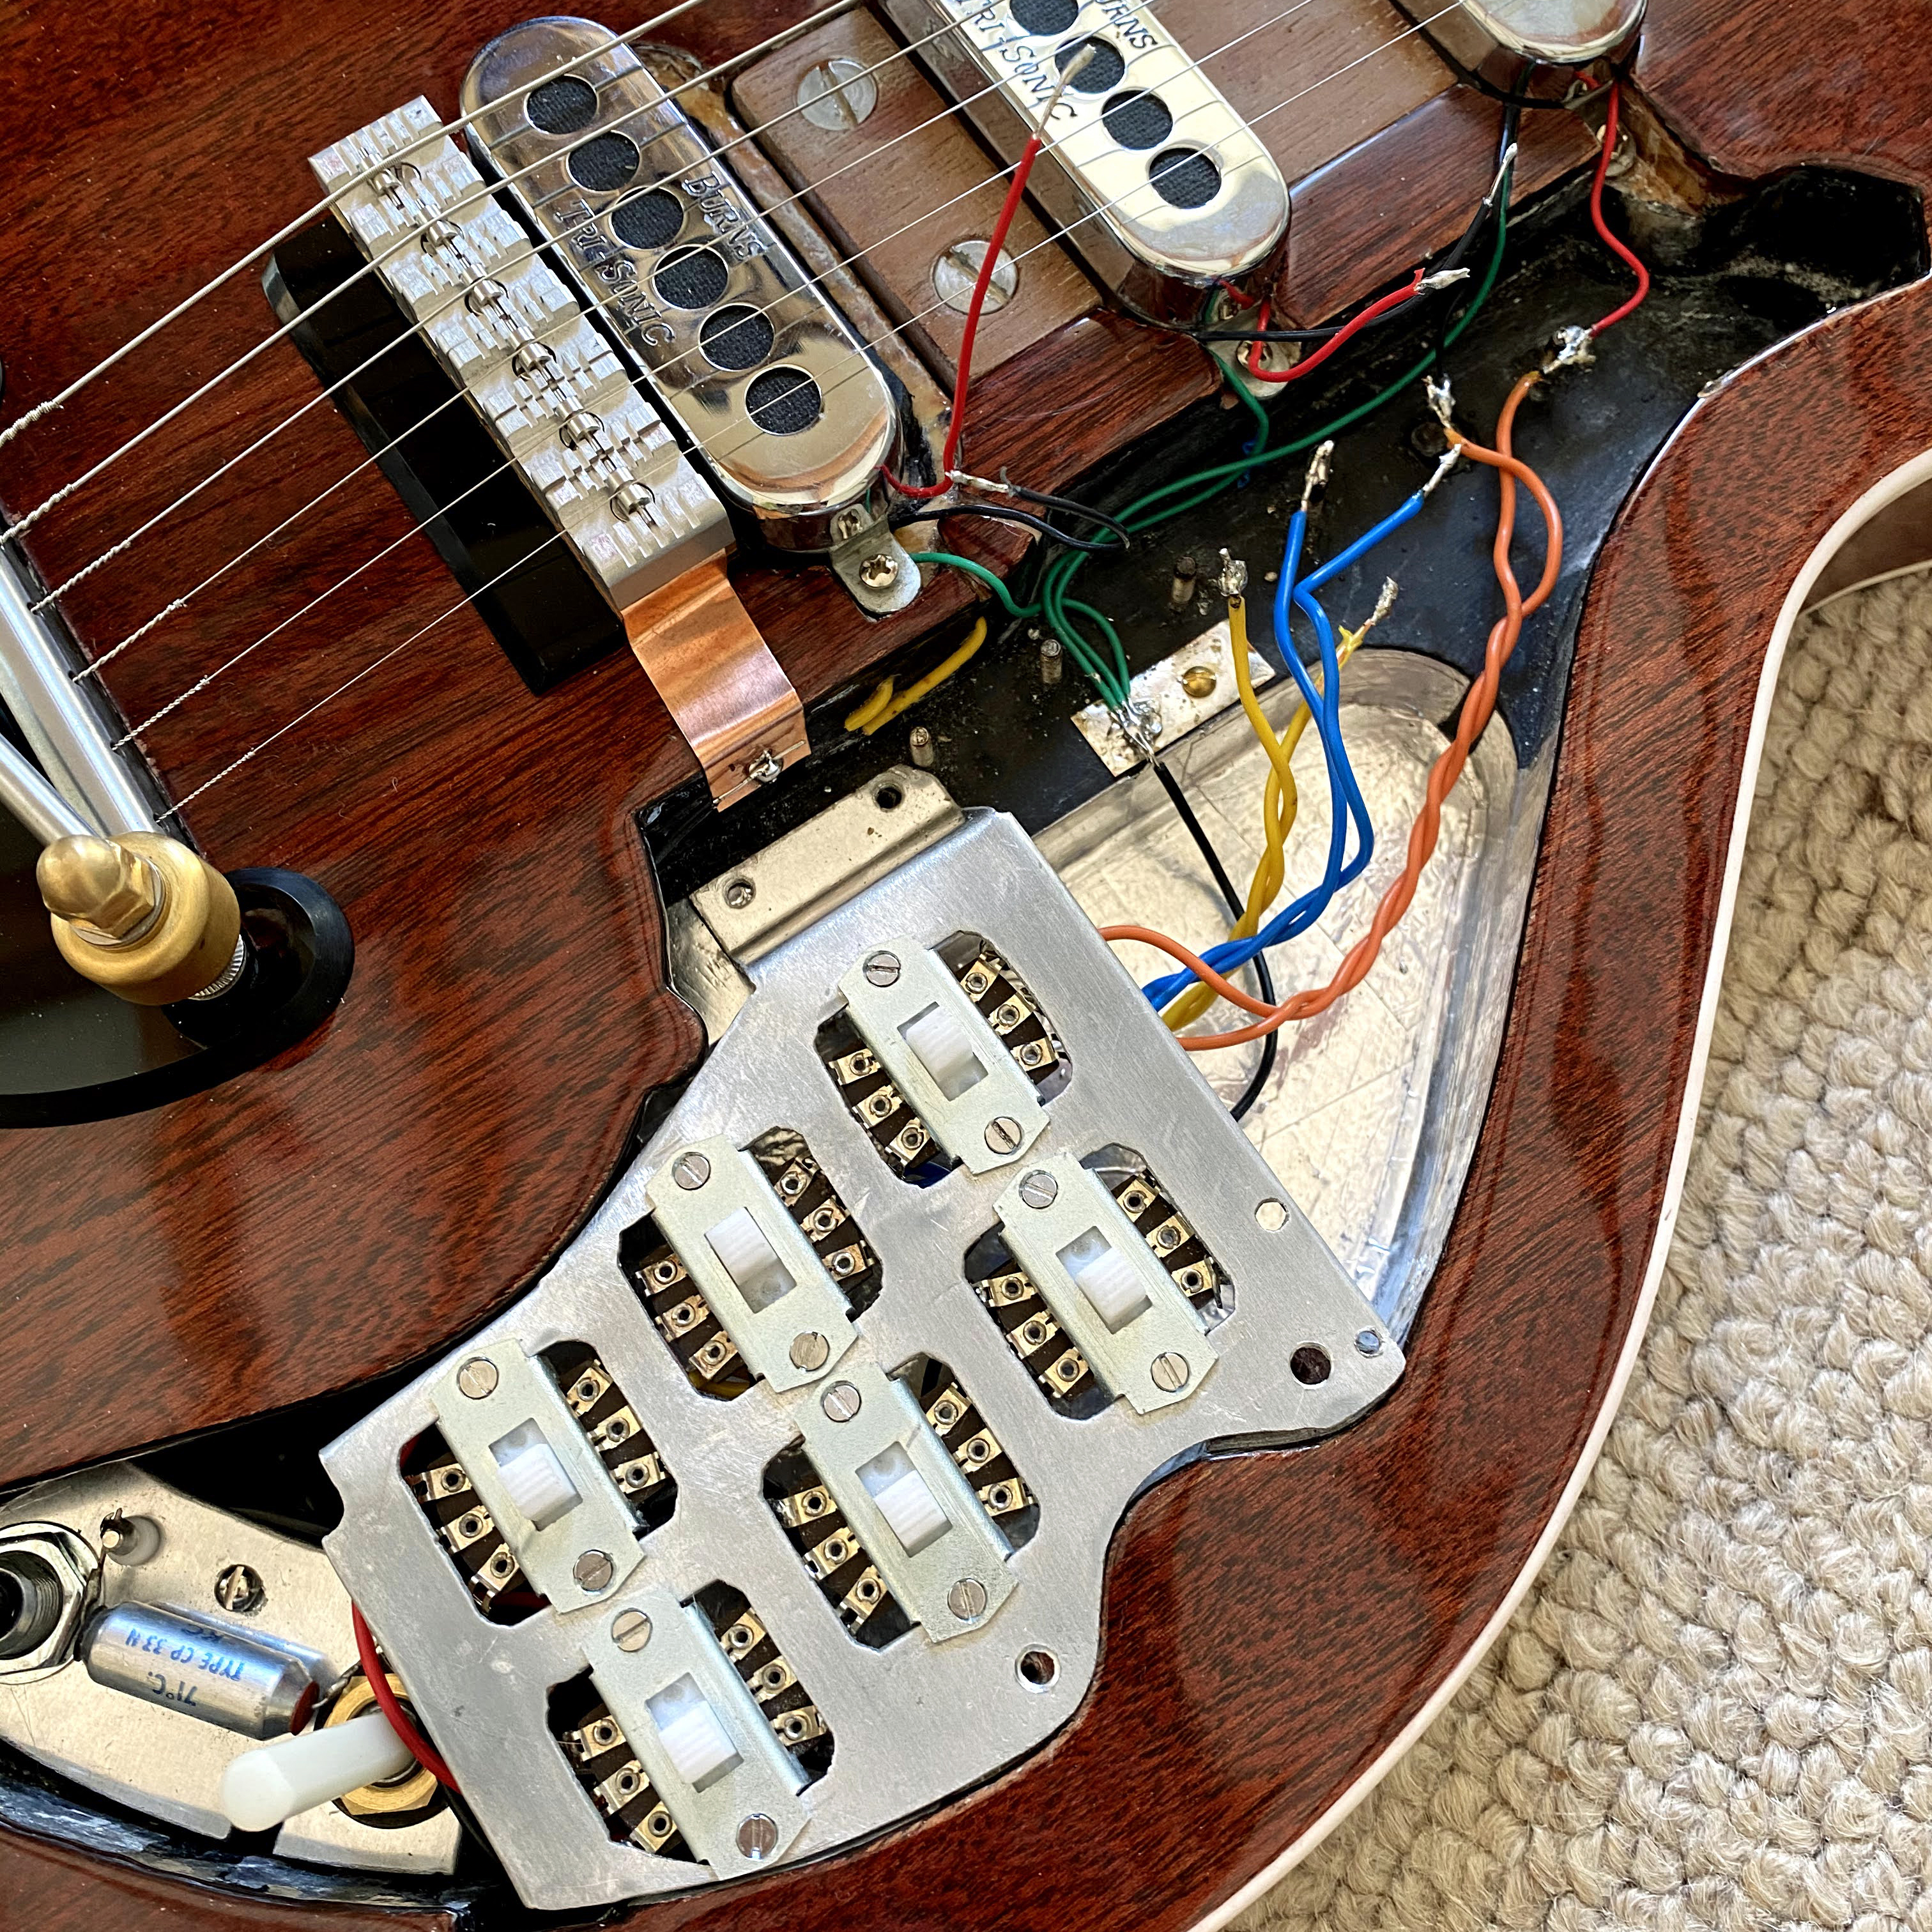

J. Bridge installation is mission critical so I gave careful consideration to the best approach. I resolved to install the nut and tremolo block and then align the bridge with the strings resting on it as a loose assembly. The downward pressure of the strings held the bridge saddles in place to allow the centres to be marked for drilling the holes for the hank nuts. After drilling, I set the Hank rivet nuts in place using epoxy resin.
I applied the original style aluminium shielding installed in the guitar that was visible in Greg Fryer’s 1998 restoration pictures. My thought being that this was the era I remember just staring at the guitar and I hadn’t seen many replicas with that style. With the bridge and strings in situ, I then assessed the pickup heights. Using Greg Fryer’s measurements as a baseline, I used fibre washers to raise the pickups to the correct height and mounted them to the body with a selection of tiny screws to not affect the scratchplate height.

The Red Special Guitar Podcast
Jon launched The Red Special Guitar Podcast in December 2020. In each episode he talks to people in the Brian May enthusiast community about how Brian’s music and his Red Special guitar inspired them and also some of the professionals who became involved with supporting Brian. I have added specific links throughout this website where individuals are mentioned and you can listen to all the episodes via the following media:
https://theredspecialpodcast.libsyn.com/
https://podcasts.apple.com/gb/podcast/the-red-special-guitar-podcast/id1545670805
https://open.spotify.com/show/4ldOFHPRH2sEk3soOdqLrC
https://www.youtube.com/c/theredspecialguitarpodcast
“Deploying the knowledge that I have discovered by studying the guitar over the last 15-20 years to make my own replica is one thing, but Brian and Harold were designing and making choices on things that had never been done before. That is inspirational.”
Jon Underhill, August 2020
“I have been a fan of Queen’s music for around thirty years but I only truly appreciated recently what makes The Red Special special. For Brian, it’s about the bond between him and his father Harold. For enthusiasts like Jon and I, it has been the catalyst to forge new friendships. For others, using it to play familiar music is deeply satisfying.”
Doug Short, November 2020
Return to the Collaborate home page:
https://dsgb.net/collaborate/
