To conclude my Brian May Red Special replica guitar build project, I have compiled a list of tools and equipment used along with some tips from the perspective of an amateur guitar builder which might be informative if you are embarking on a similar project with no prior experience.
Meanwhile, I am working up a number of kaizen on my neck and fretboard CAD designs in preparation for making another neck to correct some design and build errors and evaluate a more straightforward and cosmetically tidier finishing strategy. If all the improvements return a better product, I will fit the new neck to the original build. The neck kaizen will primarily improve three elements:
(a) the 2D profiles used in the lofting function that generates the main section of the neck
(b) the region where the headstock transitions into the main section and
(c) the rebate for the truss rod adjusting bolt which is 1/4″ too close to the fretboard end and is not deep enough to accommodate a 10 mm diameter M5 sleeve nut.
I will also take the opportunity to re-evaluate the volute bump and extent to which is protrudes into the headstock lozenge shape. I knew what I wanted to achieve originally, but I was never satisfied with these aspects. However, they represented the best I could achieve in 2016 with beginner level CAD skills.
On the fretboard, there are several different approaches I want to evaluate. Originally, I conceived a plan to part-finish it on the CNC machine bed using a densely black, penetrating wood dye which would help guard against sand-through revealing bare wood but abandoned this in favour of aerosol paint which in retrospect was not the optimal strategy. I will test this and also apply some medium viscosity cyanoacrylate superglue layers, flat these back and polish before running the fret-slotting toolpath before finally removing the fretboard from the machine bed. This should avoid significant lacquer chip-out issues. I will also modify my fret-slotting toolpath to leave 1/16″ uncut wood at each edge to allow for blind fretting which should also yield a neater appearance.
General Tips
1. You can invest the same time and energy making a poor quality object as a good one if you don’t have suitable tools and/or don’t deploy them correctly. The less skill and experience you have, the more planning and practising you should do. Since I had almost no prior luthiery skill or experience, I planned all steps meticulously and tested every process and alternative processes until I was satisfied with the result. This is partly why this project took so long. There is no reason why an amateur luthier cannot build a high quality guitar; professional luthiers earn their living making and repairing guitars and in so doing, they will optimise their tools and methods and repeat the same processes every day, month, year and will therefore be able to work faster and with more consistent results.
2. Plan to avoid making mistakes but assume that you will make mistakes and develop contingency plans to correct them. This was one of the best tips I gleaned from another amateur luthier. Most of the things that can go wrong are, in risk assessment language “reasonably foreseeable”, e.g. veneer damage, chip out caused by tool slips, etc. Almost all wood damage can be repaired, either with high performance wood filler or epoxy resin in areas that will not be visible, or by gluing the original material carefully back into place. Similarly, lacquer damage can be very effectively repaired with cyanoacrylate superglue. A large number of different formulations (black, clear and low, medium and high viscosity) are available which dry to form a tough, glassy resinous finish that can polishes to a high lustre.
3. Only work while you are motivated and not tired. Most of the work on this project was done while I worked a conventional 185 hour, five week, three shift pattern so early on I made a rule to never work when I was tired and/or unmotivated. This is the second reason why this project took so long to plan and execute. The whole design and build process was more endurance than enjoyable; hobbies are not supposed to be ‘character-building’ so I see no reason to make it any worse. If you work while tired and/or in the wrong frame of mind you will foul things up, it’s that simple. Japanese craftspeople have an enviable attitude that is worth emulating: they work in a conducive environment with a focussed mindset and respect the tools and materials they are working with.
4. Design around the components you have in your possession, not to theoretical dimensions. Whether you are designing in the modern manner using a computer with basic sketching software or even a professional CAD software utility or in the traditional manner with draughting paper and a sharp pencil, or technical pens, it is common sense to acquire the components (e.g. pickups and tremolo hardware) first, measure them and then make your design fit them. This saves disappointment and re-work caused by making assumptions.
5. Guitars designed in the 1950s and 1960s are designed in feet and inches (imperial) not metres and millimetres (metric). This is a bit of a soapbox of mine, but if you study all the dimensions on the Red Special and take into consideration the logical mindset of Brian May (who majored in mathematics and physics at high school and university) and Harold May (who was an electronics designer by profession), you find that it was planned meticulously and constructed from regular sized imperial circles, ellipses and line segments. Only the original design sketches remain because Brian has stated that the working drawings were glued onto the wood and drilled, routed and chiselled over. It is a shame that an archive copy wasn’t made.
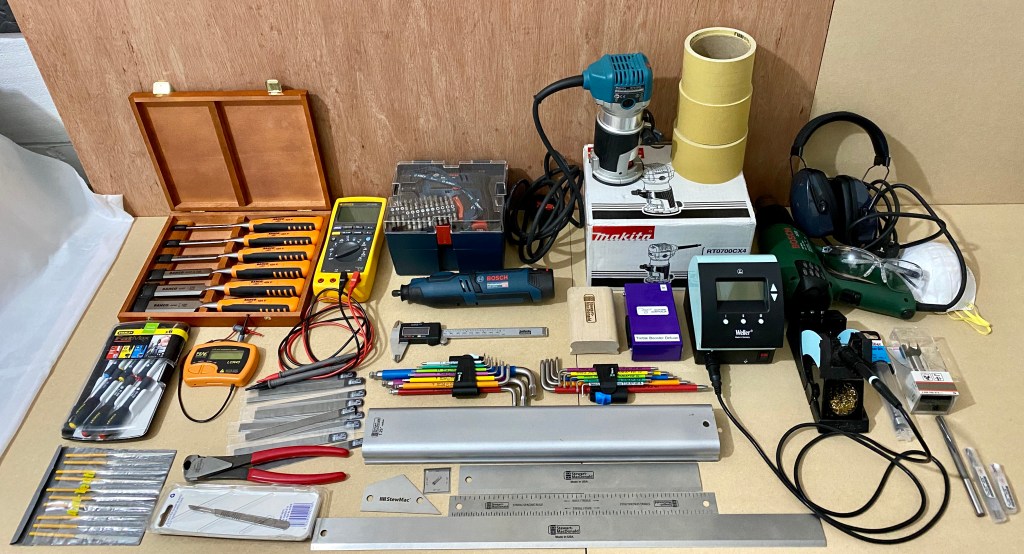
Tools can be variously categorised variously as machine or hand tools, wood-working or metal-working tools, general or luthier-specific and as essential and desirable/useful. I bought a considerable number of luthier tools from Stewart Macdonald (StewMac) in Ohio, USA in 2013/14 when I was making the 3/4 scale ‘1975’ Red Special and the USD/GBP exchange rate was around 1.50. Although other suppliers are good (e.g. Luthiers Mercantile), StewMac are a large company dedicated to supplying luthiers with excellent customer services who are constantly seeking to develop new tools and improve their existing line. They partner with DHL for international shipping who expedite the customs clearance so if you are prepared to take the hit on priority shipping, you can have your order on your doorstep in around 48 hours as I have found! The list below is not exhaustive or this would be a very long blog post.
Essential Tools (General)
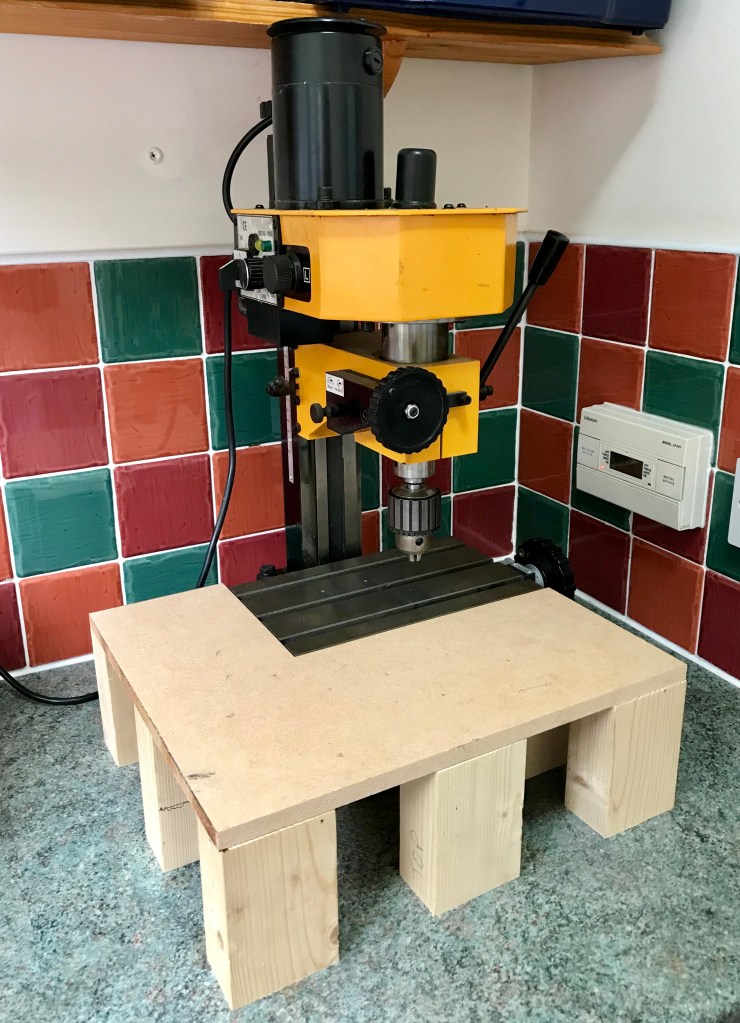
- Vertical drill press. The means to drill precisely sized and located vertical holes and turn down the length and diameter of some components is essential. A guitar needs to be precisely engineered to look appealing and play well. I have a Clarke CDM-100 micro drilling/milling press from Machine Mart in the U.K. I made a simple L-shape from MDF to extend the bed area.
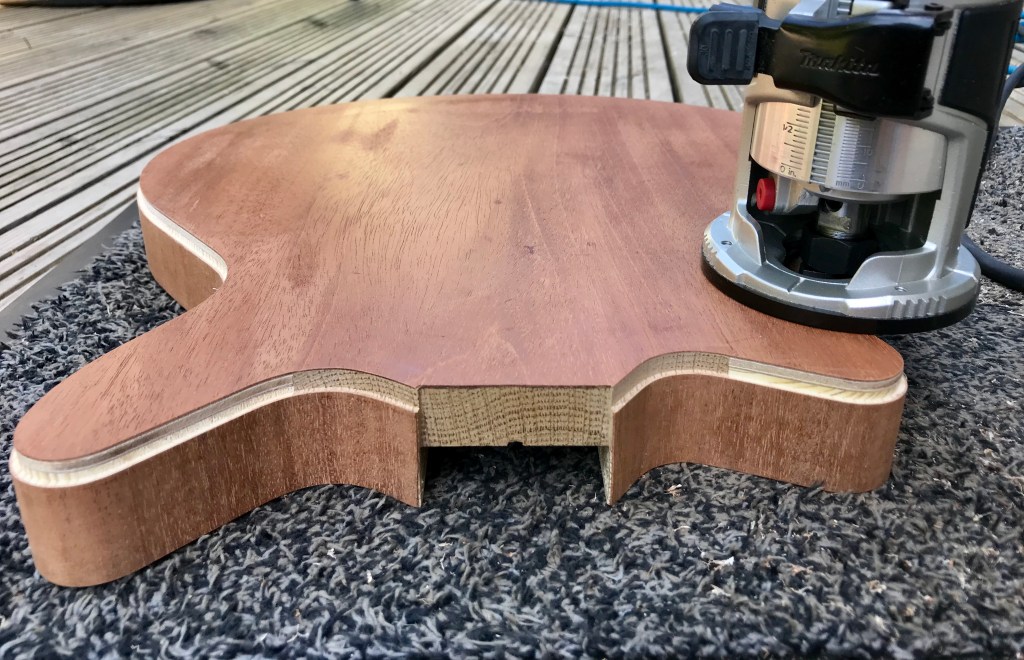
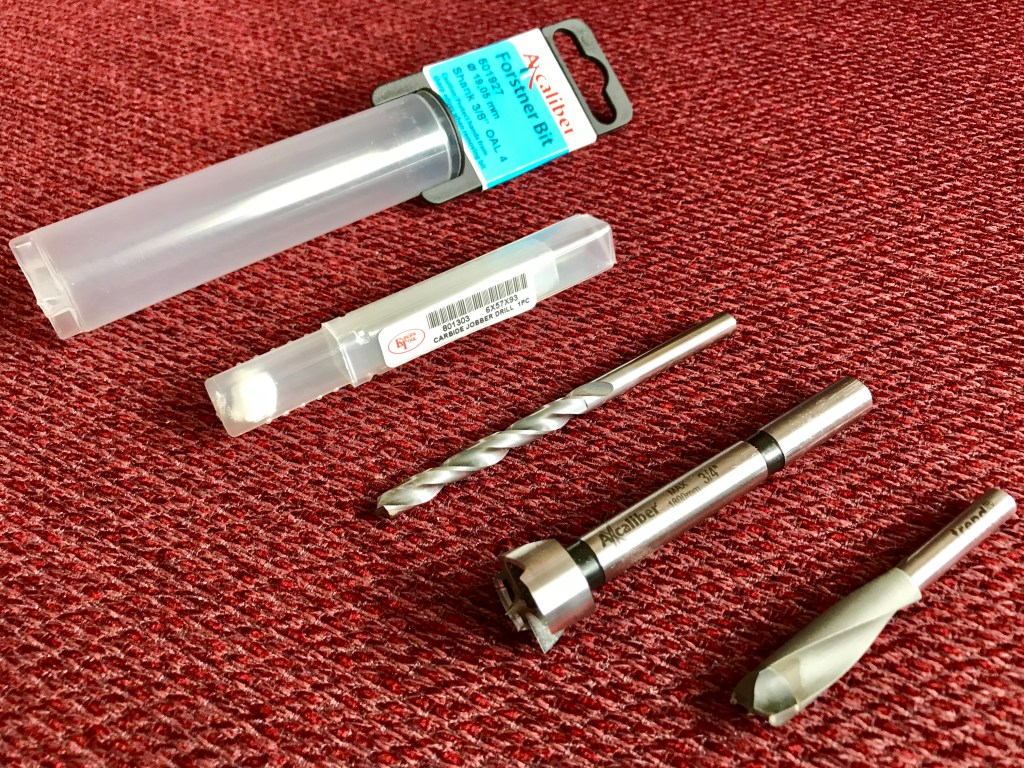
- Router. Although hobby class CNC machines like my Stepcraft 2/840 are now relatively affordable (the price of a quality guitar), most DIY guitar builders will not own one or have ready access to one. Professional joiners and carpenters I have met often recommend Makita hand tools. These are made in Japan to a high standard and will last a long time if looked after. I used a Makita RT0700CX4 laminate trimmer to cut the edge binding rebates. If I did not have a CNC machine, I would have had perspex templates laser cut and made the body by drilling and routing the outline and chambers using my drill press then a Makita brand hand held router with bearing guided Trend brand carbide tipped cutters and flush trim router bits.
- Quality wood chisels. I have a set of Bahco 6 piece 424P precision wood chisel set. If you plan to make your guitar using fully manual techniques, you will require specialist wood carving tools such as a spokeshave.
- Diamond files. Some basic metalworking is required and a selection of small, hard-wearing files are essential items.
- Good quality general tools such as screwdrivers (specifically a precision set), hexagon wrenches, various pliers and cutters, drill bits, etc. are a must. I admit that I have used this project as an excuse to purge poor quality general tools and buy better quality versions.
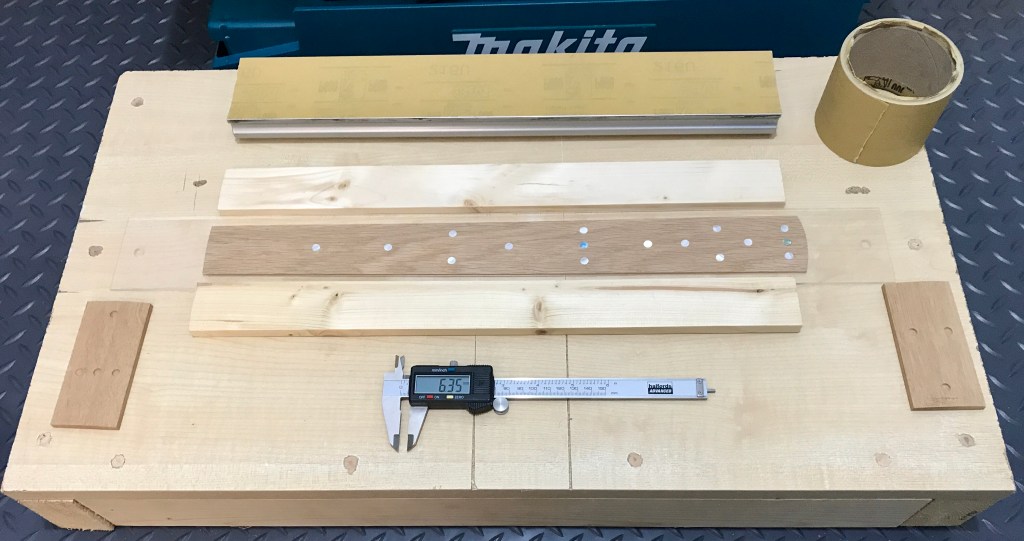
- Quality abrasive paper. I prefer 3M Stikit Gold and keep two each of the 120, 320 and 600 grit rolls available. StewMac [I have not found a U.K. supplier for this product].
- Heavy duty utility blade and surgical quality scapel (Swann-Morton is ideal).
- Digital vernier calipers. My set only cost £20 but they have given precise and repeatable measurements for years and so almost certainly offer the highest cost-benefit ratio of any tool I have bought.
- Soldering iron. I have struggled with soldering techniques in the past so invested in a quality soldering station and some advice from Nigel Knight. Many professionals prefer Weller brand soldering stations so I bought a used Weller WD-1 from eBay in 2018 to replace the budget one I originally had. High lead content, non-RoHS compliant solder has a lower melting point and is easier to flow.
- Electrical test meter. I bought a used Fluke from eBay but you only really need a continuity checker for basic guitar wiring diagnosis. If you are into hobby audio electronics, I recommend Peak Electronic Atlas series, particularly the LCR45 for pickup measurements and the DCA75 for analysing semiconductors.


Desirable/Useful Tools (General)
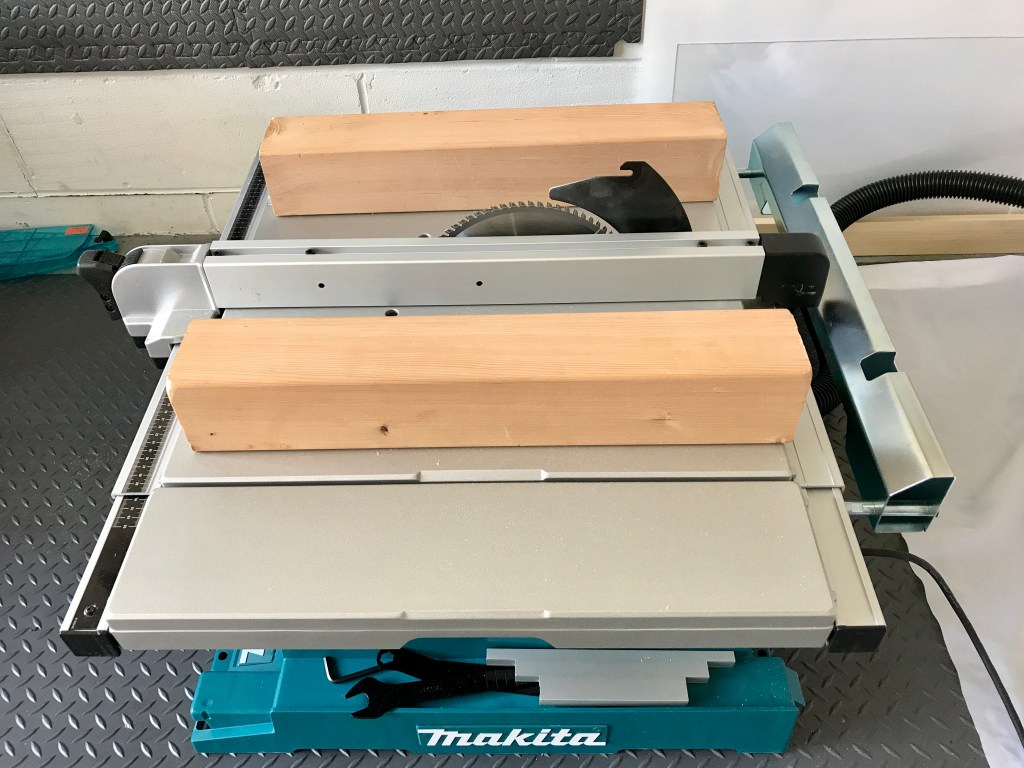
- Table saw. If you cannot rely on favours from a joiner or hobbyist friend to precisely plane wood to specification for you, I recommend investing in a table saw. After experiencing some frustration, I bought a Makita 2704 model 260 mm table saw.
- Planer/thicknesser. I do not own a planer/thicknesser although I considered buying a Proxxon DH 40 until I realised that I can precision plane neck blanks and blockboard core strips using my CNC machine with careful attention to detail. If you are into model-making, there would be further justification for investing in precision machinery such as this.

Essential Tools (Luthier-Specific)
Most of the investment I made in luthier-specific tools was on fretworking equipment since I figured that a high degree of precision was required to install, level and dress frets or risk ending up with an aesthetically pleasing guitar that played badly and ultimately disappointed after spending hundreds of hours making it.
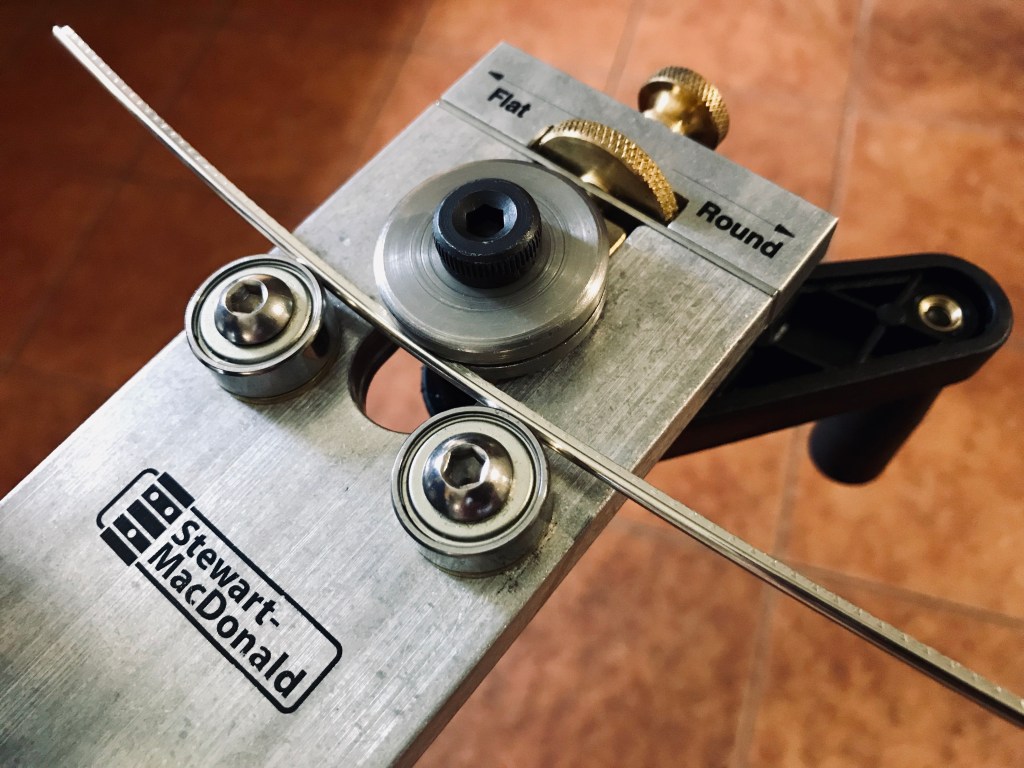
- Fretboard radiusing beam/blocks (StewMac).
- Fret bender (StewMac).
- Precision straightedge or levelling beam (StewMac).
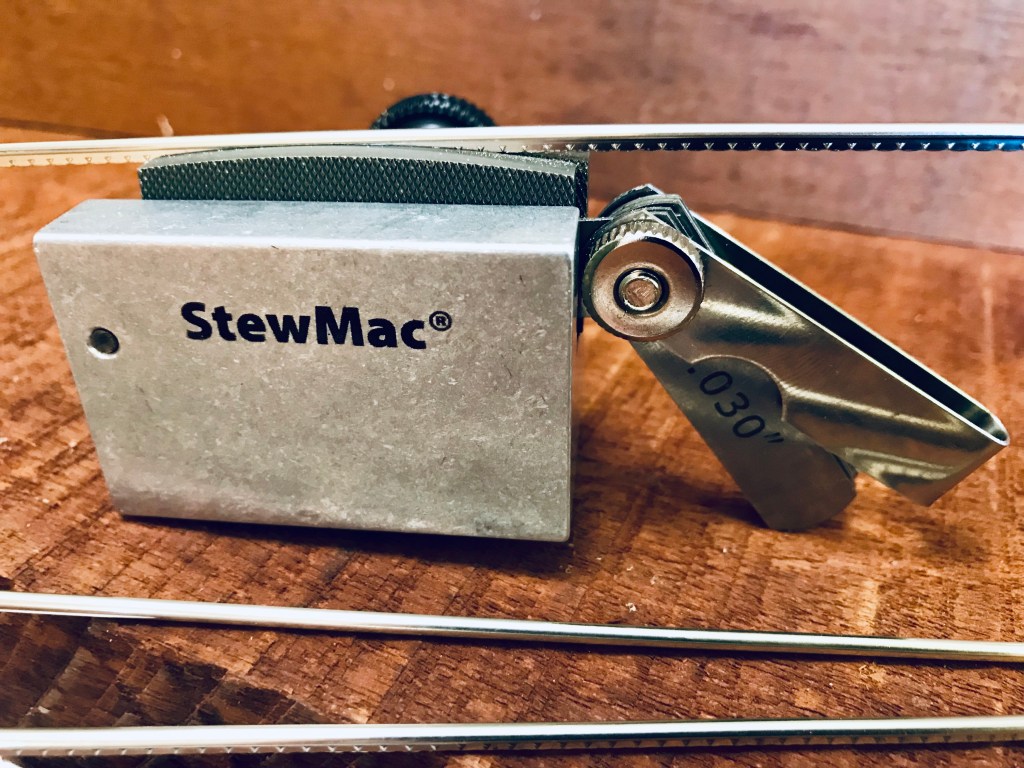
- Fret dressing and recrowning files (StewMac).


Desirable/Useful Tools (Luthier-Specific)
- Fret arbor press (StewMac). I found that with correctly radiused and de-tanged fretwire and CNC cut arced fret slots, the arbor press was unnecessary.
- Fret slotting mitrebox and Japanese fret saw (used on my 3/4 scale Red Special but not on the full size build because I used CNC to cut arc-ed fret slots)
- Fret tang nipper (StewMac)
- Fret tang barber (StewMac)
- Fret cutting pliers (StewMac)


Bespoke Tools
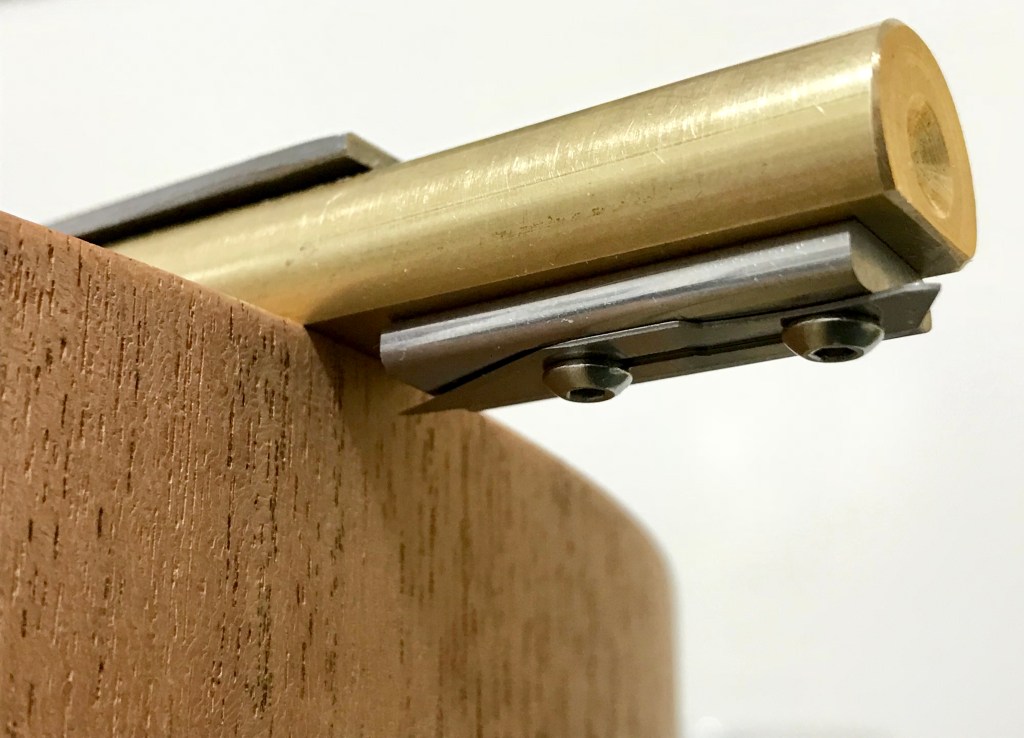
I made some bespoke tools myself to make some tasks simpler. These included a piece of aluminium sheet with radiused holes drilled out of two vertices to round over the binding edge and a gramil (inspired by the Schneider gramil from Luthiers Mercantile International) to score the veneer edges at 2 mm in from the edge and 4 mm down from the top.


Health and Safety
Health and safety is for the domestic as well as the industrial environment and should not be an afterthought. Power tools in particular are capable of causing serious hand and eyes injuries which is not ideal if you want to enjoy playing Brian May solos and not be limited to Seasick Steve numbers on your Red Special. Always wear eye protection as a minimum. If generating dust and spoil, work outside or with a workshop extraction system.
Related articles:
Materials, Parts and Suppliers
Rustins Plastic Coating
Fixings and Fasteners
