I used a Makita RT0700CX4 laminate trimmer/mini router with a StewMac bearing guided router bit to cut the edge binding rebate on the 3/4 scale Brian May Red Special replica but that was a solid mahogany body and there was no risk of veneer tear out. To mitigate any risk of damaging the veneer, I made this bespoke scoring tool. Luthiers Mercantile International offer a similar product (called a Schneider gramil) for scoring the binding/purfling ledge but the price plus shipping to the U.K. is prohibitive and I don’t require it to be adjustable.
So I decided to make my own tool (as professional luthiers often have to do). This one is fashioned from a length of 5/8″ diameter brass rod which I ground flat on one face using my mini drilling/milling press by first using my CNC machine to make a holder from an offcut of Khaya Ivorensis (African mahogany) wood. I intended to mount a Swann-Morton 10A scapel/craft knife blade which is 1/64″ (0.4 mm) thick therefore I had to make two shims, one 1.8 mm thick and one 3.8 mm thick since the blade edge is 0.2 mm from the flat side of the blade. I chose to make these from stainless steel cutlery rather than try to buy metal sheet. I ground the metal billets to within 0.1 mm of the target thickness using my drilling/milling press then final thicknessed them manually.
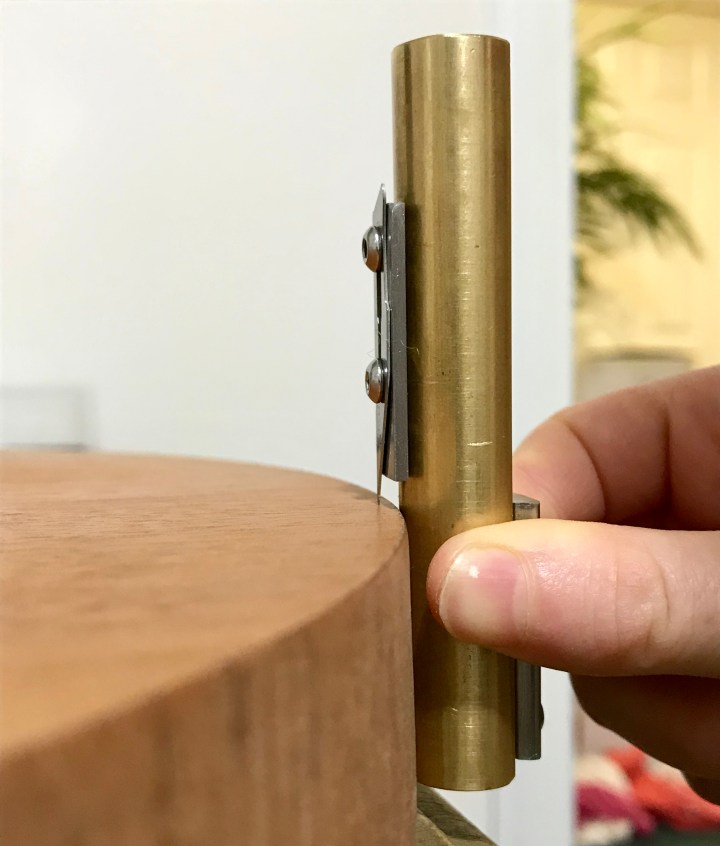
I drilled two M3 holes 16 mm apart in each shim using expensive Europa brand solid tungsten carbide jobber drills which make short work of stainless steel. I drilled equivalent M2.5 diameter holes in the brass rod and tapped these to M3, finally mounting the scalpel blade using stainless steel M3 dome head hex bolts. All finishing was done with 600 grit 3M Stikit Gold self-adhesive abrasive paper stuck to a flat work surface. The pictures in the gallery illustrate how the tool is used to score the veneer: flat edge on the top or bottom surface of the guitar to make the 4 mm deep cut, curved edge on the curved side of the guitar to make the 2 mm wide cut.


Next article:
Part 43: Neck and Fretboard Assembly
Previous article:
Part 41: Electronic Components Assembly
